



Cascade purchases are cheap and can give a huge mechanical advantage. Stan Cockeram explains where they can and can’t be used
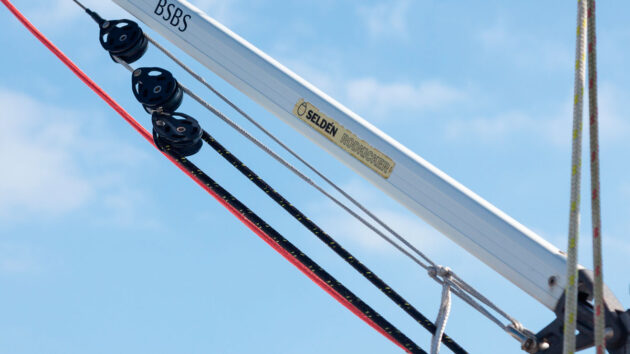
A cascade is a way to assemble smaller purchases together. The cascade approach requires the minimum number of sheaves, generally at a lower cost than a standard purchase, and is capable of achieving very high mechanical advantages, well beyond what is practical with a straight purchase. By far the biggest disadvantage is that the cascade approach reduces the length of pull that can be applied (usually known as the throw).
Let’s have a look at the simplest form of cascade
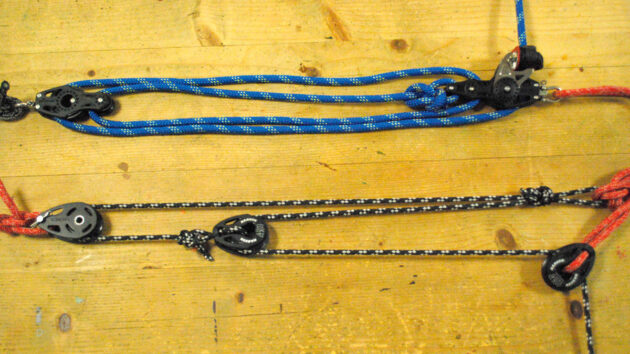
The simplest form of cascade
To make a 4:1 purchase, we can use three single blocks. It consists of two 2:1 purchases, one pulling on the end of the other. Compare this to the simple 4:1 purchase using two blocks, each with two sheaves. As a demonstration of how cascades work, this is useful but in practical terms you would probably use the straight purchase even though the cascade would be considerably more cost-effective. As previously stated, the best use for a cascade is where you need a powerful pull but don’t require a great deal of movement. Good examples of this include the kicking strap and adjustable backstay.
Kicking strap cascade
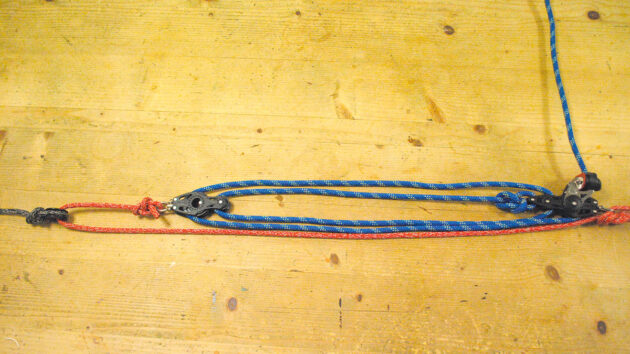
Almost every rig will have a kicking strap to prevent the boom skying. The kicking strap is also a powerful tool when trimming sails, especially when sailing off the wind. The common 4:1 purchase kicking strap is fine to control the boom but less effective when trying to make adjustments. You can double the power of your kicking strap by adding one (strong) block, or in this case a lead ring, and a length of rope as seen in the photo. If your current kicker has a strut with a purchase in it then you are probably already using a cascade!
Outhaul
Another common use for a cascade would be an in-boom outhaul system. Up to 4:1 it is probably easier to use a simple purchase – beyond that, once more, the cascade comes into its own. It is easily installed inside the boom and can use simple blocks requiring little or no maintenance. Using just two blocks arranged in a basic cascade and the exit from the boom, leading the rope through the clew and back to the boom can provide 8:1
Adjustable backstay cascade
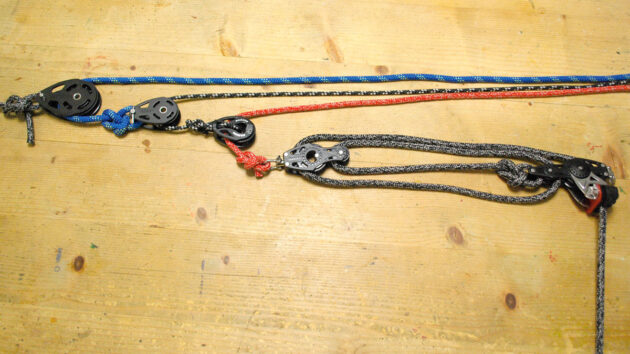
If you require adjustability in your backstay, a cascade is an excellent way to provide it. There are a couple of questions you would need to answer in order to decide how best to implement it.
First, and most important, is the backstay a structural element in your rig? By this we mean, if the backstay failed, would the rig collapse? On a lot of modern yachts with swept spreaders this is not necessarily the case – the backstay is used more for bending the mast rather than holding it up. If the backstay is structural it is vital that the block and line used in the cascade are sufficiently strong that they will not fail before the main part of the backstay. There should also be a failsafe leash to take the load if the cascade fails.
Secondly, how much throw do you need? Most backstays don’t move very far in general, which, given the powerful cascade required is probably just as well. Take the arrangement shown as an example – it provides 32:1. That much power could never be achieved by a simple purchase, the friction in the blocks and ropes would be overwhelming. You would need to use a winch or other device to generate this kind of power. If the top block was 2m off the deck, the total throw available would be approximately 200mm. In order to provide a cascade backstay for a Contessa 32 with a good deal of adjustment and power, we ended up with the top block more than a third of the way up the backstay. You would have to decide whether this was acceptable to you!
You might also want to consider leading the control to both sides of the boat – this would require a slightly different arrangement for the bottom purchase but can be easily done.
Mainsheet – the most useful cascade application
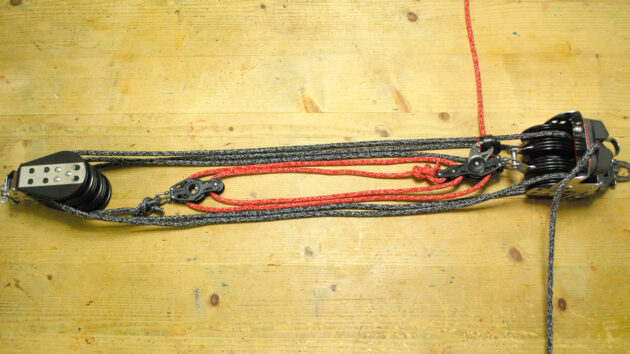
Using a cascade in a mainsheet requires a slightly different approach, but in many ways this is the most useful of all cascade applications.
Many people find that they have certain issues with the mainsheet in day-to-day sailing. The load on the line can become intolerably heavy, especially as you approach close-hauled, making good sail trim difficult. Once you are sailing close-hauled, especially if the wind increases, the thought of what happens when you uncleat the sheet to bear away or reef can be intimidating. All thought of fine trimming goes out of the window.
A common response to this situation is to consider increasing the overall purchase of the system, perhaps from 4:1 to 6:1 or even greater. This will reduce the load a little but it will also vastly increase the amount of rope in the system, increase the friction (owing to more sheaves and more rope going round corners), and the gains you expected might not be as dramatic as you hoped.
An alternative is a two-speed or ‘fine-tune’ mainsheet system. People are put off by the term ‘fine-tune’ as it sounds a bit tweaky and racey, but actually it is all about increased power, ease of handling and comfort.
In order to create a two-speed system you need to install a secondary purchase on what is currently the dead end of the mainsheet – this is commonly attached to a becket on the lower purchase block. If you add a small purchase between what was the dead end and becket, you will multiply the power of the mainsheet purchase by the new purchase. For instance, adding a simple 2:1 purchase to the dead end of typical 4:1 mainsheet will give you a ‘fine-tune’ purchase of 8:1. Note that the existing blocks and rope are retained and you only need to get the 2:1 (with a cleat).
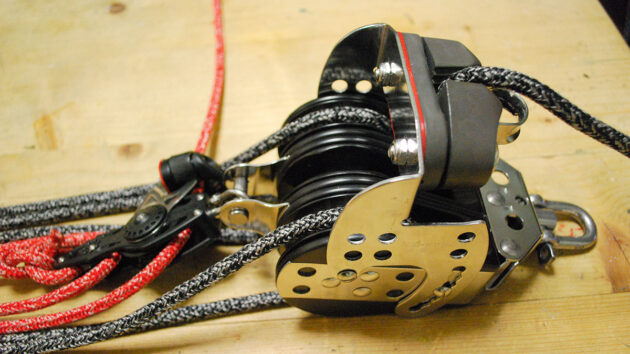
4:1 fine-tune with a 6:1 coarse gives 24:1 – simple, useable power
In practice you will use the standard mainsheet (the ‘coarse tune’) to make gross adjustments to the sheet and then use the ‘fine tune’ purchase for the last pull in to close-hauled. The fine tune should be long enough only to cover the length of one fall in the mainsheet. When it is time to bear away, you release the fine tune first, unloading the system very effectively and making the action of subsequently releasing the coarse tune much less worrying.
There are two things to bear in mind when setting up a two-speed system:
The fine tune does not have to attach to the becket – any sensible point on the centre line of the boat will do – the cockpit floor is popular, but make sure that the lines won’t foul during sailing manoeuvres.
While sailing downwind it is best to keep the fine tune pulled tight so that the top block does not fly around during gybes. Just remember to release it before hardening up so that you have the full length of the fine tune when you need it.
Two-speed mainsheets are easily made up and represent some of the cheapest power available on a boat. Common combinations include 8:1 (coarse 4:1, fine 2:1), 12:1 (coarse 4:1, fine 3:1 OR coarse 6:1, fine 2:1), up to 24:1 (coarse 6:1, fine 4:1).
Specifying components
What blocks to use
The top blocks in a standard cascade carry the highest loads but they also turn the slowest. This makes them a prime candidate for a plain bearing block, usually increasing the cost-effectiveness of the system considerably as well as reducing required maintenance.
In terms of strength, the top block takes the full load of the system. This is especially important in the case of the cascade backstay. The top block on the backstay needs to be stronger than the wire it is attached to. The line that passes through the block should have at least half the strength of the block. The next block needs to have half the strength of the top block and the line passing through it should have half of that strength. The third block would have one quarter of the strength of the top block and so on. If the cascade finishes with a bigger purchase (perhaps 4:1 as in the case of the backstay shown above), it is likely that performance will be improved with a pair of ball bearing blocks but that is by no means obligatory.
Adding blocks to the mainsheet system to make a fine tune means that the purchase needs to handle the load that you would have in your hand on the coarse tune. As a consequence relatively small blocks can be used.
What line to use
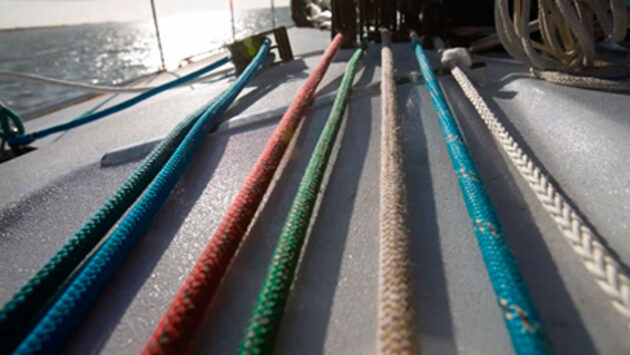
It is worth considering the line you use in these systems and indeed all systems on your boat. People often increase the diameter of lines in order to make them more comfortable to handle. This is a two-edged sword.
Increasing the diameter may be more comfortable, but it will significantly increase the friction in the system due to internal friction in the rope. Although the lines in cascades move slowly and there are considerably fewer sheaves for the rope to move around, it is still worth keeping the lines down to near minimum sizes for the strength required.
For the line through the top blocks in a heavily-loaded cascade, you will want to use either wire or a modern rope like Dyneema. If you use wire, make sure the block it passes through has a metal sheave in order to handle the wire.

How important is headsail trim?
PBO reader Jenny Spear wants advice on how to improv the performance of her boat's headsail. Ian Brown has this…
Trysail trimming: a guide for sailors
Ben Meakins explains how to set and deploy trysails to improve boat control in high-wind conditions

Sail trim: Sailing downwind without a spinnaker
Sailing efficiently when the wind comes astern doesn’t mean you have to fly a spinnaker or cruising chute. David Harding…

Mainsail trimming in light airs
How to go to windward fast
Want to read more seamanship articles?

A subscription to Practical Boat Owner magazine costs around 40% less than the cover price.
Print and digital editions are available through Magazines Direct – where you can also find the latest deals.
PBO is packed with information to help you get the most from boat ownership – whether sail or power.
-
-
-
- Take your DIY skills to the next level with trusted advice on boat maintenance and repairs
- Impartial, in-depth gear reviews
- Practical cruising tips for making the most of your time afloat
-
-
Follow us on Facebook, Instagram, TikTok and X