



You don’t have to pursue an award-winning finish in order to transform a neglected, rotting, 12ft sailing dinghy into a perfectly safe and serviceable craft, as David Pugh reports
My first memories of my tatty-looking 3.6m (12ft) Tepco sailing dinghy date back to learning to sail on my uncle’s boat as a teenager. Modified years ago for use as a tender, in time, its weight and size prompted my uncle to replace it with a younger, sleeker model. Since then, the boat has seen little love, and dinghy repairs are now badly needed.
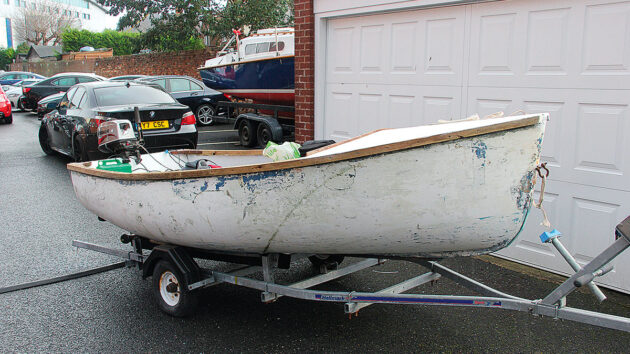
The ‘tatty-looking’ 3.6m (12ft) Tepco sailing dinghy
Neglect is no friend to any boat; however, when I turned the hull the right way up most of the timberwork fell off in a shower of rotten splinters and woodlice. At some point in its history, the gunwales and some of the knees had been replaced with plywood, which had rotted and delaminated beyond repair. The forward bulkhead and half deck, also plywood, were in a similarly poor state, but the solid hardwood thwart and side benches had survived well and could be retained.
However, the plywood panels below them, intended to enclose polystyrene buoyancy blocks, were scrap. Although some of the woodwork was cosmetic, knees, gunwales and bulkheads provide much of the hull’s rigidity, so something had to be done.
Tear down before dinghy repairs
Our first step was to rip out all of the rotten timber. A demolition bar made short work of the gunwales, foredeck and plywood panelling; the bulkhead put up more of a fight, but with the aid of a Bosch multi-cutter we cut away the glassfibre holding it in place and it pulled away. A run round with the vacuum cleaner revealed a sorry sight, with flaking paint and a crack in the port side extending about six inches down from the gunwale.
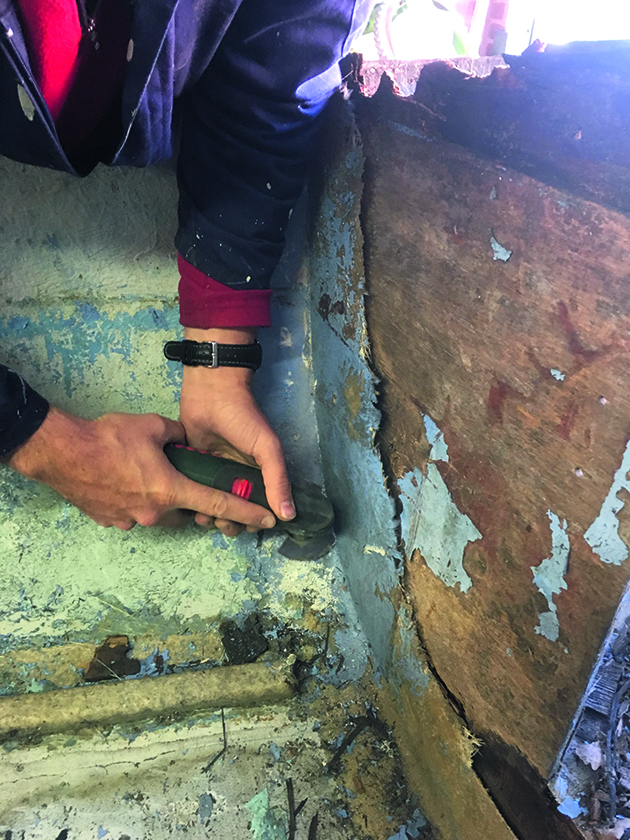
A flush-cutting multi-tool removed the original GRP tabbing
Clearly, we needed some materials, so we headed down the road to visit our local builders’ merchant, Sydenhams. They supplied us with four 4m lengths of pressure-treated softwood approx 40mm x 15mm, a sheet of 6mm WBP ply and a sheet of 9mm WBP ply. The local branch of Screwfix provided a box of 200 stainless steel screws: these are A2 stainless, so not ideal for the marine environment, but we reasoned they would probably last as long as the softwood.
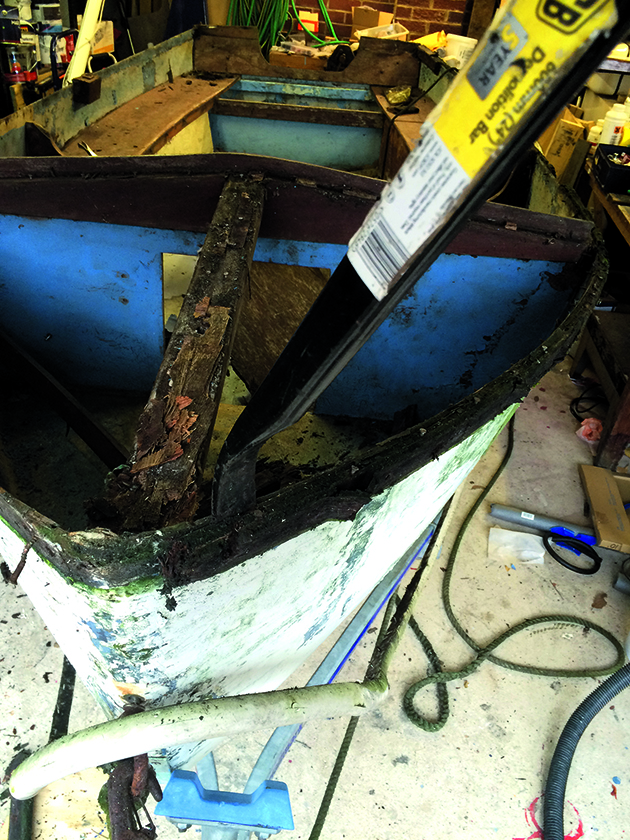
A demolition bar made short work of the rotten gunwales and foredeck
Next was a trip to the chandlery to buy an inspection hatch, two drain bungs and 1.5kg of epoxy.
Minimum restoration
We started work by repairing the glassfibre damage. A thick mix of epoxy neatly filled the numerous screw holes where the previous gunwales had been screwed through. The crack in the port side we simply ground back and reinforced on both sides with strips of glass tape wetted out with unthickened epoxy.
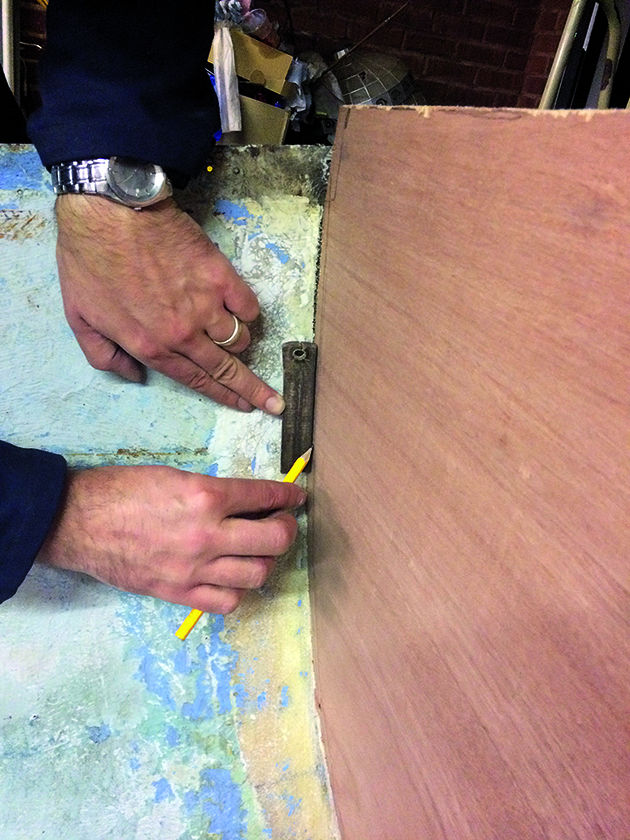
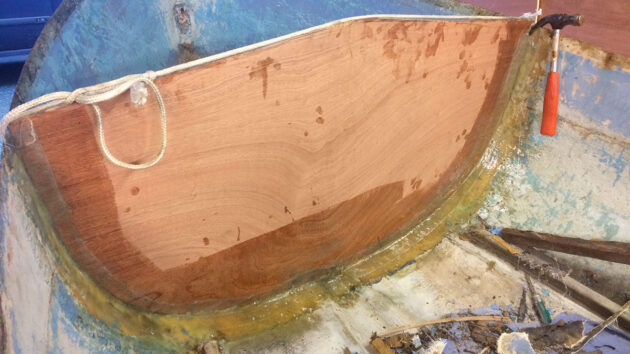
Transferring the shape of the hull to the bulkhead to gain a good fit
The next stage was to make and fit a new forward bulkhead. We roughly cut a new panel from 9mm plywood using the old bulkhead to give the shape. However, on putting it in place we found that the hull came away significantly at the top – clearly the old bulkhead had been partially responsible for maintaining the hull shape.
To resolve this, we ran a lashing around the boat to pull the sides of the hull in to the bulkhead, then used a dummy stick to transfer the hull form to the plywood. A few tweaks with the jigsaw and a block plane gave us an adequate fit to the hull.
We put the new bulkhead in place with the hull held to shape with a lashing. We then bonded the plywood in to the hull using wide glassfibre tape wetted out with epoxy, and left it to set.
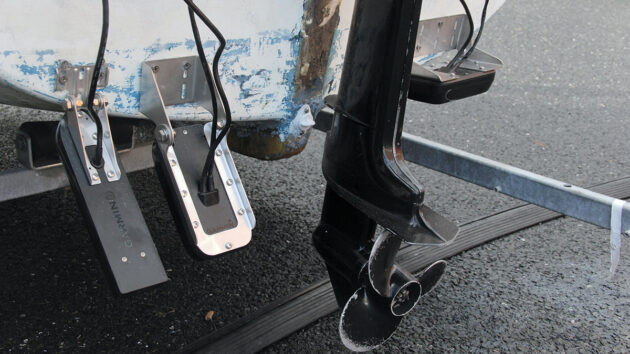
A new bung fitting in the transom improved the boat’s seaworthiness
Once cured, we trimmed the top to shape, cut a circular aperture to fit a standard dinghy watertight hatch and made a drainage hole for a bung at the bottom. We then made a centre support for the foredeck using a length of studding softwood and refitted a length of the original hardwood to support it.
New gunwales
To replace the inner and outer gunwales, we opted to use treated softwood. Although not as durable as hardwood, pressure-treated softwood is cheap, lasts reasonably well and, in this case, is easily replaced. We were able to buy the timber in 4m lengths, saving the need to scarf two pieces, but found that it was not quite flexible enough to bend around the forward part of the hull.
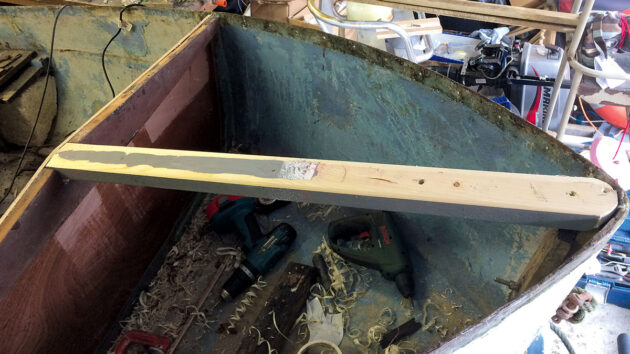
New foredeck spine in CLS softwood – we coated it with epoxy to prevent it from rotting.
To solve this we built a simple steam box using a metre length of drainpipe, insulated with an old curtain and with a wallpaper stripper steamer inserted into the bottom of the pipe. Prior to steaming, we stepped the forward ends of the inner gunwales by 6mm to allow for the foredeck. We then rigged our steamer around an inner and outer gunwale pair, aligned with the section of maximum bend.
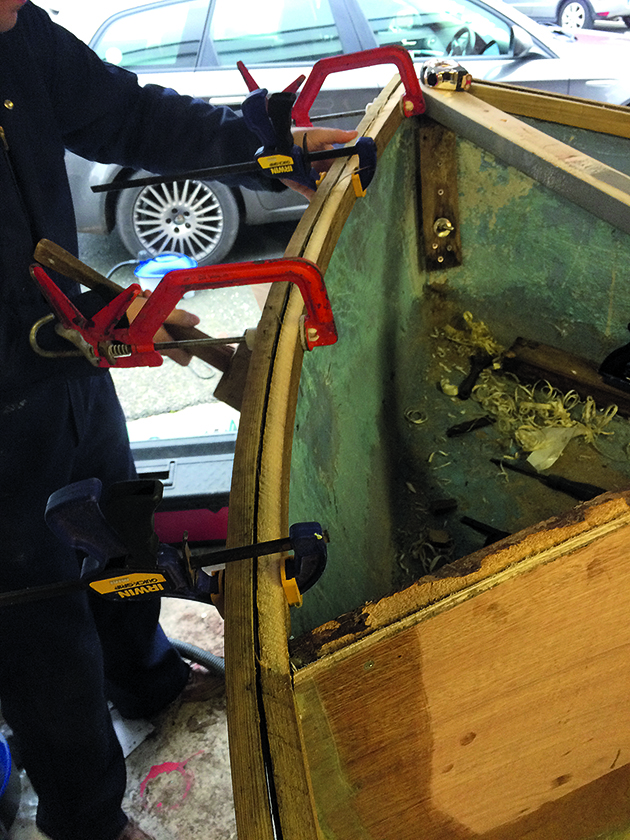
Clamping the freshly-steamed gunwales in place before screwing through to fix them
As a rule of thumb, timber takes about an hour per inch thickness in the steam box to become flexible. We withdrew the timber after 40 minutes and found it bent easily around the hull. Working as quickly as possible down the hull, using clamps to hold the inner and outer gunwales in alignment, we screwed the two lengths together. Once in place, we trimmed the ends flush at the transom and shaped them at the bow.
Replacing the deck
We took the easiest option to gain the shape of the foredeck, placing the sheet of 6mm plywood over the top and drawing around the gunwales. Allowing a 20mm margin for the outer gunwale, we cut it out and offered it up to find it fitted adequately well.
To proof the timber against rot we gave the new bulkhead, deck and supports a coat of unthickened epoxy before screwing the deck into position and filling any gaps with thickened epoxy. Once complete, we gave the whole lot a coat of Sandtex textured masonry paint, left in stock from a non-slip paint test.
Where the dinghy repairs worth it?
Our aim was to get the dinghy afloat for minimum expense of time and money, whilst doing so well enough that we wouldn’t need to do it again every time we use the boat. Everything worked well, with the exception of the Sandtex paint which started coming off when scuffed around by feet and seawater, leaving a milky residue.
We were particularly pleased with how easily the gunwales bent into place once we had steamed them. We now have a useful, stable and seaworthy dinghy.
How I used salt to add non-slip to my cabin sole
The cabin sole on my Contessa 32 has a lot of nicely varnished hardwood-faced ply joinery. But part of the…

10 low-cost solutions for non-slip decks on boats
Anti-slip decks are vital for safe sailing, with a wide range of attractive, long-lived, and sustainable coverings available. Jake Kavanagh…
Dinghy sailing skills for cruisers
What can a lapsed cruising sailor learn from a dinghy course? A lot, as Ali Wood discovers when she returns…
Which is the best cruising dinghy?
Clive Marsh explains what he looks for in a lightweight cruising dinghy
Want to read more practical articles like Dinghy repairs on a budget?
A subscription to Practical Boat Owner magazine costs around 40% less than the cover price.
Print and digital editions are available through Magazines Direct – where you can also find the latest deals.
PBO is packed with information to help you get the most from boat ownership – whether sail or power.
-
-
-
- Take your DIY skills to the next level with trusted advice on boat maintenance and repairs
- Impartial, in-depth gear reviews
- Practical cruising tips for making the most of your time afloat
-
-
Follow us on Facebook, Instagram, TikTok and X