
If you have a pile mooring, permanent and properly rigged pick-up lines will make life a lot easier. David Parker explains how to rig them
In congested waters, pile moorings are an efficient use of space, writes David Parker.
However, if you are fighting wind or tide or both, parking yourself neatly between two hefty pilings can be tricky to say the least, so a decent set of pick-up lines will make the whole process quicker and more straightforward.
They are not particularly costly or difficult to rig and are well worth setting up if you have a permanent pile mooring. Good lines are not only a sensible investment for practical purposes, they will also make things safer as well as easier for you and your crew.

The kit needed to rig pick-up lines: mooring rope, pick-up buoys, thimbles, a floating line and carbine hooks. Carbine hooks are fine for the pick-up buoys, but should not be used to secure your boat to its permanent pile mooring – you’ll need large galvanised shackles for that job. Credit: David Parker
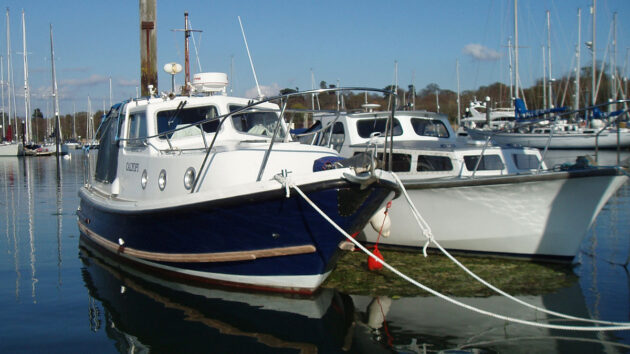
If you’re fortunate enough to have a pile mooring with a pontoon, pick-up lines will not be required: but if you have to raft up or come in on your own, then you will need them unless you are prepared to secure fresh warps and/or chain fore and aft each time you moor up.
This may also involve the use of a tender to rig the lines properly to the rings – a laborious process.
It can be even more challenging in difficult conditions, particularly if you are short-handed. With permanently-rigged lines, however, you can moor up each time without getting off the boat.
What you will need to rig a pile mooring
This project doesn’t require a big shopping list: I bought most of the kit I needed after a bit of research and a few clicks online.
The first and most important thing to work out is how much rope you will need for the whole job. Work on the basis that four lines will be required, two to the bow and two to the stern.
The lines will also need a reasonable catenary, ie a curve, so that each line hangs freely from the boat, isn’t too tight or too slack and will handle easily.
Establishing this length will be trial and error, but use the tender beforehand to take accurate measurements of existing lines, or rig test ones for this purpose.
Before I set up the pick-up line system, I was using individual mooring lines with a turn around the ring to prevent chafe: using these temporary lines allowed me to measure up for the new system.

Stainless steel thimbles are spliced into the end of the lines to prevent chafe. Credit: David Parker
As an example of some measurement figures, with my boat between the piles, my test mooring lines port and starboard and fore and aft measured approximately 4m each.
I used these measurements as the basis for the overall length of rope I needed to order.
Remember when measuring to allow for differences in the rise to the bow and stern respectively, and the fact that on one side, lines will need to be slightly longer if rafting up.
Also factor in what you require to cleat off and make up your spliced eyes to connect to the mooring ring. Initially, I calculated that about 5m would be
adequate for each line.
However, in the end, I erred on the generous side and ordered 25m in total to have plenty spare. The last thing you want is to rig everything up and then find you have made things harder for yourself, or the system won’t work, for the want of a few extra feet of rope.
When you’ve worked out the length of your lines, you then need to work out the type of rope you wish to buy, and its diameter.

Four lines need to be prepared to provide double warps at the bow and stern. Credit: David Parker
I chose 3-strand nylon, which is good for mooring lines due to its elasticity and resistance to abrasion: it is also easy to splice.
When it comes to diameter, buy the thickest rope you can, which will fit your cleats easily. (Remember, nylon swells when wet.)
Choosing thick lines is not only for reasons of strength, although it is reassuring to be tied securely to a chunky set of ropes in a blow.
Weightier, thicker rope will sink better and is less likely to snake around in the water and foul your prop when you come alongside.
Finally, when I had checked and rechecked my sums, I ordered 25m of 18mm nylon rope online and four 16mm stainless steel thimbles.
These thimbles would be adequate for the rope, but still small enough to get through the jaw of the shackles attached to the ring.
Preparing the main mooring lines for a pile mooring
The reason thimbles are spliced into the rope ends is to prevent chafe, and with a bit of practice, it is not difficult to do this yourself.
It is a valuable skill, and if you have never spliced before, there are lots of books to explain the technique.

The length of the lines can be adjusted to suit once in position. A soft eye could be spliced on the inboard ends if preferred. Credit: David Parker
Practice first with thinner, cheaper line so you can do a good job when it comes to the important stuff. Ensure that you make the thimble a snug fit in the eye so that it doesn’t work loose.
For a belt and braces job when the splices are complete, it’s a good idea to mouse the thimble in place as well.
If you are not confident about splicing the eyes yourself, you can of course take them along to a rigger who will do the job for you.
Before I had spliced the lines, I had been out to the mooring at low water to put my hefty shackles in place around the ring attached to the bar on the piles.

Each set of double lines is attached to a hefty shackle on the ring. The thimbles and shackle pin have been moused for added security. Credit: David Parker
I had also moused the shackles in place, this time with cable ties, which would need replacing when I finally fitted the lines.
When mousing with cable ties, resist the temptation to trim the plastic tails: once trimmed, they leave very sharp edges, and you can easily cut yourself on these.
If you are absolutely sure of the length of your lines, you can also splice soft eyes to the onboard ends so they will just drop over the cleats.
However, when it came to fitting my lines, I preferred to just use bowlines. This would still allow me to easily adjust the length as required, and if I move to another mooring, I can still reuse the lines, altering the length as necessary.
Rigging the mooring buoys
With my new lines on and adjusted to length so that the boat sat nicely between the piles, the next job was to rig the mooring buoys, which are attached to a floating pick-up line.
For this line, I used a smaller diameter of 10mm, although you can use thicker line if you’re happy with it. The idea of this floating line is that it will be attached to the main mooring lines when you cast off: this is the ‘pick-up’ part of the system.

Low water is the best time to check that the lines sit correctly and are not twisted. Credit: David Parker
You can choose to have just one buoy, but I chose two to ensure I could retrieve my lines easily, whether fore or aft.
I can also use the forward buoy to moor up my tender when I leave the mooring, because there is just enough clearance here between the bow of the neighbouring boat and the pile.
Another advantage of having the option of two buoys is that I can moor facing upstream or downstream if circumstances dictate.

At high water, check that the lines have enough slack to comfortably sweep up from the bar on the pile. Credit: David Parker
When determining the length of the floating line required, allow for a decent-sized loop at each end.
Each loop will be fed through the mooring line eyes: the loops are then secured with the carbine hooks so they can be clipped/unclipped easily.

At each end of the floating pick-up line, there is a large loop, a carbine hook and a pick-up buoy. Credit: David Parker
When alongside, the loops and carbine combination is also a handy way to fasten the line between stanchions fore and aft.
I found it worked well having the pick-up buoy approximately a metre away from the loop, with the carbine hook midway between the loop and the buoy.

Once the loop is clipped closed by the carbine hook, the lines are secure and can be let go into the water. Each loop at the corresponding end of the pick-up line is threaded through the eyes of the large mooring lines to allow them to be retained for easy retrieval. Credit: David Parker
You can tweak these arrangements to suit depending on your boat.
Float test
Before actually using the system, make sure it works with a float test.
This will show you how the lines will sit in the water. You want them to be fairly tight so that they run reasonably straight between the piles and will not snake and snag your prop as you come alongside.

When initially setting up the system, carry out a float test to ensure that the lines sit nicely in the water. Also, carry out a grab test to ensure that you can retrieve the mooring lines easily and that they can be made fast as required. Credit: David Parker
However, you will also need to retrieve them efficiently, so do a grab test with a boathook to make sure you can pick up and fit the lines easily. Do this when still secured by your test lines.
You will probably find that you make adjustments to shorten or lengthen lines accordingly once you start using the system in practice.

When not in use, the floating line can be clipped neatly out of the way at convenient points fore and aft, such as stanchion bases. Credit: David Parker
If rafting up and your port and starboard lines are different lengths, it is also handy to mark them up so you know which is which. (If rafting up to a neighbour, you will still need breast and springs lines when moored up).
Now try it out
When your new lines are rigged, choose a calm day and do a few practice runs first, both casting off and picking them up.
That way, you can iron out any snags and be sure it all works smoothly before you need to do it when conditions might be less than ideal.
Leaving a mooring

Credit: David Parker
1. When each end has been checked and the full system rigged it can now be tested. Initially, the bow lines are clipped to the pick-up line, and this is repeated with the stern lines.

Credit: David Parker
2. Once securely fastened, the mooring lines are ready to be let go into the water.

Credit: David Parker
3. The pick-up lines are lying alongside the neighbouring vessel, ready to be retrieved on return to the pile mooring.

How to pick up a pile mooring
Picking up a pile mooring can be a challenge – especially in a tidal harbour. David Harding explains how it’s…
Can I trust this boat mooring?
Most sailors use traditional moorings without knowing about their condition or how they are made. Ben Sutcliffe-Davies explains
How to make an easy marina mooring pick-up device
Jon Sharp devises an easy marina mooring pick-up using a hoop on a pole

DIY mooring line chafe protection
Alex Blackwell makes his own mooring chafe protectors, ensuring they're lashed to the line to stop them moving
Want to read more articles like Rigging pile mooring pick-up lines?

A subscription to Practical Boat Owner magazine costs around 40% less than the cover price.
Print and digital editions are available through Magazines Direct – where you can also find the latest deals.
PBO is packed with information to help you get the most from boat ownership – whether sail or power.
-
-
-
- Take your DIY skills to the next level with trusted advice on boat maintenance and repairs
- Impartial, in-depth gear reviews
- Practical cruising tips for making the most of your time afloat
-
-
Follow us on Facebook, Instagram, TikTok and Twitter