
To make the most of available space for overnight trips, David Parker shows how he built additional cockpit berths on his Seaward 23
One of the main reasons I chose to buy my Seaward is that, as well as having a strong reputation as a motor cruiser, it seems very roomy for a 7m (23ft) craft, writes David Parker.
Primarily, our family just uses the boat for some local cruising and weekends afloat. However, if it gets rough or starts raining, there are enough cockpit seats where everyone can get out of the weather and stay comfortable.
So the cockpit area is spacious for sitting, but I also wanted to be able to make the most of it by adapting it as sleeping accommodation for overnight trips. I also wanted these extra berths to be simple to set up when needed, and it was important that any modifications I made would be unobtrusive and any additional panels would stow easily.
Basically, I used a system of hardwood support rails which I cut and fitted permanently in position to the existing internal cockpit mouldings, while the removable berth bases are conveniently-sized plywood panels.
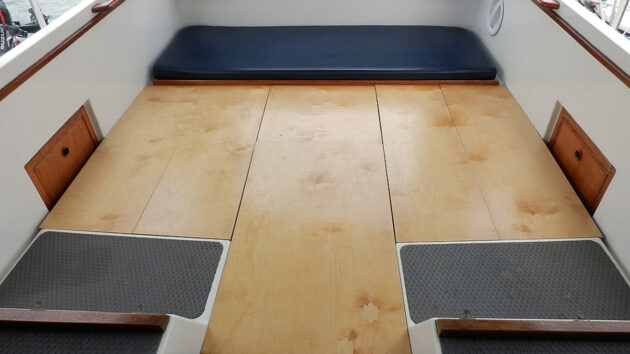
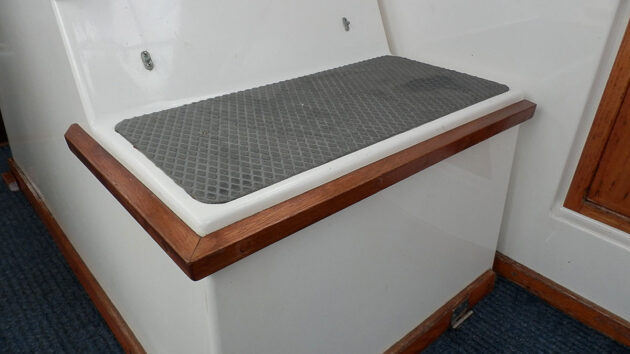
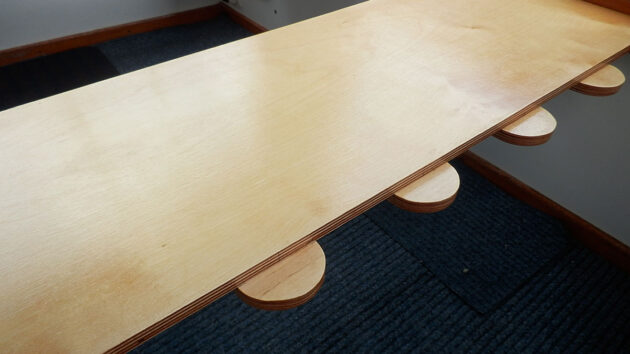
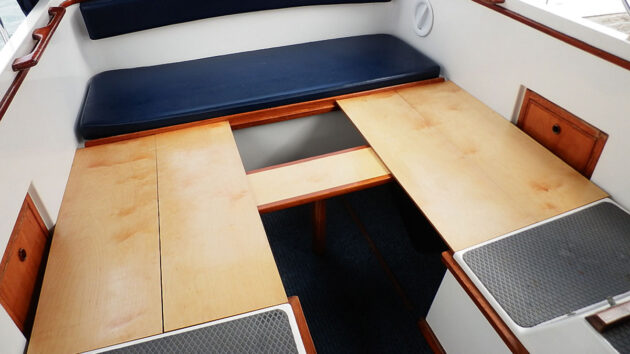
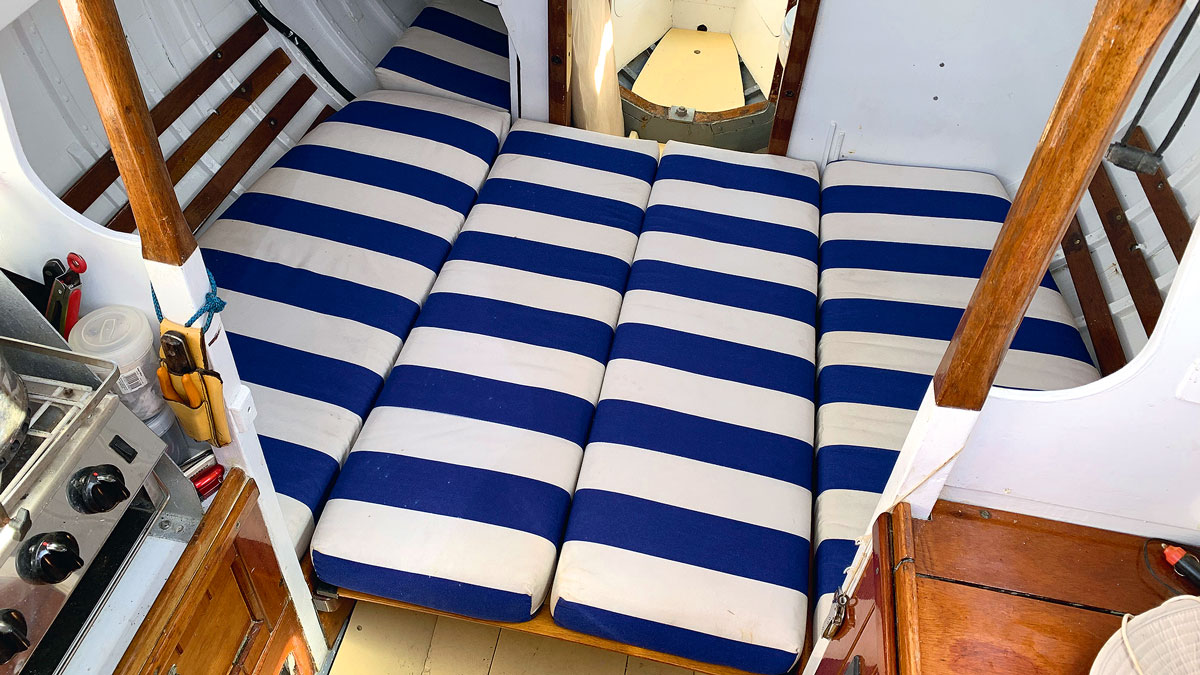
On my boat, the berth area takes up the aft section of the cockpit behind the wheelhouse. This measures approximately 182cm (72in with cushion) in length, with a width at the stern of 170cm (67in) tapering to 180cm (71in) at the beam of the boat.
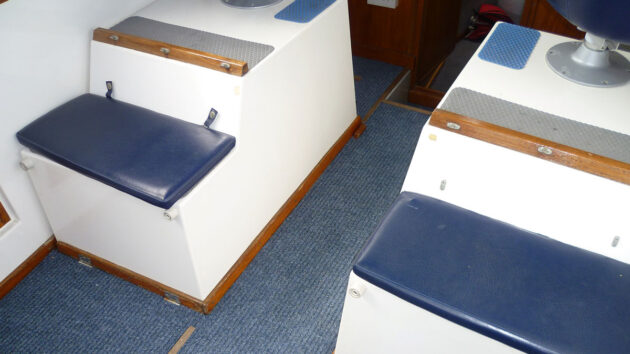
On each engine cowling behind the helmsman and navigator seats there are two aft-facing cockpit seats. Rubber stops were used as supports when raising the cowlings: David replaced these with rails for the forward section of the berths. Credit: David Parker
Much of the job was done with hand tools, and most of the actual final fitting and shaping was completed on board.
However, I made up pre-prepared sections where possible beforehand, which I took upriver to my mooring in the tender.
Before I made up the berth panels, I also decided how and where I would stow them and cut the sections to shape accordingly.
The berths are now installed, and the system has worked well. I decided not to make up permanent additional cushions due to the space they’d take up when not in use.
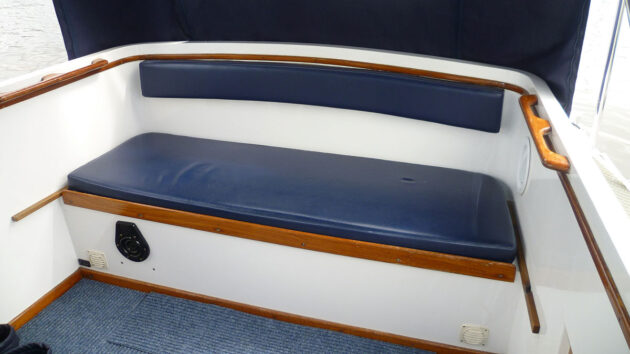
The original bench seat which runs the full length aft of the cockpit. Credit: David Parker
Instead, we use the existing cushions plus a couple of our self-inflating camping mats, which fit into the saloon lockers easily.
Of course, before doing any installation on board and particularly when drilling into panels etc, check the area behind is clear of any cables or pipes.
Also, ensure the structures and surfaces involved are strong enough to take any modifications.
Many of the techniques described here can be adapted to suit different boats.
Making the hardwood rails for the berth
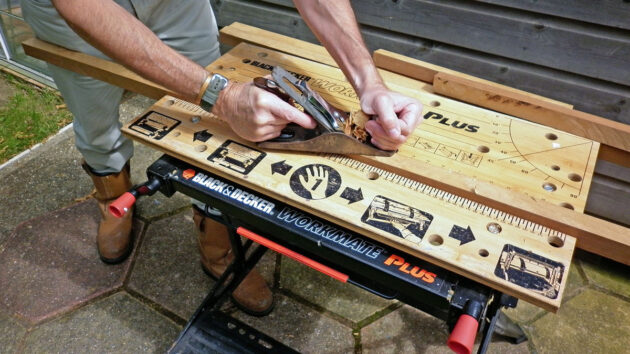
My boat is fitted out in teak, so to match the existing specification, I bought a plank of afromosia (£20) for the hardwood rails.
I sourced this second-hand and cut it myself on my own table saw.
Described by some as ‘African teak’, afromosia – when you can get it – is very durable and can be used for boatbuilding. I really like its rich golden colour, which is similar to aged teak when varnished.
A word of warning, however: the grain goes all over the place so when you plane it up you need patience and very sharp tools.
Instead of preparing it yourself, you may prefer to get the hardwood rails planed up by a timber merchant. Always check when drilling into the internal hull skin that there are adequate clearances for fixings.
Credit: David Parker
1. I cut hardwood rails from a plank of afromosia on a table saw and planed them to measure 25mm (1in) square. Pre-cut and planed timber can also be used, depending on what you need.
Credit: David Parker
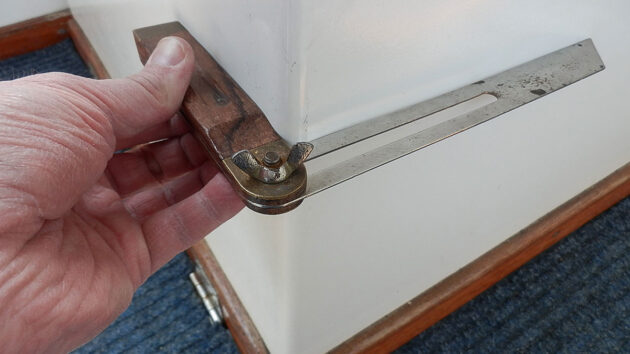
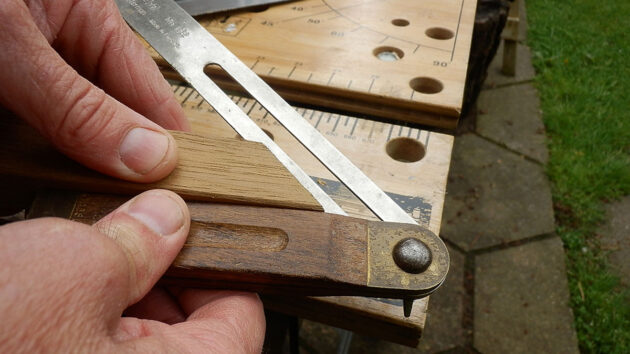
2. After the rail levels were established (see below on Using a water level), the angles on the seat mouldings were checked with a sliding bevel. Horizontal and vertical angles were recorded at both the forward and aft sections, where rails would be fitted.
Credit: David Parker
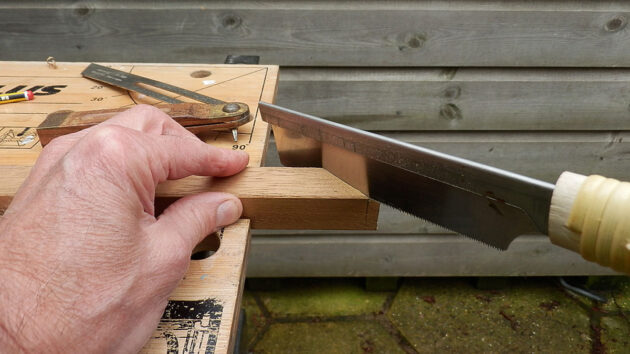
3. First, the forward rails were prepared. Two jointed sections were needed for each so that the rail would go across the width of the engine cowling and then extend along the side to support a central berth.
Credit: David Parker
4. The mitres were checked where the forward rails would form a right angle around the exterior of the cowling. It was easier to prepare sections like this at home so that only fairly easy shaping and trimming would be needed on board.
Credit: David Parker
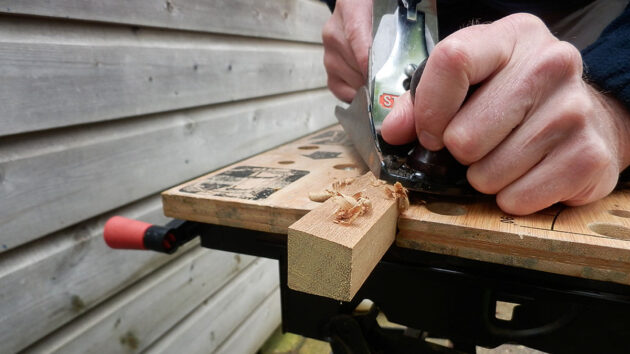
5. The rails were planed so they’d be a snug fit against the cowlings. The back of the engine covers slopes at an angle of 83°, for instance, so a bevel was required to take account of this.
Credit: David Parker
6. While planing the rails, check the progress regularly with the sliding bevel set to the required angle. A work bench with a long vice is useful so rails can be planed accurately along their length.
Credit: David Parker
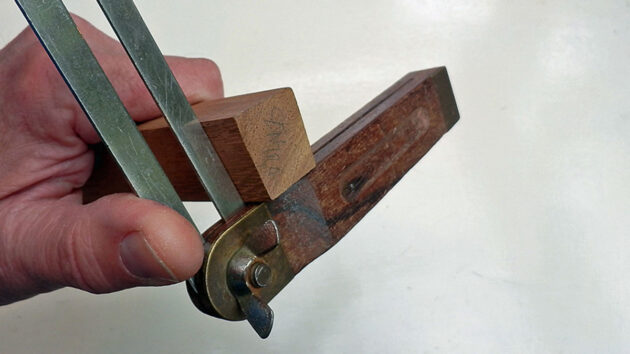
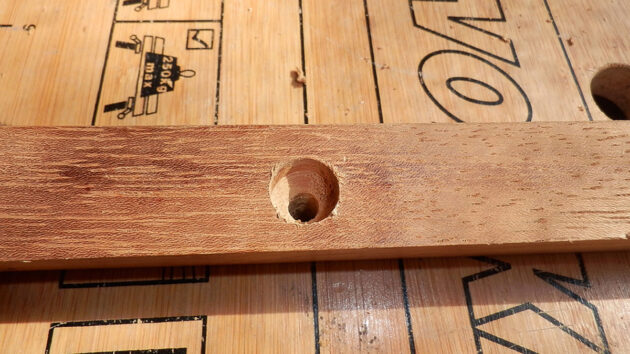
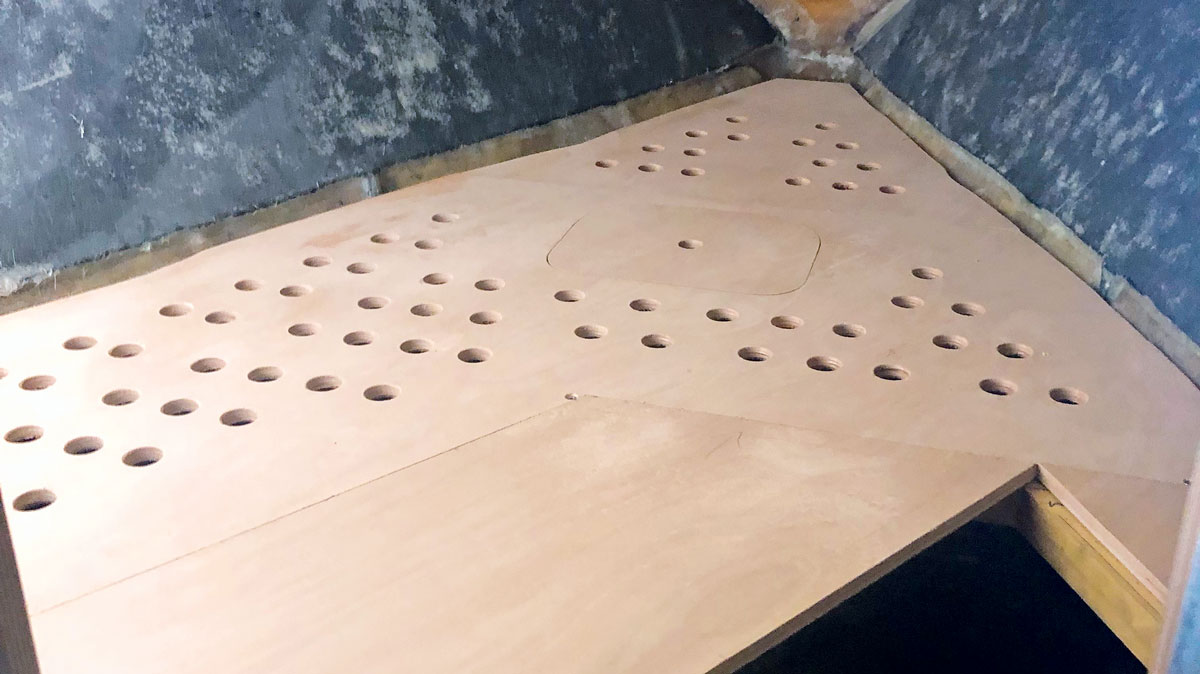
7. I pre-drilled holes every 150mm (6in) with a counterbore bit to a depth of approximately 12mm. The holes would be glued and plugged once the rails were attached.
Credit: David Parker
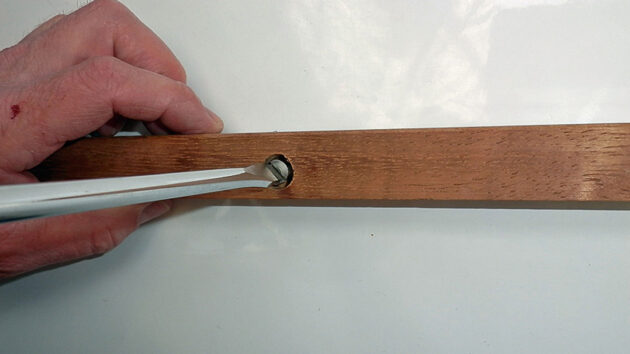
8. I drilled pilot holes in the GRP and then screwed the rails in position using 25mm countersunk No10 stainless steel screws.
Credit: David Parker
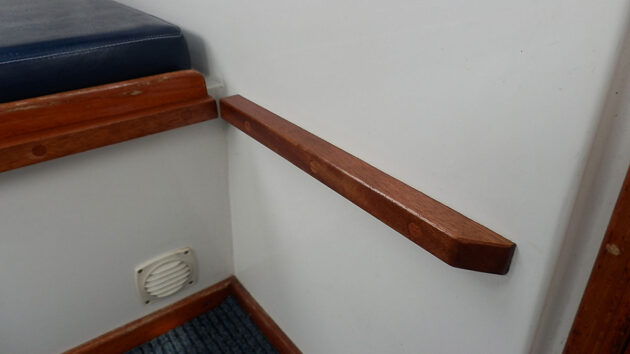
9. A rail was fitted the width of the boat at the stern cockpit seat, and short side rails were fitted to support the longer edges of the berth panels. The fuel tanks are behind these rails.
Credit: David Parker
10. Here’s the completed forward support rail on the starboard side engine cowling. The edges and ends of the rails are chamfered for neatness.
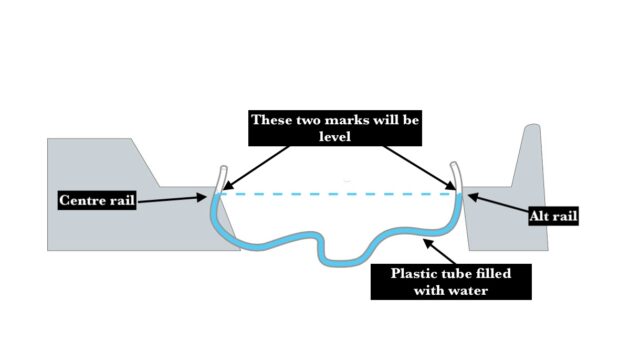
Using a water level
Credit: Practical Boat Owner/Future PLC
Provided the boat is perfectly level to start with, you can use a water level to ensure all your support rails are the same height.
It’s a simple device that has a host of uses and is very accurate and versatile – it does not depend on line of sight, and you can even level around corners with it.
A plastic tube filled with water is all that is required.
Tape the tube to a bulkhead and line the level up at the required point. By ensuring you keep the level at that point always on the same mark, the water at the other end of the tube will be at the same level.
You can use it to make as many level marks as are required.
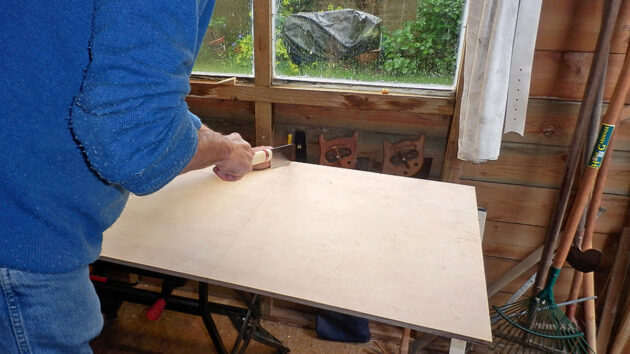
Making the berth bases
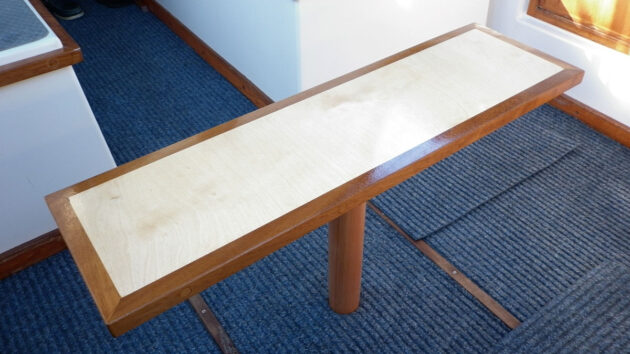
The berth bases I made up out of a single sheet of 8x4ft 12mm-thick birch plywood. As a central support for the whole structure, I also made a small cockpit table out of the same plywood with two pieces laminated together for the strength and thickness required.
This fits into the existing pedestal mount for the main cockpit table.
As it turns out, we find we use this small cockpit table a lot for drinks and quick picnics – it’s much easier and quicker to install than getting out our main cockpit table.
Credit: David Parker
1. I made the infill panels from 12mm birch ply. I cut the sheet down into three large panels, which were then shaped in situ.
Credit: David Parker
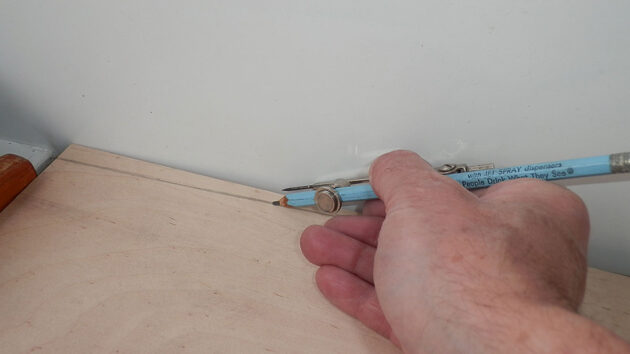
2. The curve of the cockpit panel was transcribed to the plywood using a pair of compasses, and the panel was then planed to shape until it was a snug fit.
Credit: David Parker
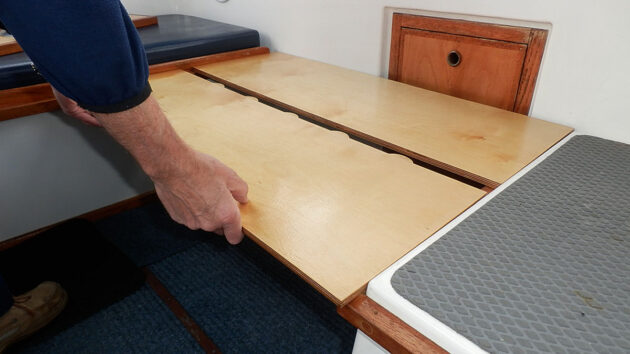
3. The three main panels for the berths were fitted in position. At this stage, the panels were too large to be stowed conveniently on board, so I needed to cut them down to more manageable sizes. Each side panel was cut down the centre, and plywood tongues were fitted to provide support underneath the join. It’s a good idea to coat light-coloured plywood with varnish early on to prevent handling marks.
Credit: David Parker
4. The side panels simply slot together with the tongues underneath. The central panel, when fitted, will have the benefit of a pedestal support.
Making the central pedestal support for the berth
Credit: David Parker
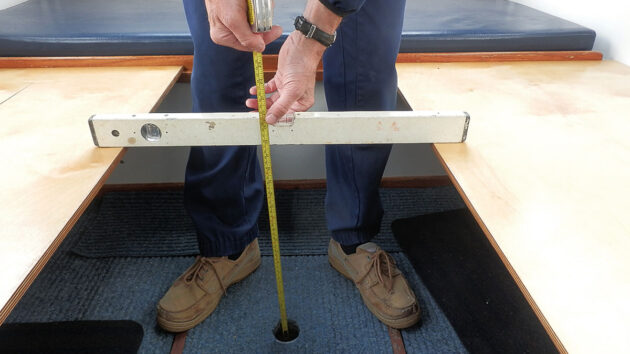
1. To work out the height of the central pedestal support, I used a level across the two side berths, then measured from the bottom of the existing pedestal mount hole used for the cockpit table.
Credit: David Parker
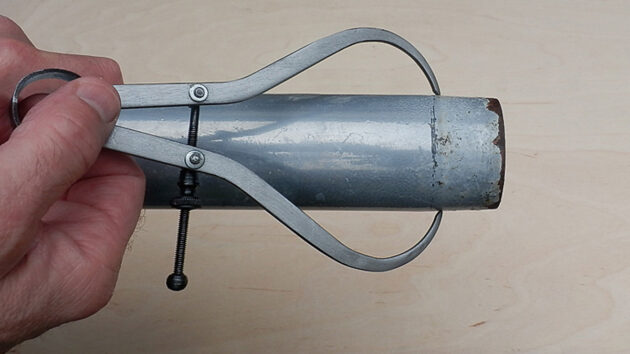
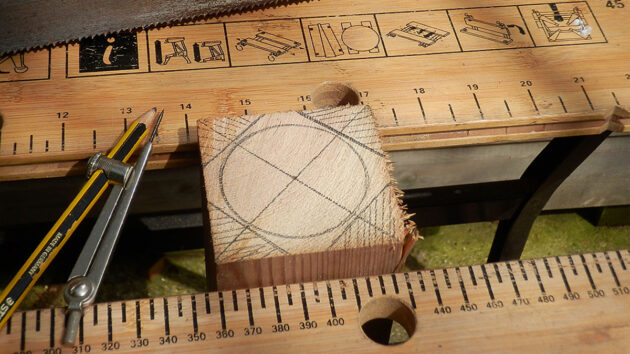
2. I used a caliper gauge to measure the diameter of the pedestal tube. The tube is tapered towards the end to wedge the pedestal in place firmly.
Credit: David Parker
3. I cut a wooden pedestal pole from a piece of 75mm (3in) square softwood.
Credit: David Parker
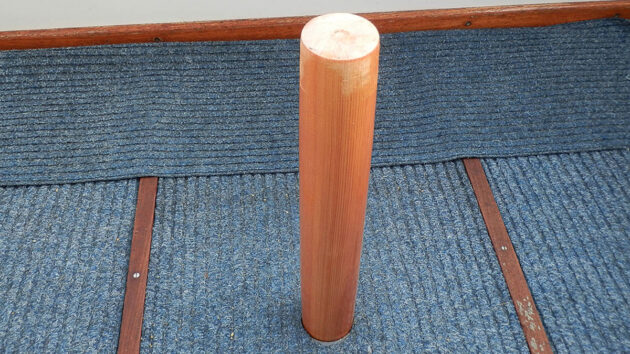
4. Here’s the pole in place, planed to shape, sanded and varnished. The base is made so that it fits tightly into the floor mount.
Credit: David Parker
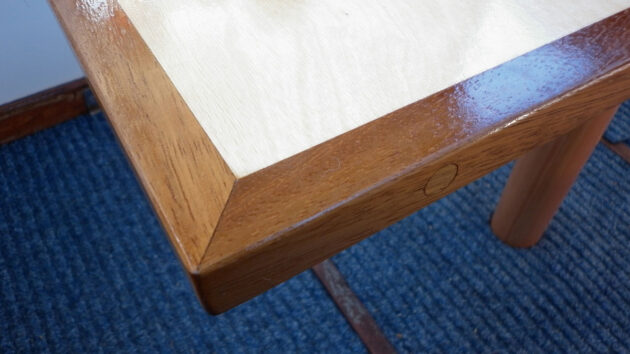
5. A central support/cockpit table was made using two pieces of ply laminated together. A hardwood edge trim finishes the table off nicely.
Credit: David Parker
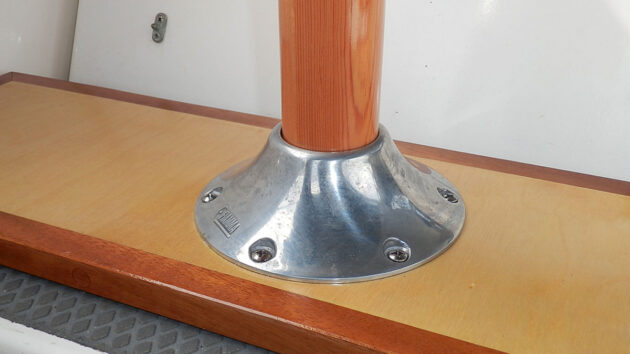
6. A pedestal mount – readily available from chandlers – was screwed to the base of the table to house the pole.
Credit: David Parker
7. The completed table and pedestal support has a dual purpose of supporting the berths and providing a handy-sized secondary cockpit drinks and picnic table.
Credit: David Parker
8. Here’s how the table acts as additional support for the side berths, though its main job is to support the central berth sections.
Credit: David Parker
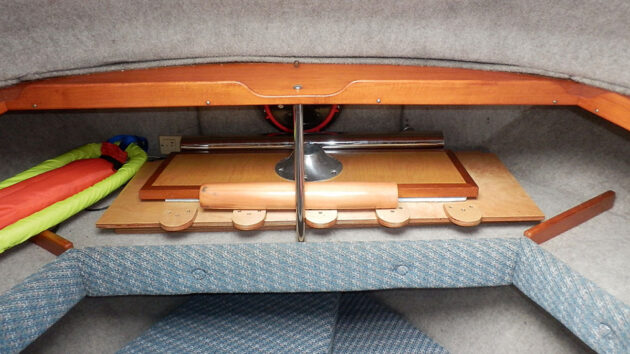
9. All the parts were designed so that they can be stowed easily out of the way when not in use, in this case on a saloon shelf.
Boat berth: forepeak conversion
Richard Rogers rethinks his twin V-berths to double configuration ‘without that annoying triangular insert’ aboard his Morgan Giles 30
Boat berth upgrade: a cheap and simple way
Barry Pickthall makes a cheap and simple sleeping comfort upgrade - a double boat berth
DIY bunk ladder for getting in and out of berths easily
Don Fitzroy Smith fashions cheap, light, easy to stow and make bunk ladder and headboards for getting in and out…

Boat wood: a complete guide for yacht owners
Boatbuilder and finisher Lyndon March explains which types of wood work best for different repairs and modifications on board
Want to read more practical articles like this?
A subscription to Practical Boat Owner magazine costs around 40% less than the cover price.
Print and digital editions are available through Magazines Direct – where you can also find the latest deals.
PBO is packed with information to help you get the most from boat ownership – whether sail or power.
-
-
-
- Take your DIY skills to the next level with trusted advice on boat maintenance and repairs
- Impartial, in-depth gear reviews
- Practical cruising tips for making the most of your time afloat
-
-
Follow us on Facebook, Instagram, TikTok and Twitter