
Chris Mardon fixes his jammed foresail furling gear
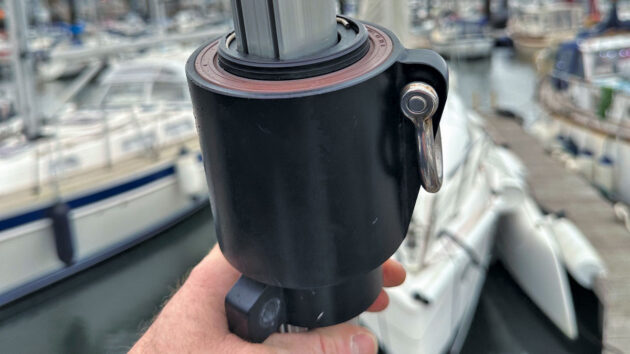
The swivel car on my 40ft yacht seized last year when half my genoa was wrapped around the forestay, making it impossible to pull down.
I was able to roll the loose flap of sail back on itself until I was able to pull it down. The outcome could have been very different in bad weather.
Removing the swivel car was too big a job for me, so I paid for the services of a professional rigger.
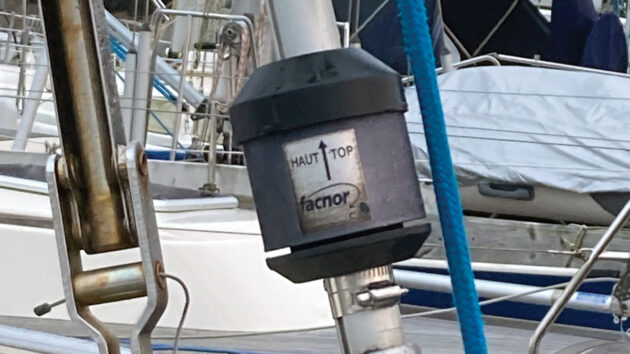
Although this article is specific to my 2004 Facnor model C38 swivel car, much of the work described here could be applied to other makes.
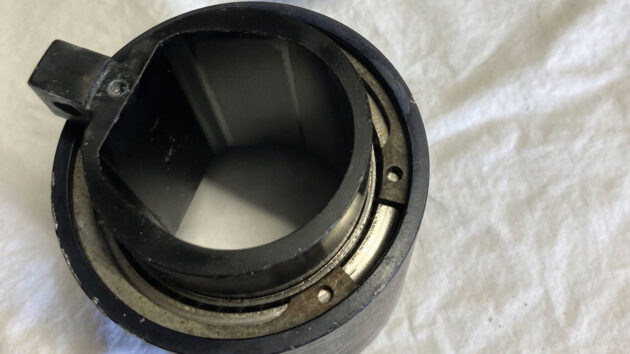
Chris Mardon’s Facnor C38 swivel car. Credit: Chris Mardon
‘Open’ cars like mine don’t have any seals, and their bearings are normally stainless steel or Delrin, so they don’t rust.
The downside is that they collect dirt. Annual washing out with hot water and vinegar helped to keep mine running, but after 20 years, it eventually seized.
I had an easy decision to make: pay £800 to buy the latest replacement or strip the old one down and rejuvenate it. I had nothing to lose.
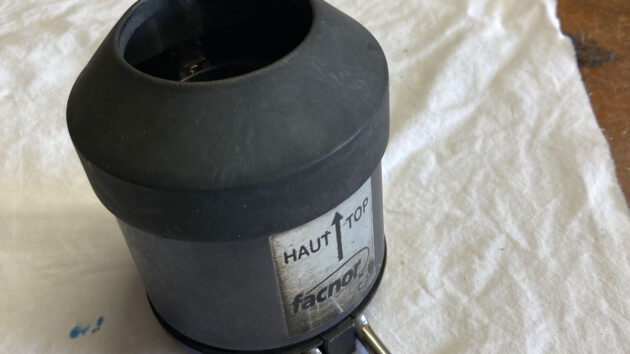
Once removed by the rigger, I took the swivel car to my workbench to remove the top shackle and top cover.
Top circlip revealed – no need to remove it. Credit: Chris Mardon
You then see a big circlip, but this one does not need to be removed.
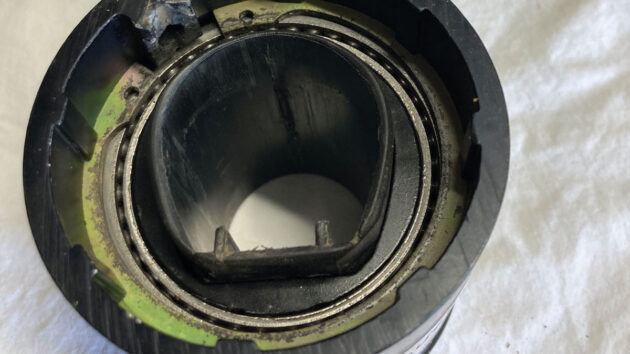
I stood the swivel car upside down in a baking tray to catch the ball bearings, removed the bottom shackle and undid the single stainless steel screw from the plastic guide. I could then pull out the centre black plastic guide.
Inside the outer casing was another circlip securing the lower ball race, both of which had to be removed.
Now, the ball bearing races could be removed. I made a note of which way round each track was situated for reassembly later, then pushed the inner casing out – dozens of ball bearings then spilt out into the baking tray.
Bottom-end view of the swivel car. Credit: Chris Mardon
I put equal numbers of balls into two small containers and poured in enough cleaning fluid to cover them to soak.
I then removed the two half-ball race tracks and used a screwdriver to scrape off the worst of the black caked-on dirt.
Scrubbing with a wad of wire wool removed the remaining dirt until I had four bright-as-new ball race tracks.
Having drained off the cleaning fluid, I rolled the balls around under my palm between two layers of cloth until they were clean.
Rags soaked in cleaning fluid were used to wipe clean the inner and outer metal casings and the inner plastic guide sleeve.
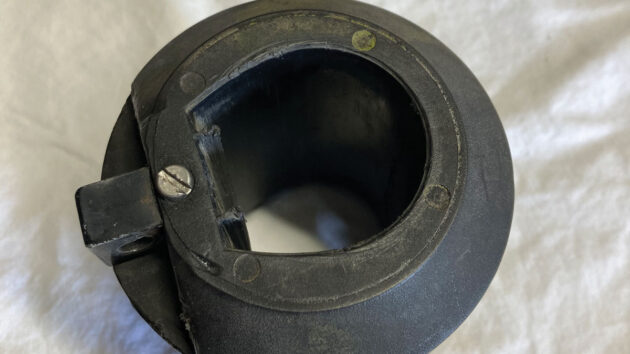
Lower circlip revealed. Credit: Chris Mardon
I don’t recommend using wire wool on the casings as it might damage their anodised surfaces.
Reassembly: I put the top inner ball race track onto the top of the inner casing, loaded silicone grease into the ball race track, then carefully put all the ball bearings one at a time into the greased track.
I then carefully lowered the inner casing into the outer ball race track, taking great care not to dislodge any balls.
If you dislodge any, remove the inner casing and start again.
The shackle boss on the bottom of the inner casing prevents both parts of the lower ball race track from sliding into place square, so they have to be skewed around the shackle boss to fit into place, leaving just enough of a gap to load the balls through the gap between the tracks one at a time.
Chris Mardon’s furling swivel car cleaned up as good as new. Credit: Chris Mardon
It was fiddly, but with care and patience, I fitted all the ball bearings.
I closed the outer and inner tracks together, squared up on the inner casing. The whole assembly now needs to be righted without the ball bearings falling out, so you can slide the inner casing and its ball bearings into the outer casing until it’s tight against the top circlip.
I then replaced the lower circlip, making very sure it sat snugly within its groove all the way round.
I replaced the plastic inner guide and secured it with its screw using thread locking liquid on the screw’s thread.
You can now rotate the inner casing within the outer casing, and it should feel perfectly smooth all the way round – if not, you have missed something!

Headsail furling: how to choose the right system
There is a huge range of headsail furling gear on the market. Rupert Holmes gives some tips for choosing the…
How to choose the right roller furling system for your boat
With a plethora of furlers on the market, Stan Cockeram weighs up a number of factors to help you decide…

In-mast roller furling problems: how to rebuild a Seldén furling gearbox
Mark Ryan rebuilds his Seldén furling gearbox after wrestling with stiff roller furling for a year and discovers stress-free and…
How to dismantle and repair a seized wind generator at home
I confess, I’m frequently guilty of surrendering to the old adage, ‘If it ain’t broke, don’t fix it!’ But I…
Want to read more practical articles like this?

A subscription to Practical Boat Owner magazine costs around 40% less than the cover price.
Print and digital editions are available through Magazines Direct – where you can also find the latest deals.
PBO is packed with information to help you get the most from boat ownership – whether sail or power.
-
-
-
- Take your DIY skills to the next level with trusted advice on boat maintenance and repairs
- Impartial, in-depth gear reviews
- Practical cruising tips for making the most of your time afloat
-
-
Follow us on Facebook, Instagram, TikTok and Twitter