
Richard Hare describes how he built the ply/epoxy fridge during the reconstruction of his Westerly Konsort galley
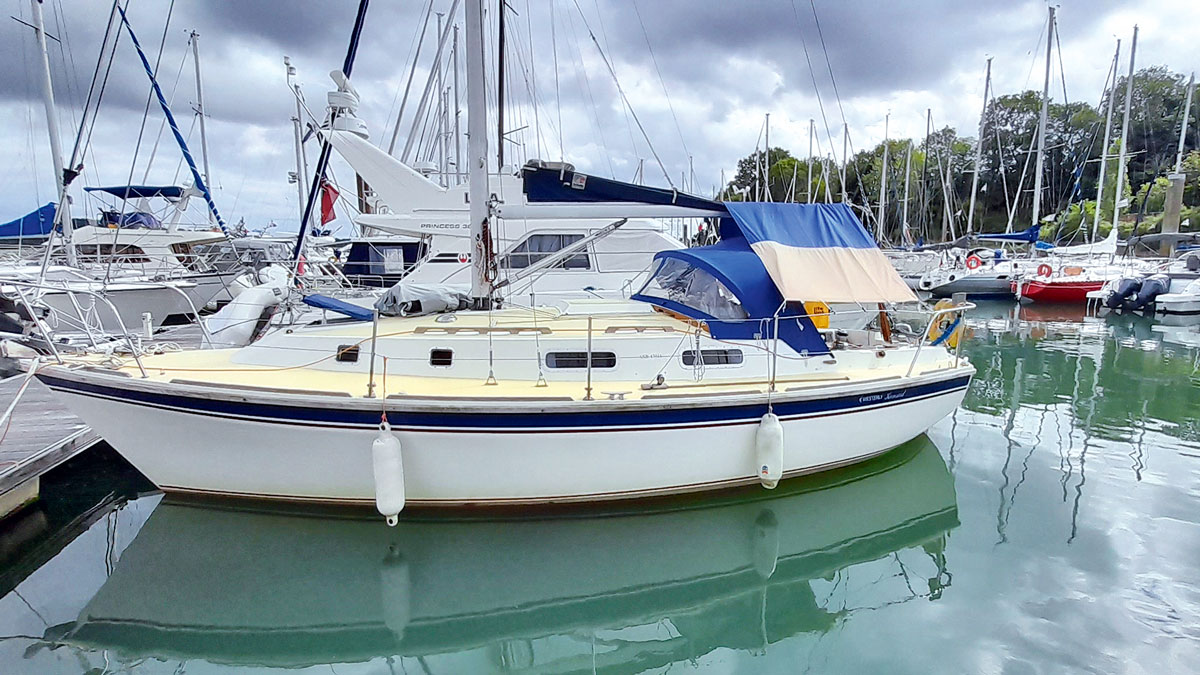
There were so many alterations that I wanted to make to the galley on my Westerly Konsort, Cockle, that the simplest thing was to remove everything almost entirely and rebuild it.
Reconfiguration included two sinks instead of one and a sink outlet that discharged speedily above the waterline, not sluggishly below it.
This also enabled me to use the wasted space that existed behind the drawers and the basin drain pipe, which amounted to about half the cabinet’s capacity.
As to a fridge, my Westerly Konsort didn’t have one despite her being the fourth from last to be built.
Instead, it had a massive, useless, cold box. There was no refrigeration capability.
So, if energy were not to be frittered away, the new fridge box would be a lot smaller and, consequently, more efficient.

The constructed and painted box shown with 12mm closed cell foam to two of the three sides (and bottom) and 25mm closed cell foam bat to the rear. A former drawer sits on a shelf below the fridge for storage. Note also the borehole in the fridge corner to provide access to the compressor beyond. Credit: Richard Hare
I could hit the ground running on this as I’d already built a similar DIY fridge aboard my previous boat, the Golden Hind 31 Keppel.
I cruised Keppel extensively in the Mediterranean and French waterways for many years, and every night the fridge was turned off, such being the high level of insulation built into its construction.
Visitors sometimes expressed horror at the thought of this, but all were convinced of its effectiveness when passed a small glass of milk from the fridge in the morning. It was always cold.
In over 20 years of sailing in very hot cruising grounds, no one ever got ill.
The construction of the DIY fridge
Internal
The box comprised 18mm plywood, screwed and bonded at its joints using filled epoxy.
Dry wood is itself a very good insulator, superior to plastics. The box’s internal dimensions were 40cm (L) x 35cm (W) x 40cm (H).
The eight internal corners of the box were rounded using filled epoxy, shaped with a lollipop stick. The four internal sides were then painted with two coats of clear epoxy.
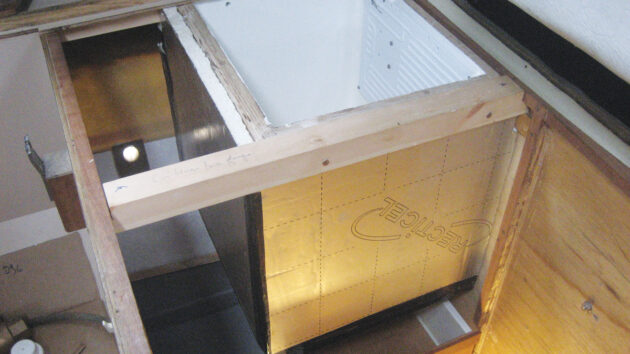
All insulation and support bearers in place. Note the drawer below and the above-waterline hole for re-routed double sink drainage. Credit: Richard Hare
Then, with the box set totally horizontal, about 6mm of clear epoxy was poured into the bottom to self-level.
This reduced the internal height to about 39.5cm, sufficient to accommodate that all-important (to us anyway) 1lt bottle of Suze, and pastis, of course. This solid epoxy base provides a tough, waterproof bottom to the box.
It was then given two internal coats of International Toplac single pot PU white paint.
No drain hole was made in the bottom of the fridge, as I’ve never had a need for one. I’ll return to this later.
External
Externally, the fridge box was lined on two sides and the bottom using 12mm closed-cell foam.
This was then lined additionally using 25mm closed-cell foam bats to all five surfaces.
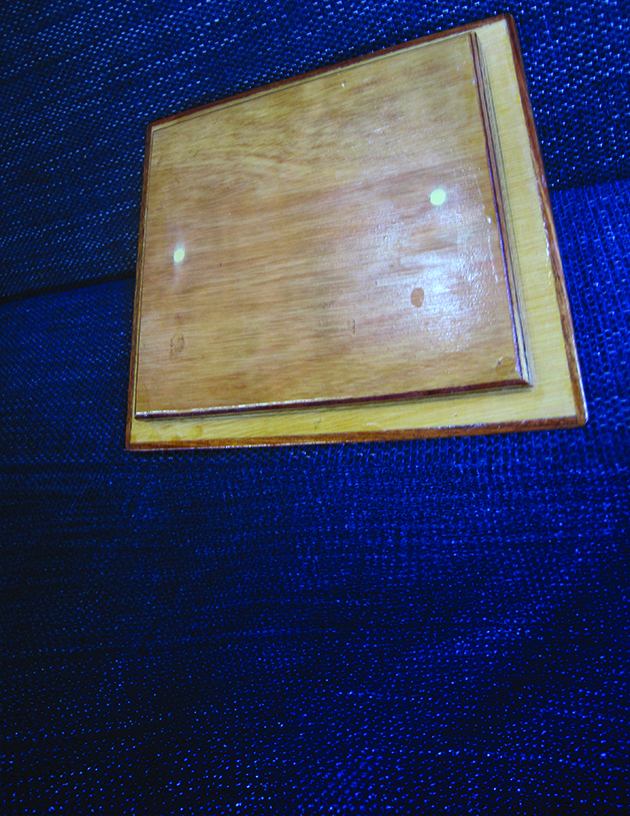
Plywood 9mm thick is insufficient insulation to the lid, so an 18mm plug was added. This also adds useful weight to seal the top of the fridge. The lid was carefully routered to provide straight and 90° edges to receive edge-lipping, bonded using epoxy, as was the aperture in the worktop. The lid also needed extra weight to help it compress down onto the draught excluder foam surround.
Using 18mm plywood reduced the fridge’s internal height to about 37.5cm (still enough for bottles. Credit: Richard Hare
Three sides and the bottom were then given an outer lamination of 12mm plywood.
The fourth side received the same, but courtesy of the existing saloon/cockpit bulkhead.
Worktop
Before the new worktop was fitted – itself made from 9mm plywood (as opposed to the thinner plywood that was removed), it was surfaced with a conventional melamine laminate bonded to the plywood using builders’ merchant impact (contact) adhesive.
Next, the opening into the fridge was cut out carefully.
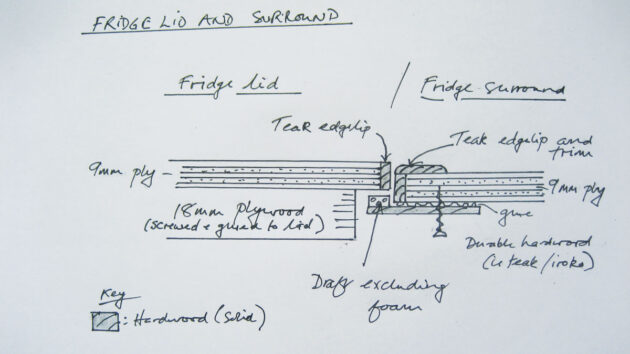
Richard’s sketches for the fridge’s lid support and trim. Teak trim and a lid support were then added around the aperture – Iroko might also have been used just as effectively. Credit: Richard Hare
Consideration was given at this stage to where the supporting horizontal fridge box supports would be located.
The removed laminated plywood was later used to make the fridge lid.
Compressor for the DIY fridge
For a fridge to work, it needs a compressor, ideally one located in a reasonably ventilated position as close as possible to the fridge box.
To this end, I decided to fit an Isotherm GE-80 Cool box Conversion Kit (suitable for a fridge up to 80lt) about 300mm (1ft) away from the fridge box, this being in the adjacent cockpit locker.
The thermostat/temperature controller is in the galley cabinet immediately above the fridge, not within the fridge, as was the case with Keppel’s set-up.
Finishing touch
Although ‘sticky’ mats provide a useful way of preventing fridge contents from sliding around when a boat rolls and heels, they need to be above the potentially slippery fridge floor to be effective.
And here, we revisit the question of a fridge drain hole.
Since I have never needed a drain hole in a fridge box (we prefer to wipe and clean it about once a month; there’s seldom water of any significance there), a platform that raised the fridge contents about a centimetre above the fridge floor was required.
This can be made by sourcing a 10mm-thick acrylic cutting board from almost any housewares shop.
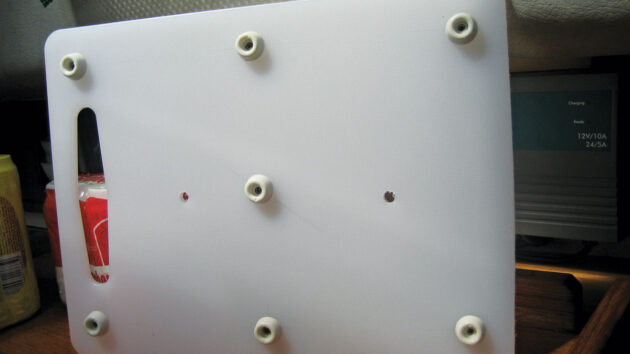
Rubber feet on an acrylic platform provide space above the fridge floor for moisture to accumulate away from the contents. Credit: Richard Hare
To be an effective false floor, drill a few holes to facilitate drainage and air movement. Screw-on rubber feet, sourced from most DIY/hardware shops and online, were screwed to its underside.
This raised the platform sufficiently (about 2cm; still just enough headroom for the Suze). Rubber feet also provide a grip onto the fridge base.
Will the DIY fridge work?
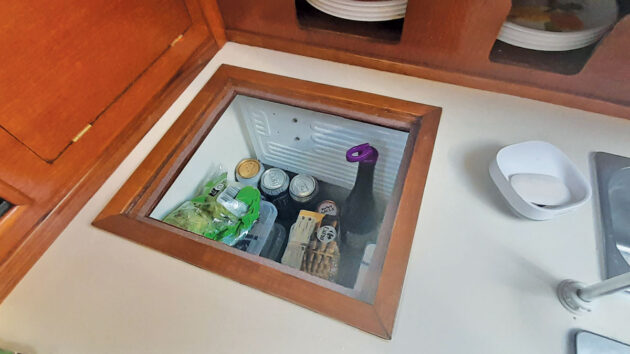
A compact fridge rather than a voluminous cold box provides ample storage for both grub and grog.
How will Cockle’s wood fridge fare?
This is no longer a theoretical question. We know the answer.
Keppel’s now quarter-century-old fridge was always turned off at night during my tenure.
Her owner informs me that it continues to be maintenance-free.
When/if it needs smartening up, a coat of single pot white paint, Toplac for example, will be all that’s needed.
Notes on the design of the DIY fridge
- It uses about the same amount of plywood as a GRP fridge box, but as part of the box (as opposed to being the plug).
- It harnesses the superior insulation properties of wood (you can hold a piece of wood in your hand while the other side is on fire). Imagine trying that with metal or GRP.
- It is lined internally using epoxy (extra deep at the bottom), and then over-painted with a quality single pot polyurethane paint.
- Given a minimum of 30mm insulation, this design can be switched off at night to conserve energy.
- I used 18mm exterior grade plywood.
- The one I built into Keppel, in use since 2000, has worked flawlessly and needed no maintenance other than a fresh coat of paint after 10 years. It has the original compressor (Isotherm) installed in 1999 and still runs as effectively as ever.

Westerly Konsort: space, security & good performance
One of the roomiest cruisers of her size, the Konsort is also known for her solidity, interior finish and easy…

How to design and fit a 50lt holding tank for a Westerly Konsort
My Westerly Konsort Koto was built in 1980 and featured a loo outlet connected direct to the sea via a…
“Why restoring an old boat at the age of 71 was one of my better ideas”
At 71, Richard Hare embarked on a year-long renovation of a 30-year-old Westerly Konsort. He shares why it was one…

How to make a boat fridge: step by step
Keith Calton converts an under-seat locker into a bespoke boat fridge for under £450
Want to read more practical articles?
A subscription to Practical Boat Owner magazine costs around 40% less than the cover price.
Print and digital editions are available through Magazines Direct – where you can also find the latest deals.
PBO is packed with information to help you get the most from boat ownership – whether sail or power.
-
-
-
- Take your DIY skills to the next level with trusted advice on boat maintenance and repairs
- Impartial, in-depth gear reviews
- Practical cruising tips for making the most of your time afloat
-
-
Follow us on Facebook, Instagram, TikTok and Twitter