
When Ozzie’s ‘Collie nose’ diagnosis scuppered his dinghy sailing days, Gary Hardy built a SCAMP boat to get his crew back afloat.
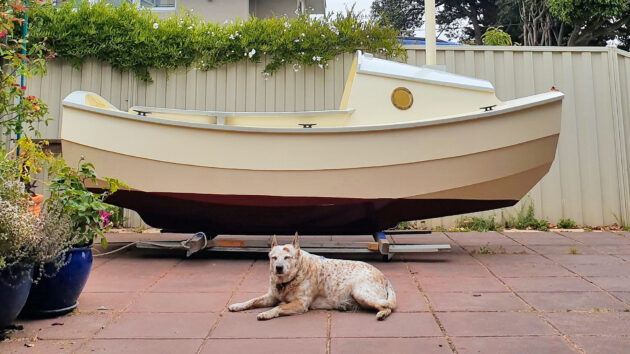
After my Australian Cattle Dog, Ozzie, had a health scar, I built a SCAMP boat, a popular dinghy cruiser design, so he could get back onto the water.
Ozzie has been my faithful crew ever since he came to us more than seven years ago.
But last summer he developed a condition known colloquially as ‘Collie Nose’. The vet advised that exposure to sunlight needed to be minimized, and Oz hung up his dog buoyancy aid and took up shore-based duties instead.
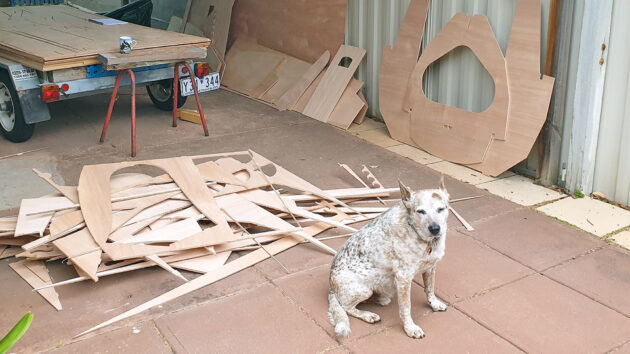
Freeing the panels from the ply sheets. I told Oz that I was building this boat for him, but he looked suitably sceptical. Photo: Gary Hardy.
But every time I started packing up my sailing gear to go out for the day, Oz would mime deep disappointment. Head down, ears down, a mournful looking dog would take himself ever so slowly off to his bed. It was not only the guilt of leaving him behind. I found that somehow sailing just wasn’t as much fun without my first mate.
Cuddy inspiration
As a keen dinghy cruiser, I have always liked John Welsford’s designs, and actually seeing a couple of SCAMP boats (the acronym stands for Small Craft Advisor Magazine Project) at the 2023 Hobart Wooden Boat festival made me realise that here was a boat that would be good for me as I get into my 70s, but also one that, thanks to its lovely sheltered cuddy, could get my crew back on the water.
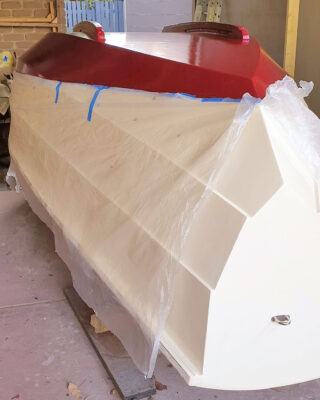
Scribe the waterline for a contrasting colour effect. Photo: Gary Hardy.
After some intensive domestic negotiations, and at the ripe age of 71, I bought the plans and the computer numerical control (CNC) file from Josh Colvin at Small Craft Advisor (SCA).
From the plans it is possible to make your own kit, laying out the various shapes on the plywood. SCA can also advise as to your nearest licensed SCAMP boat kit provider. Newyd Marine are licensed SCAMP boat kit providers for the UK (www.newyd-marine.com) or contact Josh Colvin at SCA for other locations.
If there is no provider close by, you can get the CNC file from SCA and arrange with a local boatbuilder to cut the eight sheets of 9mm ply and four sheets of 6mm ply, as well as the two sheets of MDF for the jig (which is what I did).
Don’t forget to paint and finish those interior compartments before the decks go on. Photo: Gary Hardy.
Cosy carport
I was building the boat in the carport, and one of the advantages of the relatively confined space was that I could easily fit braces where required to hold planks in place till the epoxy cured.
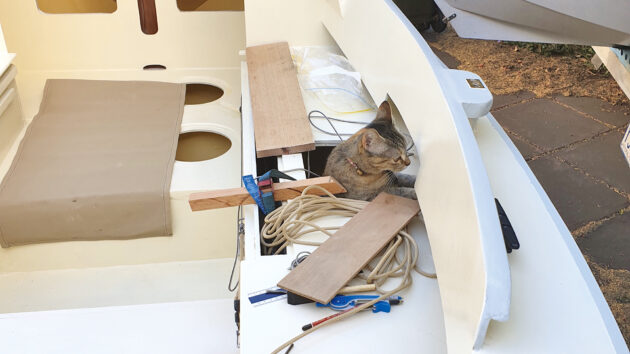
Maggie the cat found the boatbuilding extremely interesting. I had to make sure to lock her inside whenever I was epoxying to make sure I did not glue her to the structure.
Getting the strakes and carlins on required some steam, some cursing, and every clamp I could find, but we got there. The next step was some more painting and finishing of interior compartments which would be difficult to reach once the decks went on. The animals were a huge help here, too.
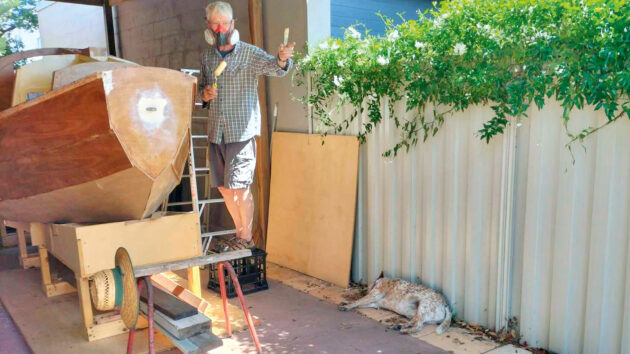
Time to get the mast, spars, foils and rudder done and add on all the hatches, cleats and fittings. Photo: Gary Hardy.
After glueing down all the decks, coamings and cockpit seats, the topsides were more or less complete. It was time to turn the boat over, and I achieved this with help from a bunch of my Wooden Boat Association friends.
With the boat upside down, the bottom and garboard plank can be glassfibred, the skegs attached and the hull could then be painted.
Bottom complete, the boat was turned right way up again, and the topsides finished off. This was also the time to get the mast, spars, foils and rudder done and add on all the hatches, cleats and fittings.
My scamp boat was well worth it
One glorious day I lowered the boat onto a makeshift trolley and wheeled it out into the sunlight. I was ecstatic. Oz managed to contain his enthusiasm.
The last steps were to bend on the sails, get the few simple lines arranged, and organise a trailer.
A happy Oz on launch day. Photo: Gary Hardy.
I had entered the boat in the Paynesville Classic Boat Rally, which helped concentrate my mind to get it finished by providing a specific date. Some corners were cut, but we managed to launch a week before the rally. After looking fairly dour for most of the build, Oz was as happy as I was on launch day!
The regatta was the windiest on record but the SCAMP boat handled it brilliantly.
The build took me 10 months working a few hours some days but with various spells for holidays, sailing other boats, and generally goofing off.
I’m very pleased with my SCAMP boat, an inspired piece of design in my opinion.
It is extremely stable, seaworthy, wonderfully manoeuvrable, comfortable, relaxing to sail, quick to rig, and low effort to get onto and out of the water. It suits the day-sailing and occasional overnighting that us old sea dogs (that’s Oz and me) like to do.
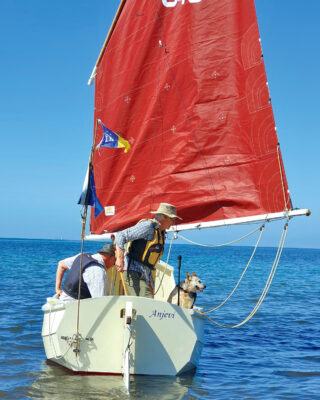
Best of all, Ozzie is back on the crew list. We are having fun with this boat.
SCAMP boat specifications
Designer: John Welsford, commissioned by Small Craft Advisor magazine
LOA: 3.63m (11ft 11in)
Beam: 1.63m (5ft 4in)
Hull weight: 190kg (420lb) including rig
Water ballast: 78kg (173lb)
Each of the CNC kit pieces slots together millimetre perfect. Photo: Gary Hardy.
Plans available from: www.scampsailboat.com
Fibreglass version from Gig Harbour Boatworks: ghboats.com/our-boats/12-scamp/
Small Craft Advisor: can provide details of your nearest licensed kit provider, or the CNC file if no licensed kit provider is nearby: info@smallcraftadvisor.com
Helpful Facebook group: Scamp Sailboat Builders, Sailors, & Dreamers
Building a SCAMP boat, step by step
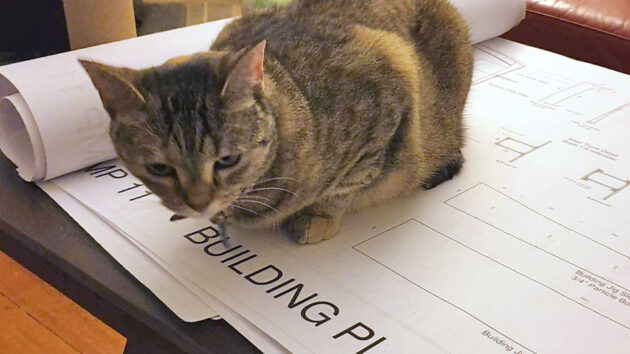
Photo: Gary Hardy.
1. Buy the plans and read through the detailed 90-page accompanying manual, which documents the build of the prototype SCAMP and discusses the tasks required, like handling epoxy, filleting, and fibreglassing. Start ordering supplies for the project, such as epoxy, filler, and screws. The manual has a useful list of the wood and supplies you’ll require.
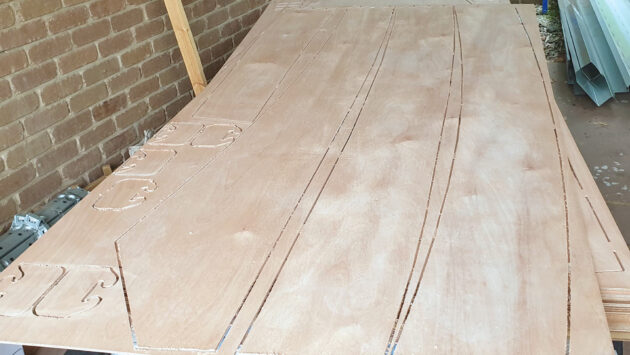
Photo: Gary Hardy.
2. From the plans, it’s possible to make your own kit by laying out the shapes on plywood. SCA will know your local licensed kit provider, or get the CNC file from SCA and ask a local CNC shop to cut eight sheets of 9mm ply, four sheets of 6mm ply, and two sheets of MDF for the jig. Source and cut to dimension some softwood for the cleats.
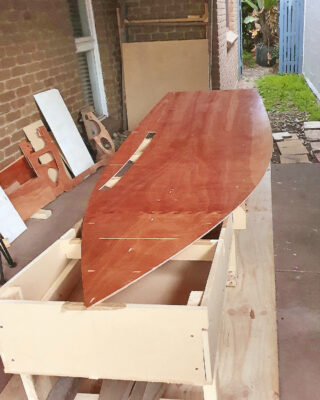
Photo: Gary Hardy.
3. Build the jig. The rocker in the SCAMP’s bottom panel is created by screwing the bottom piece onto the jig. The plans set out the curve precisely, so you can make the jig from scratch, or if you have the CNC files, the pieces are cut out of MDF and slot together. I was working on a concrete floor, so I laid down a couple of pieces of construction ply, both to help with getting everything level and square, and to screw everything down so it did not move around over the build – a great tip given by legendary SCAMP sailor Howard Rice.
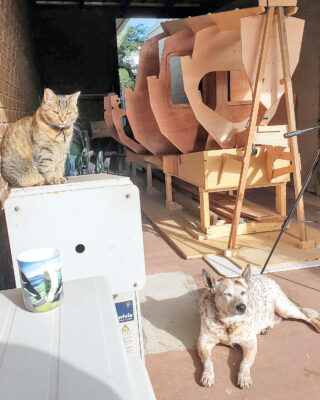
Photo: Gary Hardy.
4. Slot together the bulkhead framework and off-centre centreboard. The seat longitudinals and bulkheads slot into one another to form an egg carton-type structure, and everything fits into tabs which have been routed into the sole. Set up the forward stem and mast box, add the transoms. The boat has a freestanding mast for its balanced lug.
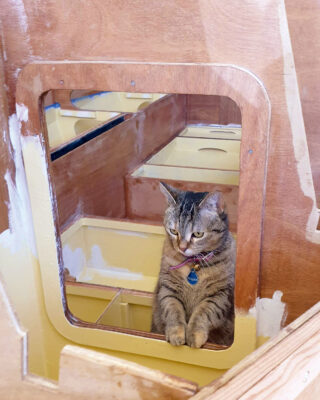
Photo: Gary Hardy.
5. Once the basic structure is in place, ‘cleats’ (pieces of 20x30mm clear softwood), are screwed and glued to the edges, to give a landing surface for the seat tops and cockpit sole. Before the seat tops are fitted the centreboard pivot, a couple of bronze bushings and a cap need to be fitted. The location is pre-drilled in the CNC kit (a huge help). I laminated my centreboard and cut it out from the plans, and did a trial fit. A CNC file for the foils is available from SCA. A cheap hardware store laser level made sure that everything that needed to be aligned was aligned before applying epoxy fillets.
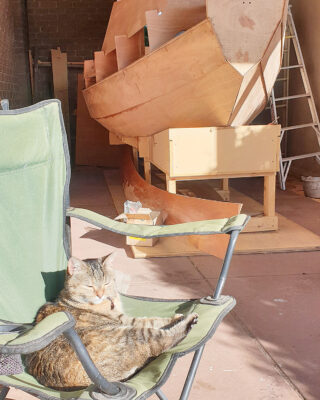
Photo: Gary Hardy.
6. The CNC kit comes with ‘puzzle joint’ scarfs so you can be sure the side planks are the precise shape. Many people recommend the CNC kits that come with bevels already cut for where the planks will touch each other. I had to plane mine as my local cutter did not do 3D, but the bevel dimensions are clearly set out in the plans and I quite like making wood shavings. I used old school stitch (with short lengths of copper wire) and glue to attach the planks to the bulkheads; some people use stainless steel brads and a nail gun. As well as thickened epoxy, I put a glassfibre tape strip over the inside joins between each plank.
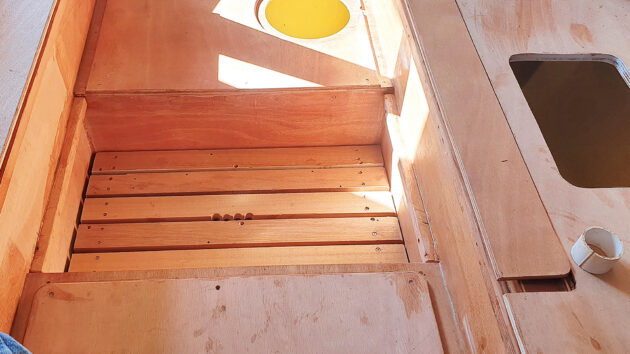
Photo: Gary Hardy.
7. It’s decision time for the layout of your hatches, and whether you are going for the optional footwell. I chose the footwell, and made a floor grate out of hardwood, which can be raised to floor level for sleeping. Top of this picture, the round hole with yellow paint, is the water ballast tank and, to the right, the cap for the off-centre centreboard case. The seat tops and cockpit sole pieces and doublers are epoxied in place.
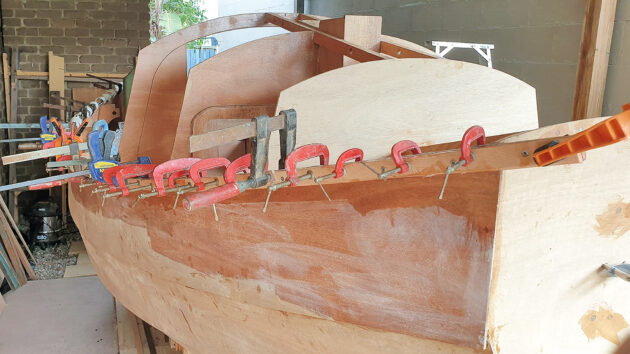
Photo: Gary Hardy.
8. I found creating the SCAMP’s attractive stem to stern curve to be the hardest step. Both carlins and gunwales are made up of laminations of 20x30mm clear stock, and that curve will find any knots or imperfections in your wood! After snapping two, I chose my stock more carefully, and used my wife’s garment steamer, a movable sleeve of plastic, and every clamp I could find, to bend the pieces into the required shape.
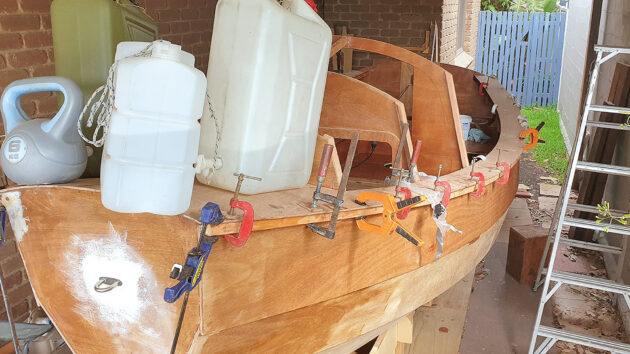
Photo: Gary Hardy.
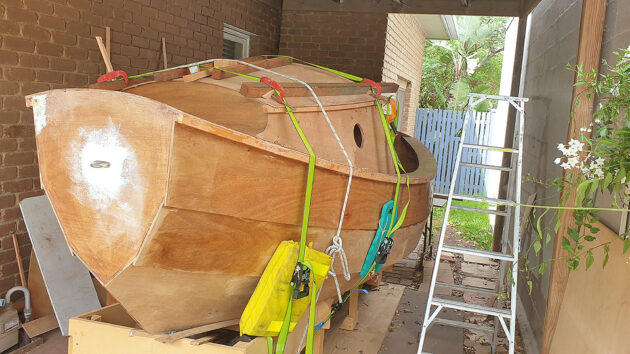
Photo: Gary Hardy.
9. Once the carlins and gunwales are set, the deck can be fitted and epoxied into place. Extra cleats are added to the bulkheads to receive the cabin sides. This step went well thanks to CNC precision; only a bit of shaping with a plane required. With the decks on, the cabin sides slot in nicely, and with a bit of gentle persuasion the cabin top can be bent on over the bulkheads and is glued and screwed. The side coamings are bent into place and glassfibre laid over the cabin top.
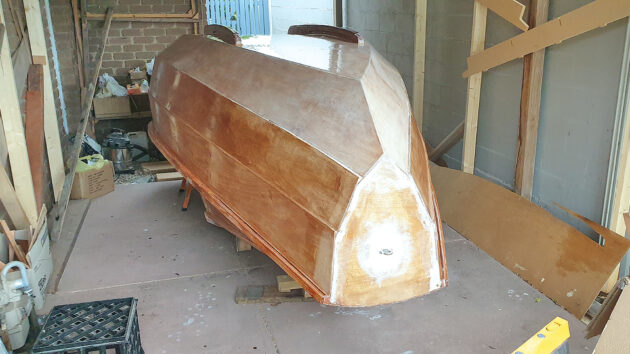
Photo: Gary Hardy.
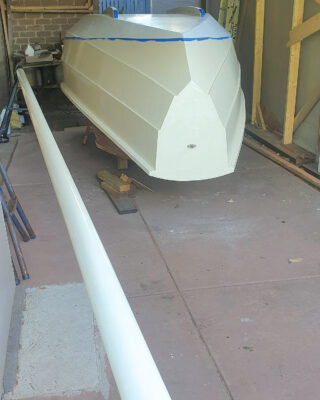
Photo: Gary Hardy.
10. With the SCAMP upside down the joints between the planks can be filled with thickened epoxy, and glass-fibre laid over the bottom. After multiple coats, and as much sanding as you can bear, the two skegs are attached. The dimensions for the skegs are in the plans. I made mine from laminated plywood with hardwood shoes. Once the basic structure is complete, it’s time for painting, scribing the water line if you want a contrasting colour, and making the mast. Many SCAMP builders make wooden masts using the bird’s mouth method. Short on time, I did a basic aluminium tube, with a wooden plug at either end.
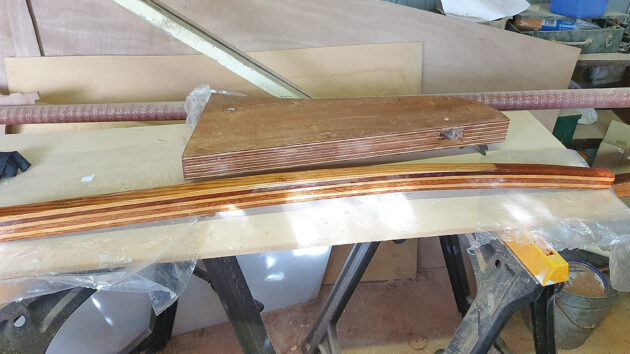
Photo: Gary Hardy.
11. The rudder stock pieces come pre-cut in the CNC kit. The pieces are epoxied together, and bushings for the rudder foil and tiller are glued in place. The plans helpfully say ‘Tiller to suit’. Luckily, one of the members of the extremely helpful Facebook group, ‘Scamp Sailboat Builders, Sailors, & Dreamers’, Dale Simonson, has put up detailed plans for laminating a nice tiller. The SCAMP plans give dimensions for the yard and boom. I tried cutting an old carbon fibre wind-surfer mast to size for the yard. It’s light and works well so far.
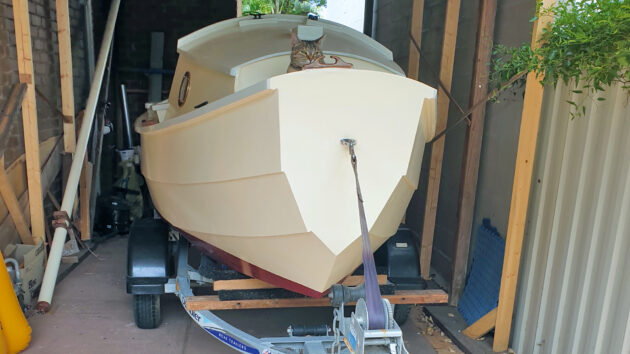
Photo: Gary Hardy.
12. Even on an 11ft 11in boat, there seems to be a lot of fittings and finishing. Deck cleats, fair lead, mast step and partners, port holes, down haul tackle, fitting the boat to the trailer, bending on the sails. All these tasks take time, but it is intensely satisfying seeing a boat you have built getting closer to the water. Build a SCAMP – you won’t regret it!
Gary Hardy retired from a career as a librarian and teacher, and rediscovered a love of sailing in a restored Mirror dinghy. In 2020 he built a 15ft CLC Skerry then sailed it 100-plus miles solo up the coast of Tasmania in the 2023 Tawe Nunnugah Raid. Gary lives in Seaholme, Bunarong land, Port Phillip Bay, Australia.

Small boats: How leisure sailing began
The pioneers of small-boat leisure sailing had to start from scratch when designing and building early yachts – but some…

Our new seadog – our puppy Chloe’s first voyage
Chloe’s first voyage was from the slip to the mooring. As always, I was more concerned about the engine stopping…
Want to read more articles about SCAMP boats?

A subscription to Practical Boat Owner magazine costs around 40% less than the cover price.
Print and digital editions are available through Magazines Direct – where you can also find the latest deals.
PBO is packed with information to help you get the most from boat ownership – whether sail or power.
-
-
-
- Take your DIY skills to the next level with trusted advice on boat maintenance and repairs
- Impartial, in-depth gear reviews
- Practical cruising tips for making the most of your time afloat
-
-
Follow us on Facebook, Instagram, TikTok and Twitter