
Rupert Holmes explains the techniques for the removal and replacement of toerails and grabrails on our your boat
A worn wooden toerail, coachroof grabrail and rubbing strake are common problems for many owners of older boats.
Most of these will originally have been teak, although lesser quality timber may subsequently have been substituted on some boats.
Fortunately, these are easy DIY repairs, providing you know a few tricks.
In many cases, removing the old toerail or grabrail may prove the biggest challenge.
If the fastenings are bolts, it’s generally a two-person job, one of whom will be inside the boat, often in confined spaces and potentially reaching behind cabinetry.
In the past, I’ve started by drilling out the teak plugs to reveal the screwheads. If the screws are made of stainless steel there’s a good chance you’ll be able to remove most of them.

Fitting a new toerail on a yacht is, in most cases, a not too difficult job
Brass screws can be much more difficult to remove, however, as they are softer, so the heads burr more easily and may be liable to snap off completely.
I’ve tried both drilling these out in their entirety, or drilling a pilot hole for a screw extractor.
However, both options can be difficult to achieve using handheld drills and require a good eye.
To speed the process up, I’d now look at using an oscillating multitool fitted with a saw blade to cut through just above the deck level, then clean up with a chisel.
After that a small hacksaw blade, or the multitool with a metal cutting blade, could be used to cut the remains of the screws off flush with the surface.
After removing the old timber and cleaning up the surface left behind, the new toerail can be fitted.
I did a dry fit on all sections to be sure all screw holes were in the right place and to mask up to facilitate cleaning up any excess sealant.
To minimise waste material, two lengths of toerail, with a trapezoid cross section, can be cut from a single rectangular length of timber.
Zest is a one-off Rob Humphreys design launched in 1992
The minimum recommendation for height is 1in (25mm), but a figure of at least 1½in (38mm) would provide better security.
The biggest problem when fitting the new timber is likely to be bending it to fit the curvature of the hull.
The trick here is to start attaching the timber at the end with the greatest curve.
This allows the other end of the piece to be used as a lever to manually bend the wood into the correct position for each screw hole.
This is invariably a two-person task, but one that can generally progress very quickly.
I used a PU adhesive sealant, which is long-lasting in a marine environment, sensibly priced and quick and easy to apply.
It’s worth calculating in advance how much sealant is likely to be needed.
For my partner’s boat Zest, to achieve a 0.8mm thickness, two rows of roughly 3mm diameter gave a little excess squeezed out at the edges.
Taking a bit of time to figure this out avoids wasting sealant and makes the clean-up much easier afterwards.
It’s best to use flat-head screws, rather than countersunk, as this will prevent a tendency for the wood to split.
Bore out the top of the hole so that screw heads are recessed by at least 6-7mm.

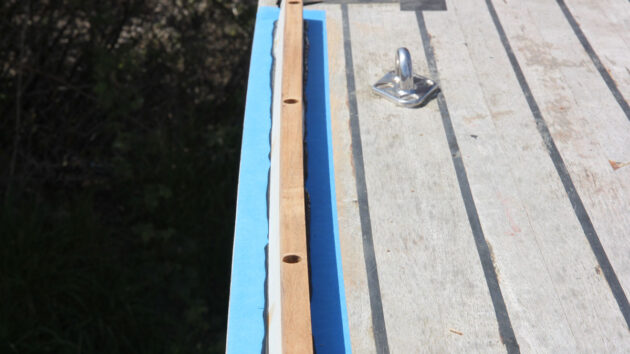
A finished toerail section, waiting for the teak plugs to be cut level. If doing it again, I would smooth the hard corners off the timber before fitting
The diameter of this needs to match that of the wooden plugs that’ll be used to seal the hole and provide a neat cosmetic finish.
Plugs are readily available from chandleries, but if you have a pillar drill and need more than a handful of plugs, it’s a lot cheaper to buy a set of plug cutters for around £20 and cut them yourself from scrap timber.
Traditionally, these plugs are sealed only with varnish, although on boats with a plywood deck, I prefer to use epoxy to minimise the chances of water ingress at a later stage.
When fitting plugs, make sure their grain is aligned with the grain of the rest of the timber and tap them gently into place with a mallet.
Then, use a razor-sharp chisel to slice the top of the plug off, leaving it flush with the surrounding timber.
I used the same broad technique to replace broken coachroof grabrails on Ammos, my 30ft Discovery 3000, which I keep in Greece.
These are bent to follow the curvature of the edge of the deck.
A similar approach works for fitting aluminium toerails, again starting at the end with the greatest curvature.
If refitting the old toerail, for instance after re-sealing the bolt holes, this material will retain some of its original shape.
However, a brand new toerail will require more effort to bend it into shape – often a block and tackle is needed to force the final bit into the correct form.
Toerail replacement: step-by-step
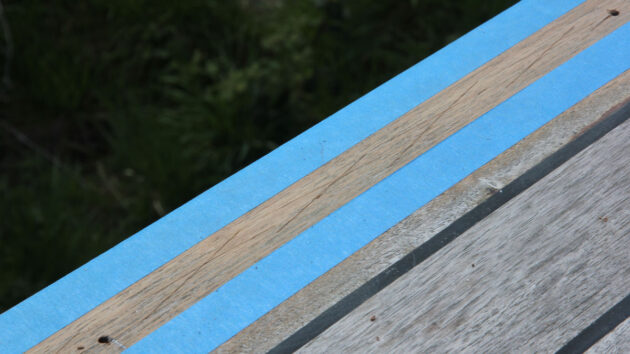
1. Holes were carefully pre-drilled in the deck, and masking tape was applied after a dry fit.
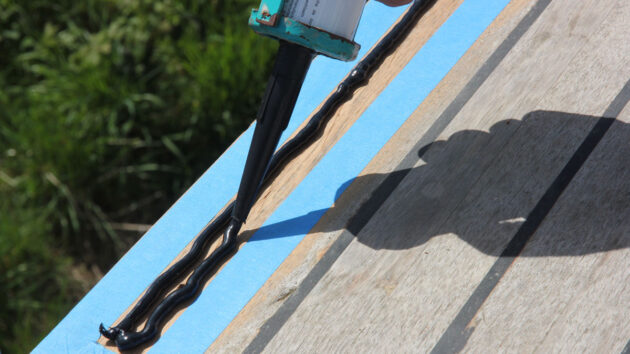
2. Don’t use too much sealant, but make sure there’s enough to squeeze out of the edges.
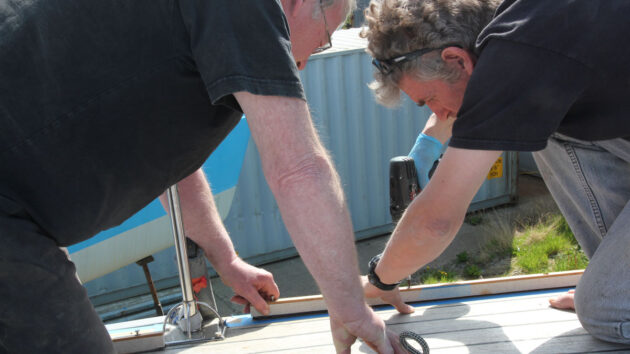
3. Fitting each section is a two-person task: one guiding the free end of the timber, the other screwing in the fixings.
4. Here’s a fitted section awaiting teak plugs and a final clean-up of the sealant once it has cured.
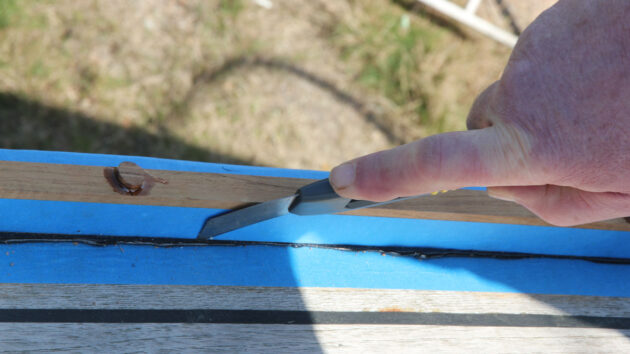
5. Once cured, trim the excess sealant using a craft knife. The deck will be clean when you peel off the masking tape.
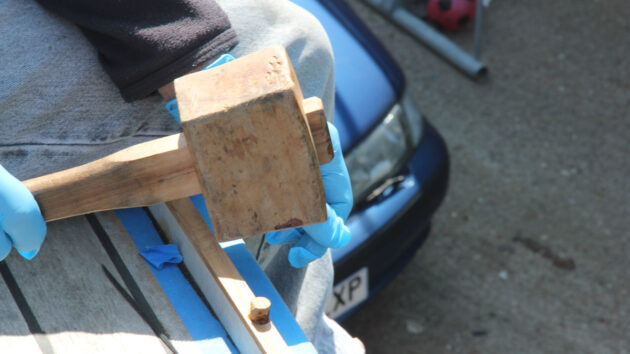
6. Glue and gently tap the teak plugs home, making sure the grain aligns with that in the toerail.
Want to read more practical?

A subscription to Practical Boat Owner magazine costs around 40% less than the cover price.
Print and digital editions are available through Magazines Direct – where you can also find the latest deals.
PBO is packed with information to help you get the most from boat ownership – whether sail or power.
-
-
-
- Take your DIY skills to the next level with trusted advice on boat maintenance and repairs
- Impartial, in-depth gear reviews
- Practical cruising tips for making the most of your time afloat
-
-
Follow us on Facebook, Instagram, TikTok and Twitter