
Andy Pag fixes up his boat’s deck with the help of an affordable airless gelcoat spray gun, and shares his tips for getting a perfect finish even with a non-skid pattern.
When grubby repairs and stains were spoiling a section of my boat’s deck that had a non-skid pattern, I turned to a gelcoat spray gun for the solution.
No amount of cleaning would make it look pretty, and the moulded non-skid pattern made it impossible to rub away the stains. What it really needed was a new coat of gel coat, but slapping on some gloopy gel coat with a paintbrush would look awful and fill in the valleys and troughs of the non-skid. The ideal would be spray paint, but I had zero experience with a spray gun, and whenever I’ve been let loose with a rattle can, I’ve been responsible for more runs than Mo Farah.
I’d always wanted to try my hand with a gelcoat spray gun, but the thought of shelling out a few hundred quid for a compressor and all the gubbins needed has been an insurmountable barrier.
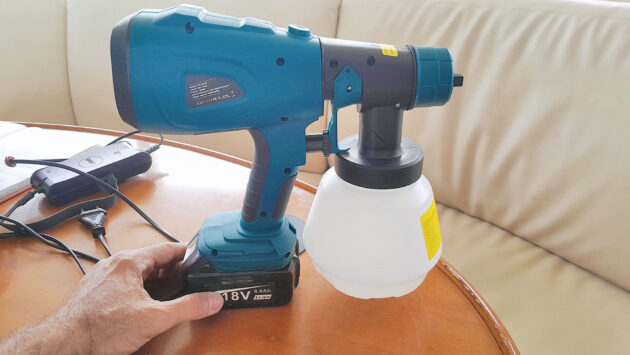
But then an advert online caught my eye for an airless spray gun. It’s a high-speed hairdryer with a spray gun nozzle on the front and a paint jug hanging underneath. It is cordless, and different models fit whatever drill batteries you own.
So I ordered one for the princely sum of £30, and set to work collecting all the materials I’d need.
Prep school
Firstly, surface prep.
There’s no way to sand a patterned non-skid section of deck. Hamish, a professional boat painter and marina neighbour on S/Y Argosy, recommended using thick Scotch-Brite pads rubbed along in the direction of the non-skid lines. It’s not ideal, but you do get some abrasion in the parts sandpaper could never reach.
Simple soap and water would do for degreasing, followed by a hose down.
And then the masking. I had no idea how much overspray the airless gelcoat spray gun would create, but I know from previous experience, it’s better to cover too much than spend hours sanding back unwanted overspray.
We bought taped plastic sheeting, which is much easier to use and ended up using about 25m of masking tape with it, but half the boat was covered, and even though the wind had picked up, everything stayed in place.
The final step was a wipe-down with some acetone and paper towels. Kitchen roll can get grated up by the non-skid, leaving tiny scraps of paper behind, so use something more sturdy, like a clean cotton cloth or blue roll.
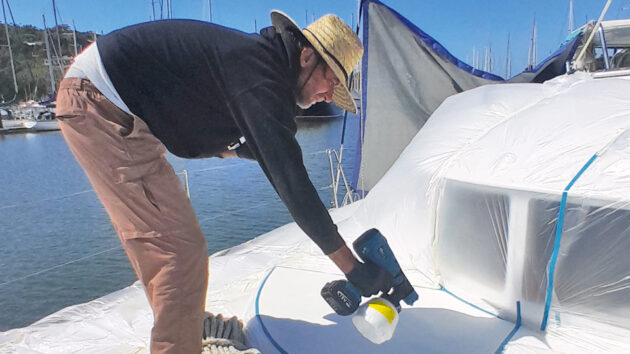
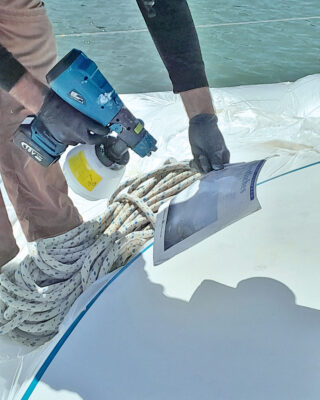
The spray gun Andy used was a cheap, generic make bought online. Photo: Andy Pag.
Think thin
Unless you’ve bought ready-to-spray gelcoat, it will need to be thinned… a lot. And even the ready-to-spray stuff could probably use some thinning, too.
Some people use acetone, but this can apparently cause yellowing of the gelcoat and can also impede the reaction between the gelcoat and the catalyst. One way around this latter problem is to add the catalyst first and then thin it.
But that only works if you know how much thinner you need to add to get it to the right consistency for a gelcoat spray gun; otherwise, you’re against the clock, and while you test it, the gelcoat will be going off.
The better option for thinning gelcoat is the more expensive styrene monomer. It’s nasty stuff that comes in a metal can because it dissolves plastics, so keep that in mind if you’re decanting it into plastic mixing cups for any length of time.
I thinned the gelcoat to make it easier to stir in pigments while trying my best to colour match.
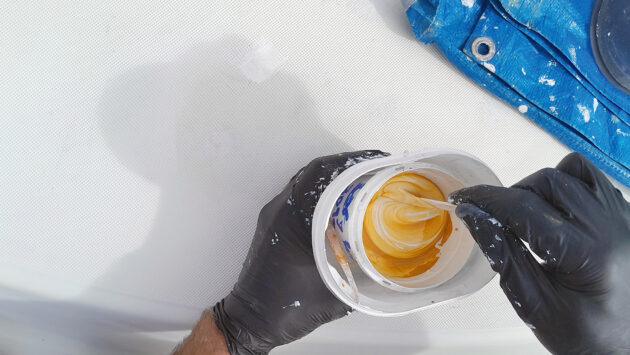
Take time to colour-match the gelcoat to the true colour of your boat deck. Photo: Andy Pag.
Colour match
With our 25-year-old boat, I’ve found I only need yellow and black pigments to colour-match white gel coat or polyurethane paint to the white of my suntanned deck. But ‘white’ gelcoat can come with a blue, yellow or grey hue from the manufacturer, so you’ll have to take your time and try to match it under a diffused light. Cloudy but bright days are best for doing this.
No matter how good the colour match is, it won’t be perfect. There are a couple of ways to disguise the difference. The first is to mask off at a natural edge on the boat’s contours. In my case, I used the borders of the non-slip sections.
The other way is to mask off a larger area and blend the new gelcoat in by applying very thin layers over a progressively smaller area, down to just the area you want to give full coverage.
Testing times
A test spray before adding the catalyst helps you ensure the gelcoat is thin enough and gets the settings on the gun right. I used a piece of old wood to set up the most oval shape I could get on the nozzle, and set the gun to vertical so I could do horizontal stripes with it. In the end, I had about a 50:50 mix by volume of gelcoat and styrene.
The gelcoat spray gun produced quite a small spray pattern, about 5in tall, but it was smooth and didn’t have too speckled an edge, which would be a sign that the paint is too thick for the gun and coming out in globs. I used the largest nozzle that came with the kit and set the needle adjustment stop to almost fully open to achieve consistent coverage.
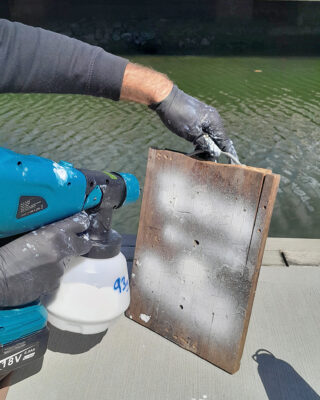
Make sure you practice spraying the gelcoat on scrap wood before applying it to your boat deck. Photo: Andy Pag.
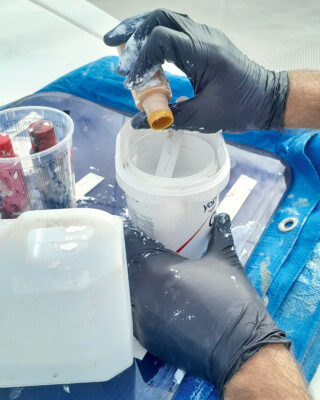
Once I was happy with the spraying, I mixed in the catalyst.
When dosing the catalyst, remember that you need to dose for the volume of gelcoat, not the volume of gelcoat and thinner combined – it’s 1% by volume if it’s a warm sunny day, up to 2% for colder days. I tend to overdo it as I live in fear of having to scrape off gelcoat that doesn’t harden.
Spray in stripes with a steady speed of movement, but a fast change in direction so you’re not dumping double paint when you U-turn. If you’re masked at the edges of your work area, then do the U-turn over the mask so it doesn’t matter how much paint drops, as long as it doesn’t run into your work area.
Overlap each stripe by about 50% to ensure smooth coverage, and remember that less is more. In most cases, it’s best to move horizontally, and don’t be embarrassed to jiggle your whole body to get the gun motion smooth. Resist the temptation to keep going and allow each coat to dry; a run will really spoil your day.
Double-check everything is working as it should before starting on the boat. Photo: Andy Pag
One or more coats
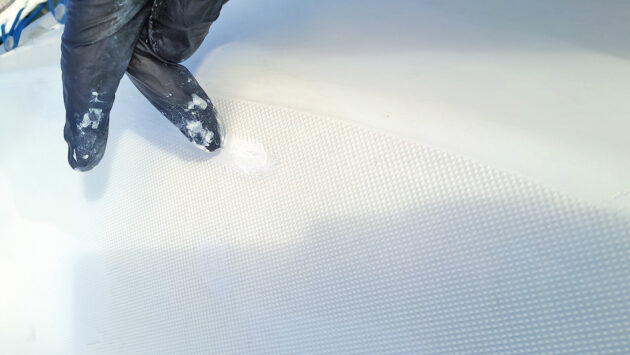
In my case, one thin coat was enough to cover the stains. But if you need more coats, give a few minutes for the first coat to flash off before applying the next coat.
However, don’t wait so long that the gelcoat starts to catalyse in the gelcoat spray gun. You might get three coats out of a batch before you need to drain the tank and clean the gun out, but aiming for two will take the pressure off you.
You can always refill and start again, but for each clean-and-refill cycle, you’ll need to prepare extra gelcoat, as there’s quite a bit that’s wasted in the tubing of the gun and the bowl if you’re only painting a small area.
Start spraying with the gelcoat spray gun
In a way, the act of spraying is an anticlimax. The prep work takes hours, and the spraying is over in seconds.
But with the right prep work, it will look fantastic and be hard-wearing. If you’ve catalysed it well, it will surface harden within a few hours, so you don’t need to worry too much about the long-term weather forecast.
The styrene can rise to the surface, making it sticky. Don’t confuse that with gelcoat not catalysing. A sweep with a paper towel soaked in a mild solvent like isopropyl alcohol will take the stickiness away.
The key to a good result on your first time is to do lots of testing off the boat on scrap pieces and get your mistakes out of the way before you start on your actual deck.
Between the work of masking, cleaning the gelcoat spray gun and mixing up batches, spraying can be a lot of work for a small area, although the gun is not too bad with overspray, so you might not need as much masking as we did. But it’s when you have a large area to paint or an area where finish is really important, like topsides, that spraying really comes into its own.
■ Editor’s Note: It is always best to wear appropriate PPE, like a mask and eyewear, when carrying out this type of project.
Colour-matching
Clean the area you want to match your gelcoat to.
Dab a small blob of uncatalysed gelcoat onto the surface and stare at it for a good minute, moving around to see it from different angles, casting a shadow over it, and in direct light. Take your time for your eyes to adjust to staring at white.
Smear the blob with your finger and look at it for another minute. Pay close attention to the original colour of your boat, and you’ll begin to see what hues your blob is missing. Then add tiny traces of pigment one at a time and repeat with the next blob. Expect the process to take at least 30 minutes.
Dab a small blob of uncatalysed gelcoat onto the surface to check it’s the right colour. Photo: Andy Pag.
Don’t be tempted to add more than traces of pigment, as once it’s in your pot, you can’t take it out.
Typically, you’ll add pigment and make blobs until you realise that you’ve passed the optimum amount, and your latest blob isn’t as good as your previous one. If you’ve added small traces, then you’ll be close enough to an acceptable colour match.
If your blobs are too bright, wait until the end to add black to darken them. This will make your blobs greyer and darker, but other pigments may bring the brightness down, so keep the black until last.
Add the pigment sparingly, as once it is in the gelcoat, you can’t remove it. Photo: Andy Pag.
Make sure you stir in each dose of pigment thoroughly, scraping the sides of the mixing cup with a tongue depressor stirrer.
When you think you’ve got it, ask a friend to come and stare at your blobs.
Once you’re happy, clean off all blobs with an acetone-soaked rag, go have a cup of tea, and come back half an hour later and test your cocktail with a fresh blob to make sure you really do have it.
How well did the gelcoat spray gun work?
I’ve always been put off spray painting by the thought of buying a compressor and choosing a gun from the myriad of options. But then I discovered the airless gelcoat spray gun.
For under £30, I got a compressor and spray gun all in one – and you can find ones which fit Makita, Dewalt or Ryobi batteries.
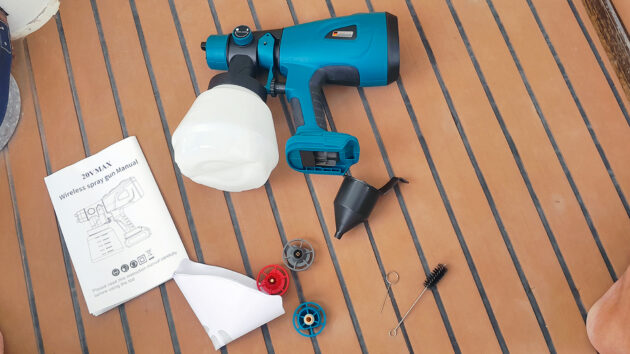
The kit comes with a bunch of handy accessories, which, as a first-time user, I was glad of.
There are a couple of cleaning tools which I needed after each job, and both could do with being a bit longer to reach parts they don’t quite reach. I also received some paint filters to make sure the paint is smooth and won’t block the gun.
The spray gun came with basic cleaning tools. Photo: Andy Pag.
A DIN cup is included; a small funnelled cup with a hole at the bottom, that you can use to test your paint’s runniness. Fill the cup up, and if it takes between 25 and 60 seconds to drain, then the airless sprayer can fire it out of the nozzle.
DIN is a measure of viscosity and stickiness and, based on the DIN time, you can either thin your paint or use a smaller nozzle. There are four nozzles that come with the kit, from 1.0mm to 3.0mm, which cover you for pretty much any paint, lacquer or primer.
The manual was written in poorly translated Chinese English, but the device is so simple that there are only really three things to play with.
Firstly, there’s the spray pattern dial. You can either have it set to a circular spray area or, for most jobs, to a stretched oval, which is best for painting an area with overlapping stripes.
Secondly, you can turn the ellipse sideways or vertically, and finally, there’s a needle stop. This controls how much the paint nozzle opens and how thick a covering you’ll get with each pass.
As a novice, it is best to test it first on some scrap cardboard and just fiddle with the settings and viscosity. You’ll be amazed at how easily you get a great finish.
Learn from Andy’s mistake
I catalysed the gelcoat in the spray gun pot. In hindsight, this was a bad idea as it has an uneven shape, and the pot doesn’t lend itself to allowing you to mix it thoroughly.
As a result, I found some gloopy bits where it had catalysed unevenly.
My first attempt at spraying resulted in nothing coming out. After stripping everything and prodding around at the internal bits, my wife, Julie, appeared with the instruction manual and turned to the troubleshooting page. She listed off the possible causes, all of which I’d addressed until the last one, ‘Paint pot lid is secured and airtight’.
With a sheepish “Oh!” and half a turn more of the pot lid, the paint was flying out.
Cleaning the liquid gelcoat out of the internals of the gun takes just a few minutes. Cleaning hardened gelcoat from the internals of the gun takes a few hours. It doesn’t strip down completely like a paint pistol, and the cleaning tools that come with the kit are pretty basic.
Step by step: how to use a gelcoat spray gun
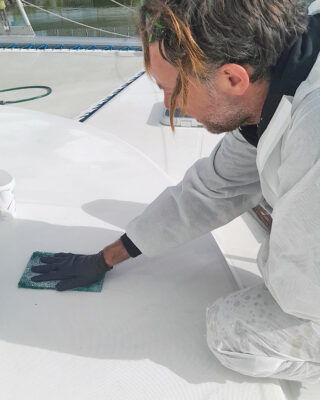
Photo: Andy Pag.
- Abrade the area to be coated – a Scotch-Brite pad is best for non-skid.
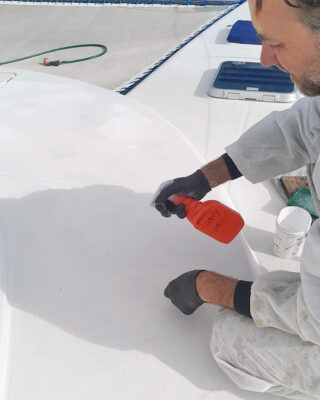
Photo: Andy Pag.
2. Clean with soap and water and thoroughly rinse off afterwards.
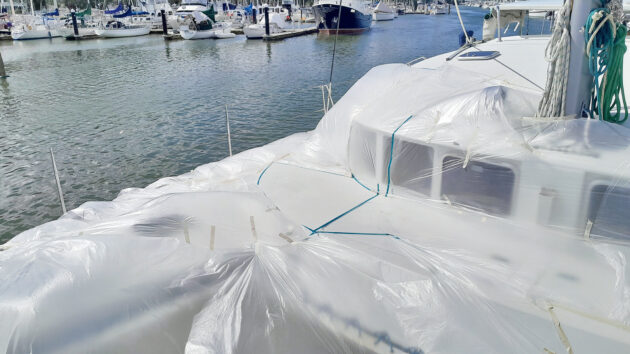
Photo: Andy Pag.
3. Mask off the boat, then rub the spray area down with acetone.

Photo: Andy Pag.
4. Take plenty of time to carefully colour-match your gelcoat, adding a tiny bit of pigment at a time.
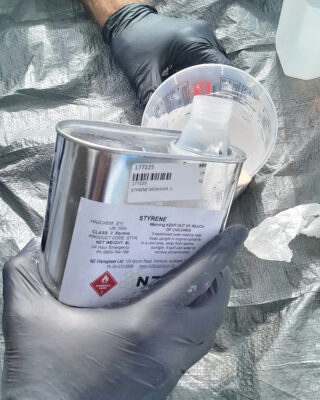
Photo: Andy Pag.
5. Once your ‘white’ is as close a match as you can get it, thin the gelcoat using styrene monomer.
Photo: Andy Pag.
6. Test the thinned but uncatalysed gelcoat in the sprayer. Thin further if needed and set your needle stop.

Photo: Andy Pag.
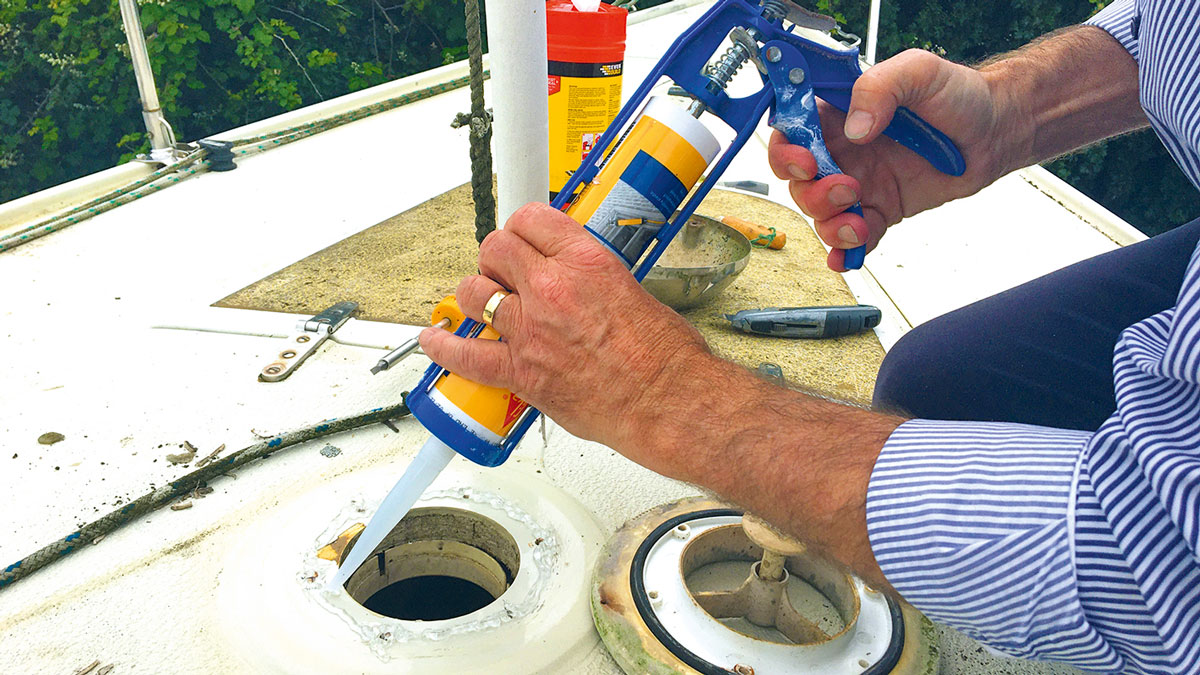
7. Now add the catalyst in proportions to suit the unthinned gelcoat.
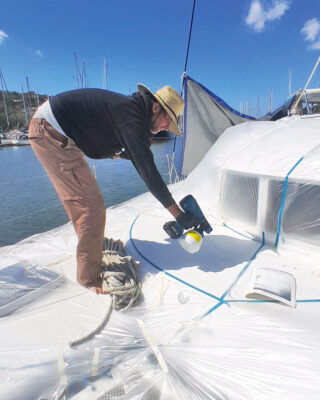
Photo: Andy Pag.
8. Apply your spray coats, overlapping each pass by about 50%.
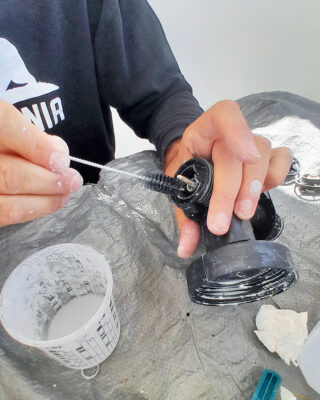
Photo: Andy Pag.
9. Clean out your gun before the gelcoat starts to catalyse.
Andy Pag is a former engineer and journalist. He and his wife, Julie, sailed their Lagoon 410, Cushla Na, from Greece to New Zealand. He regularly contributes to Practical Boat Owner.

How to remove gelcoat: Our expert’s advice on sanding back your boat
Antony Cole writes: “I have 50-year-old GRP trimaran with damaged gel coat undersides. “The gelcoat was left rough and pitted…

10 Gelcoat cleaners tested
Which gelcoat cleaners are best at combating waterline yellowing on boat hulls?
Best marine sealants and adhesives for boat jobs
With help from adhesive and sealant expert Laurie Brebner, PBO’s Ali Wood explains which works best for different jobs on…

Problems with ageing bonded boat windows on the Jeanneau Sun Odyssey 42 DS
The window bonding on some Jeanneau Sun Odyssey 42 DS yachts manufactured from 2005 onwards is coming undone, caused by…
Want to read more articles like this?

A subscription to Practical Boat Owner magazine costs around 40% less than the cover price.
Print and digital editions are available through Magazines Direct – where you can also find the latest deals.
PBO is packed with information to help you get the most from boat ownership – whether sail or power.
-
-
-
- Take your DIY skills to the next level with trusted advice on boat maintenance and repairs
- Impartial, in-depth gear reviews
- Practical cruising tips for making the most of your time afloat
-
-
Follow us on Facebook, Instagram, TikTok and Twitter