
Phil Taylor gives his yacht a new lease of life by replacing its cracked mast with a good one from an abandoned Thompson T24. Here are his sailboat mast replacement tips.

Every had to go through a sailboat mast replacement?
Phil Taylor has.
Well past her 50th birthday, he writes, my Sabre 27 Tabitha’s original mast had served me well for 25 years. It was now showing its age. There were a number of corroded areas, particularly near the base, so it was time to remove it for a serious inspection.
As expected, the news was not good – the corroded area had now developed a crack, and although the aluminium on this ancient mast was a good deal thicker than on most comparable modern sticks, it was no longer suitable for the sort of extended offshore cruising I enjoy.
It was time to either replace it or, at least, to make a repair. A new mast would be best but expensive, perhaps there was a more economical solution?
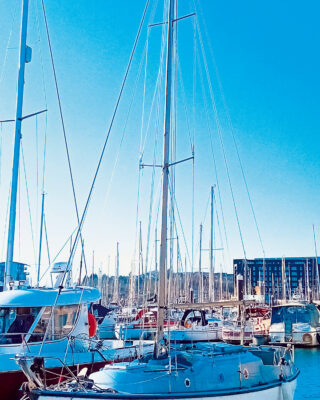
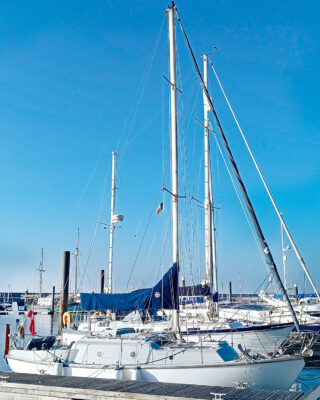
The finished result! The only Sabre 27 with a Thompson 24 racing rig. Photo: Phil Taylor.
As luck would have it, our yacht club in Cardiff Bay had an abandoned Thompson T24. Muhari had been lying around for years and attempts to sell or even give her away had been unsuccessful. The boat had a substantial glassfibre hull so was still afloat, but the sheathed marine ply topsides had been neglected for many years and the ply had rotted to the point that the roof leaked and the deck-stepped mast was in danger of plunging into the cabin.
This once fine vessel would never sail again. Enquiries with professional boat dismantlers had revealed it would cost the club thousands to dispose of.
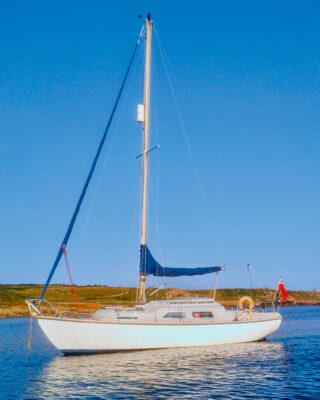
Tabitha’s previous mast had served Phil well for thousands of miles. Photo: Phil Taylor.
The T24’s racing-ready rig
The T24 was designed in 1966 by Guy Thompson who had a day job at the Bank of England. When he retired, a room in the cellar was found to be full of his designs and drawings! The T24 was intended as a one-off, but was so successful it went into production in 1968. It was renowned for speed and seaworthiness and at least one crossed the Atlantic.
Two versions of the T24 were produced: a cruising model with an iron keel, and a cruiser-racer with a taller mast and a lead keel. Muhari was the racing version.
The Thompson T24 as bought – a bargain for £1. Photo: Phil Taylor.
Unusually for a boat of this size, it had a double spreader masthead rig. These are stronger than the single spreader option and allows the use of a lighter mast resulting in less weight aloft. On the other hand, these rigs are relatively expensive so are most often employed on larger boats or on racing yachts where performance is more important than economy.
Remarkably, in spite of being of a similar vintage to mine, the mast was in excellent condition – no real corrosion and it appeared to have had an easy life. It was hard to believe it was the original.
Testing the suitability for a sailboat mast replacement
It would have been easier to keep the Sabre’s simple single spreader set-up, but you have to take what’s available.
The question was, would this racing rig be suitable for my Sabre?
Although only a 24-footer, the waterline length of the Thompson was just one foot shorter than the Sabre 27. Both masts had been made by Proctor and although that brand no longer exists (having been taken over by Seldén) they were top quality in their day.
Remarkably, the length and design of the mainsail track were identical, so my existing mainsail would fit. I discovered that the gooseneck fitting was also similar to mine, allowing the use of my existing boom without modification. The mast itself was a bit longer but the extra length just served to raise the boom to provide enough headroom in the T24 cockpit.
But would it be strong enough? The aluminium was thinner and the profile narrower but longer, and the result was a significantly lighter mast. However, the double spreader design is inherently stronger than a single spreader.
In fact, the racing T24 employed a slightly larger sail area than the modest Mk1 Sabre, and I usually reef earlier than a racing yachtsman would, preferring comfort over speed. All things considered, it should do the job.
I was convinced it was the mast for me – it could have been designed for Tabitha!
Bargain yacht
Of course, everything has a price, the club was happy for me to have the mast as long as I also took the rest of the boat and removed it from the premises – I could have the lot for £1. The deal was done! Both Tabitha and Muhari were lifted ashore and the masts removed.
With a lot of help from my friends, we separated the Thompson’s lead keel and the boat was lifted off. After removing anything that might be of use, a powerful disc cutter made relatively short work of cutting the hull into pieces small enough to fit into an eight cubic metre skip.
We retrieved anything of value and after several days of hard labour, the task was complete. The reward was not just the mast but a substantial lump of lead which we took to a local metal recycler.
Before fitting the ‘new’ mast to the Sabre I decided to renew any parts which showed signs of wear.
The bushes in the halyard sheaves at the top were made of Tufnol. I had new bushes made in Delrin – an industrial plastic with many uses due to its hardness and rigidity and the ease with which it can be machined. Fortunately, I know an excellent and economical local machinist! The spreaders sit in their sockets inside plastic sleeves which act as spacers and prevent metal- to- metal contact. They’d had their day so new ones were made in PVC.
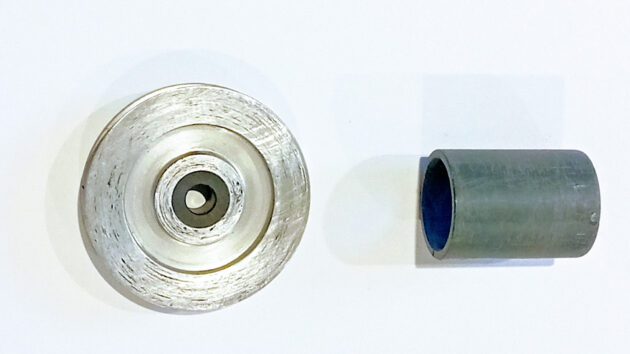
A local engineer made new bushes for the halyard sheaves and PVC sleeves for the spreader sockets. Photo: Phil Taylor.
Now all that remained was to fit the mast. My old rigging was well within date so I wanted to re-use as much as possible. The two masts were laid side by side and after removing the alloy foot from the new mast, 6in was cut off to make it the same length as the old one. The foot was then replaced using monel (not aluminium) rivets. That meant the existing forestay with roller reefing and also the twin backstays would all fit without modification.
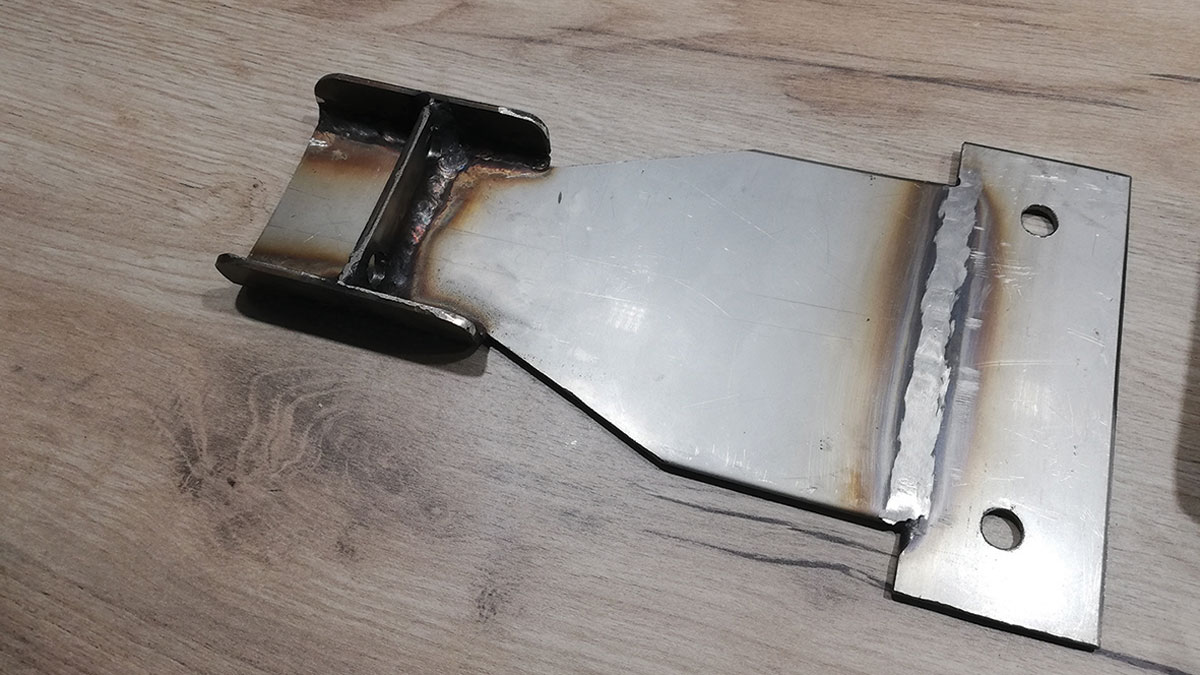
The beam of the Thompson was 8ft compared to Tabitha’s 9ft so the double spreaders were shorter than the originals. To maintain the correct geometry, the chainplates for the cap shrouds had to be moved inboard. The substantial stainless-steel chainplates from the Thompson were used as they were much stronger than the existing ones on the Sabre. They were bolted to the main bulkhead and emerged through the cabin top.
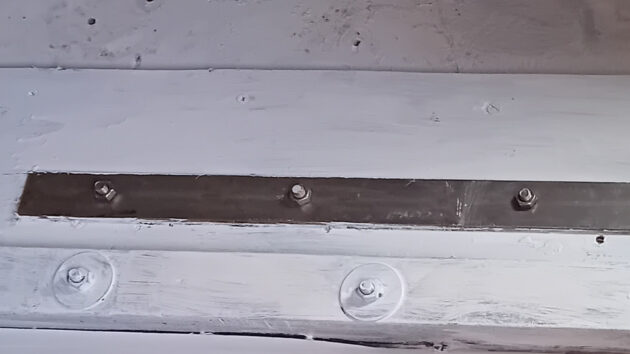
The Thompson main chainplates were re-used but moved from the side deck to Tabitha’s cabin to maintain the correct geometry for the double spreader rig. Photo: Phil Taylor.
The cap shrouds on the Thompson are split at the lower spreaders so I bought new rigging for the upper caps and the diagonals. After careful measurement, it was ordered online from Jimmy Green.
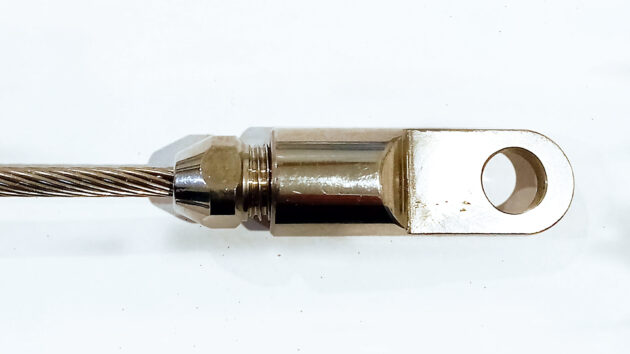
The original Sabre cap shrouds were used for the new lower caps after reducing their length using Sta-lok terminals at the ends. These terminals are not difficult to fit and are stronger than the wire so are unlikely to fail if fitted correctly.
Different methods for sailboat mast replacement
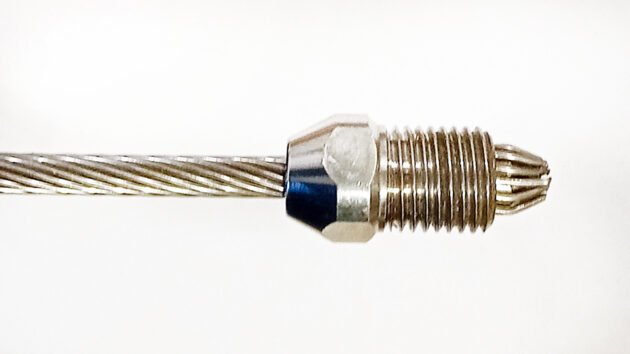
Some say that you should use Loctite on the threads, although Sta-Lok only recommends this if the fitting is for a roller furling stay. Some like to use a sealant although this is not considered to be essential. However, if you do decide to use a sealant make sure it is a neutral variety – some silicone sealants contain acetic acid which will cause corrosion. In either case, apply Loctite or sealant after assembly. Unscrew and apply it to the inside of the end fitting before replacing and re-tightening.
One advantage of these terminals is that when the time comes to replace the wire you can re-use them, although it is recommended that you use a new wedge.
The Thompson had a single lower shroud and a baby-stay, the Sabre had double lowers with no baby-stay. As a belt and braces solution, I decided to shorten and re-use the original double lowers attached to the existing (already strengthened) Sabre chainplates, and add the baby-stay as well. It looked a bit over-rigged but at least it would be reassuring in strong winds!
Measure twice
The mast on the T24 rested on the cabin top, but the Sabre mast sits in a stainless-steel tabernacle. The mast is secured by two bolts running through bushes which pass through holes in the mast and tabernacle sides. So the next job was to drill a hole in the mast for the top bush on which the rig pivots.
Careful measurement was essential – if I got this wrong I’d be in trouble! The new mast was slimmer than the old one so spacers were needed inside the tabernacle. I made these from hard plastic – two kitchen chopping boards from B&M, £4 each!
Eventually, with a posse of willing helpers the mast was hoisted into position and, amazingly, it all fitted!
The final job, once the mast was upright, was to drill the lower hole through the mast, using the tabernacle as a guide, and then insert the second bush and bolt. As an extra support, a hardwood wedge was hammered into the space between the bottom of the mast and the base of the tabernacle.
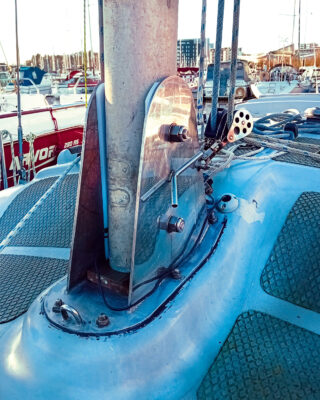
The tabernacle complete with new mast and plastic spacers. Photo: Phil Taylor.
Next, it was time to tension the rigging. Moving the cap shrouds inboard increases the compression load on the mast. That was not a problem for Tabitha because I had already increased the mast support many years ago by replacing the original post with a much stronger one. I’d also invested in a Spinlock rig tension gauge. It wasn’t cheap, but it makes it easy to set up the rigging accurately and gives peace of mind, particularly in rough weather.
Of course, to tension the upper caps and diagonals it was necessary to go up to the lower spreaders.
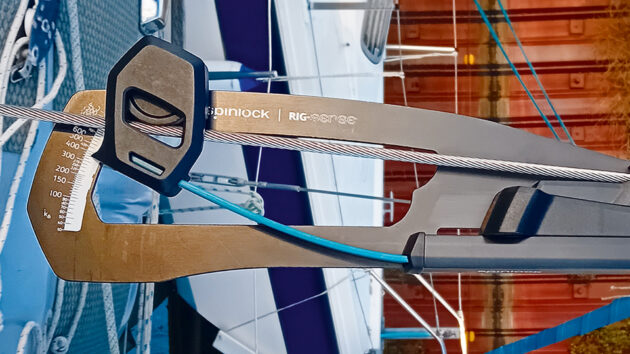
Tensioning the rigging. The gauge is easy to use and ensures correct rig tension all round. Photo: Phil Taylor.
Sea trial after a sailboat mast replacement
Now all that was left was to put the sails on and test the rig. The sails looked good on the new mast so I set off on a sea trial around the Bristol Channel and off the North Devon coast. We met a variety of conditions, including Force 6.
In theory, the lighter mast should lower the centre of gravity and enable full sail to be carried for longer before needing to reef. Also, the shorter spreaders and inboard chainplates allow the genoa to be sheeted in more and should allow the boat to point a bit higher.
That’s the theory, in practice, she just seemed to sail as well as usual which is good enough for me! At the time of writing, the new mast has covered 1,000 miles with no problems. All in all, with an overall cost of £440, it was a job well worth doing although it took a bit longer than I’d hoped. Also, I count myself lucky to have a number of good friends, I could not have achieved it without their help!
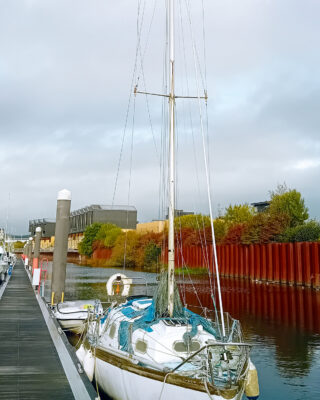
Eight weekends of work were needed to replace the mast. Photo: Phil Taylor.
A note of caution: if you are making significant changes to the rig you should consult your insurers who may want a surveyor to check any modifications.
Approximate cost of a sailboat mast replacement:
Thomson T24: £1
Skip Hire: £320
New rigging and Sta-Lok fittings: £1,200
Materials, including machining: £120
Income from the lead keel: £1,200
Overall cost: £440
Sailboat mast replacement, step by step
Using standard 1×19 stainless steel wire rope.
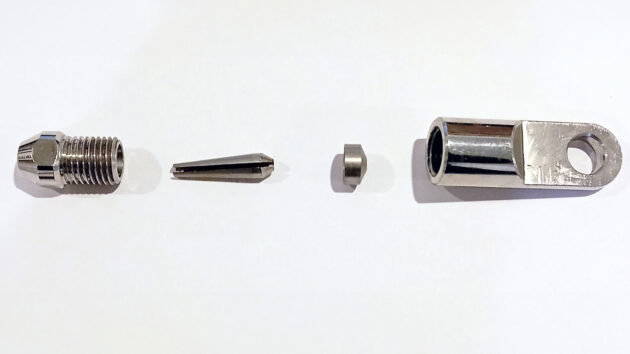
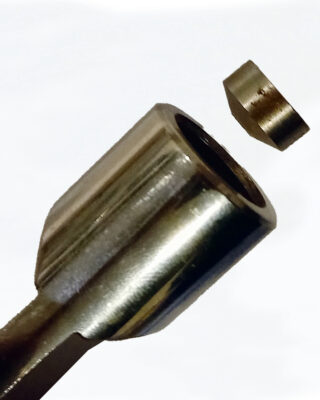
1. Component parts of the Sta-Lok swageless terminal.
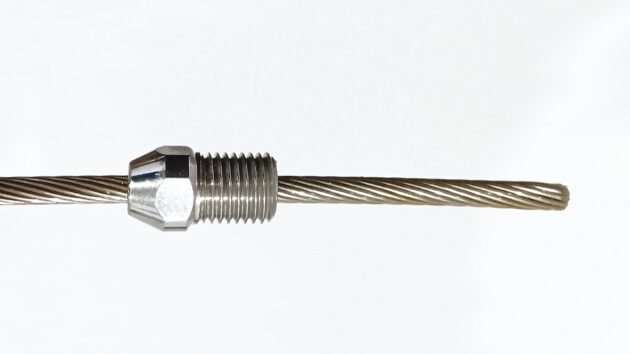
2. Slide the socket over the wire, check you get it the right way round!
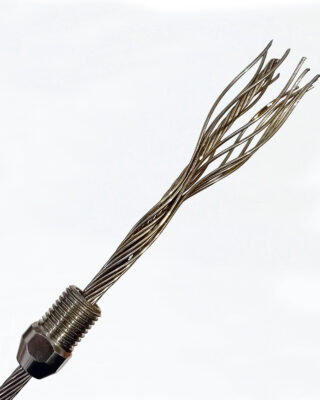
3. Unravel the outer strands from the tightly wound central core.
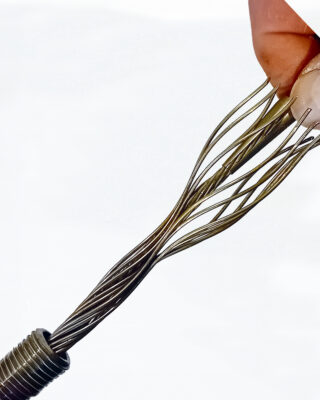
4. Slide the wedge over the central core until about 3mm of the core protrudes from the end. Make sure the wedge is the right way round.
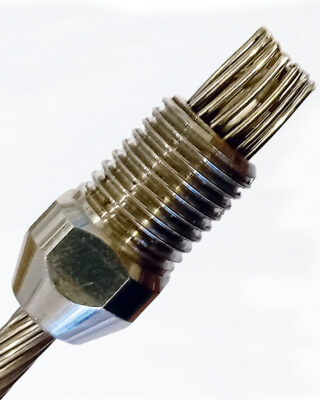
5. Arrange the strands evenly around the wedge and slide the socket towards the end. Ensure a strand does not get trapped by the slot in the wedge.
6. Now insert the former cone into the end fitting.
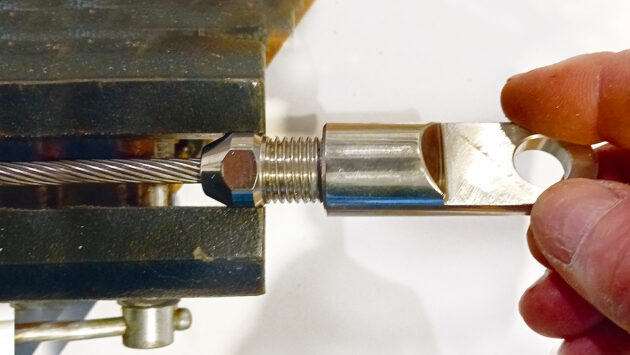
7. Holding the socket in a vice, carefully screw the end fitting onto the socket until finger tight.
8. Use spanners to tighten the end fitting until resistance is felt, making sure not to over-tighten.
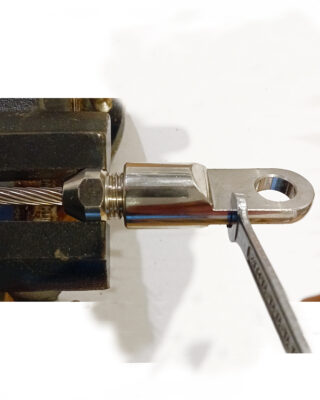
9. The finished terminal. INSET You can unscrew the fitting to check all is well or add Loctite or sealant (optional).
Phil Taylor is a retired chemistry teacher. He has cruised most of Great Britain and Ireland’s coasts and the Atlantic coast from the Netherlands to Spain. He has also completed a single-handed voyage to the Azores and back. Tabitha is even more seaworthy than a standard Sabre 27 thanks to modifications carried out during his 25 year ownership.

Do-it-yourself mast stepping
If you’re thinking of hiring a boatyard crane to step your mast, why not consider this low-tech, low-cost alternative? Rupert…

Snap, shackle and drop: coping with a dismasted sailing yacht
Steve Hodges and his fiancée Sam McClements’ second attempt at the RYA Yachtmaster Ocean passage is scuppered by a dismasted…
Masthead crane replacement
Steve Gerry fabricates a new masthead crane

Coping with a dismasting & rig checks
Faced with a sudden dismasting in 40-knot gusts, Rupert Holmes explains how he and his crew saved his boat, and…
Want to read more articles like this one on sailboat mast replacement?

A subscription to Practical Boat Owner magazine costs around 40% less than the cover price.
Print and digital editions are available through Magazines Direct – where you can also find the latest deals.
PBO is packed with information to help you get the most from boat ownership – whether sail or power.
-
-
-
- Take your DIY skills to the next level with trusted advice on boat maintenance and repairs
- Impartial, in-depth gear reviews
- Practical cruising tips for making the most of your time afloat
-
-
Follow us on Facebook, Instagram, TikTok and Twitter