
Rupert Holmes explains how to strongly attach new or replacement fittings to decks – and how to fill redundant old bolt or screw holes
Adding deck fittings is a task long-term boat owners will invariably have faced many times.
But for those new to boat ownership taking a drill to a previously pristine and waterproof deck can be a daunting prospect.
I still remember being filled with trepidation the first time I did so on a shiny 12-year-old boat worth real money, rather than the old 18ft plywood Caprice I’d renovated a few years earlier.
Had I measured everything right? Was there anything unforeseen that might go wrong?
Of course, these are legitimate concerns even for the most experienced boatbuilders – and anyone who forgets the old adage of measuring twice and cutting once does so at their peril.
But it’s equally important to keep these in proportion.
Even if you get it wrong, the basic procedure for filling in redundant bolt holes is simple, even if the final cosmetic stage, achieving a perfect colour match, is more difficult.
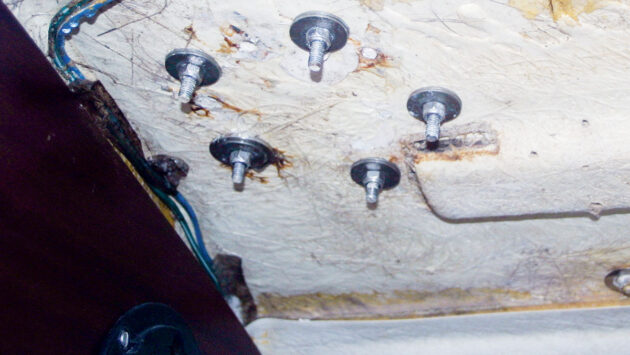
Fitting fastenings through a cored deck
Nevertheless, before you start it’s important to have an appreciation of how decks of fibreglass boats are constructed.
Most have a core of foam or balsa wood, which adds stiffness to the structure without increasing weight.
The cored areas – and those that are monolithic fibreglass – can usually be seen easily if headlinings are removed.
As an aside, this is the reason any deck leaks should be dealt with immediately.
This is particularly important for boats with balsa-cored decks, where there’s a risk of the balsa turning to mush if it remains wet for an extended period, which then compromises the vessel’s structure.
Fortunately, the area around most deck gear is likely to be solid fibreglass.
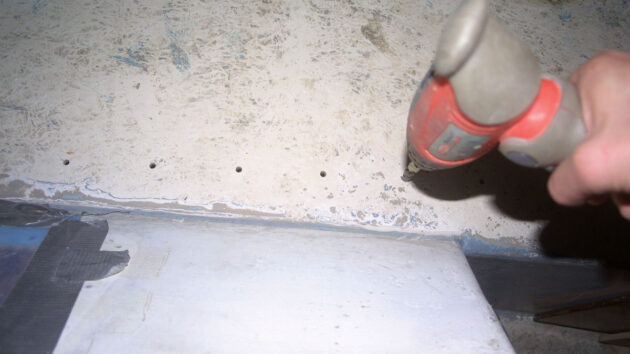
Use a slightly oversized drill bit to clean redundant bolt or screw holes of old sealant and other contamination before filling with epoxy resin. Credit: Rupert Holmes
Indeed, many boats, especially from the mid-1990s onwards, have aluminium plates bonded into the deck to take optional equipment such as extra clutches or spinnaker gear.
These are usually large enough to act as backing pads that spread the load from the fitting.
This means you can drill a hole through the deck and aluminium plate, then tap a thread for the bolts, without needing a washer and nut underneath.
A good smear of Tefgel or Duralac on the screw threads will keep corrosion caused by dissimilar metals at bay.
However, this arrangement is unlikely on a boat built in the 1970s and 1980s.
So you have to start by figuring out whether the fitting will be in a cored or solid part of the deck laminate.
If it’s solid, then all you need is to drill through and put suitable washers or backing plate underneath.
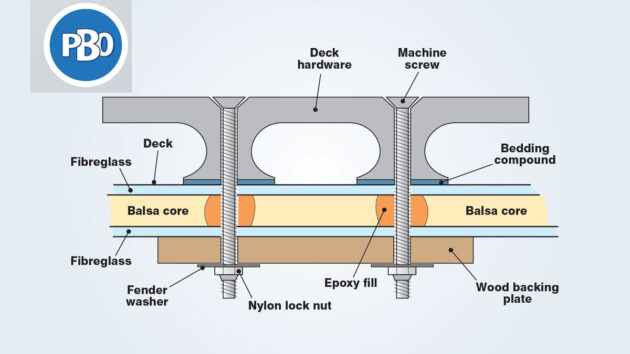
If the deck is cored where the fitting will be, you need to remove some of the core around the bolt holes.
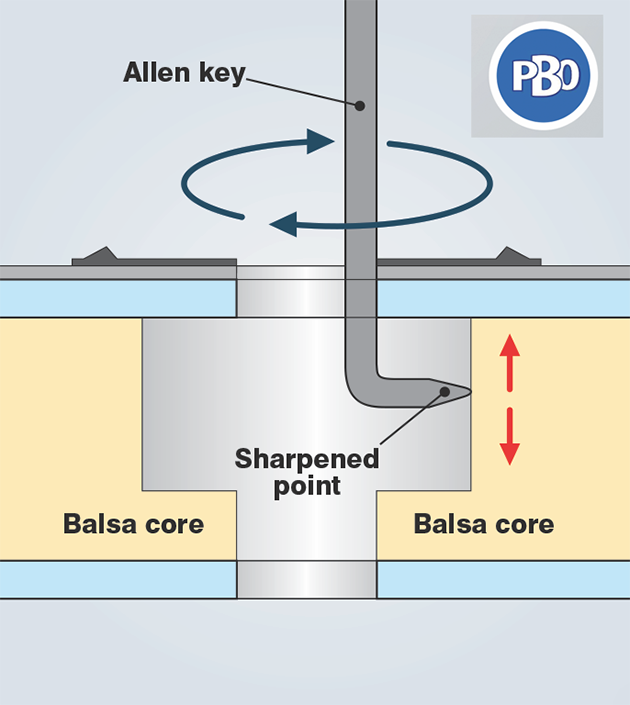
An Allen key in a power drill can be used to remove balsa core around a new bolt hole, before filling with thickened epoxy. Sharpen the point for greater effect
With a balsa deck this can usually easily be done with an Allen key in a drill, but a foam core deck may require more time-consuming measures, starting with a sharp chisel.
The void created is then filled with epoxy resin thickened with colloidal silica, creating a solid ‘plug’ that stops water reaching the core material and prevents the sandwich being compressed when the nuts are tightened.
Backing plates
Loads from deck fittings need to be spread over a wide area, otherwise there’s a risk of the bolts simply pulling through the deck.
Fittings that don’t carry much force, such as cam cleats, are unlikely to need more than extra-large (so-called penny) washers – around the size of today’s 2p coins.
However, clutches, winches and mooring cleats can carry considerable loads.
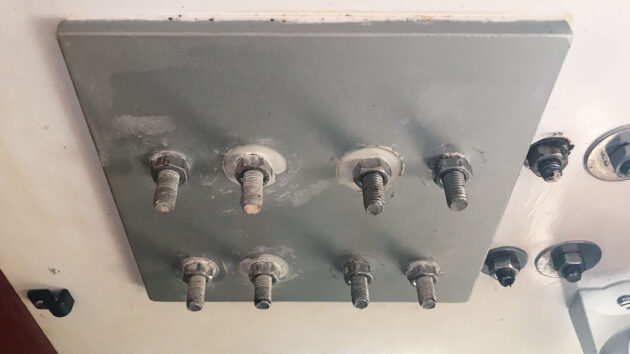
A substantial aluminium backing plate beneath the deck, where a bank of clutches is mounted on the coachroof. Credit: Rupert Holmes
For these, an aluminium backing plate of at least 4mm thickness will help spread loads, although marine plywood combined with penny washers will often suffice, especially for boats under around 30-32ft.
Occasionally, really high-load applications will need more backup than this.
The most common of these is babystays – many were originally bolted through the deck, but over time this has proved inadequate.
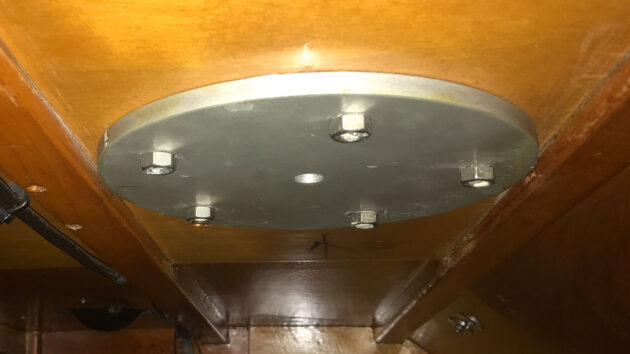
Larger boats may need a bigger plywood or aluminium backing pad, especially for primary winches, as in this case. Credit: Rupert Holmes
This applies even more for inner forestays that carry a staysail or heavy weather jib, where the stay may encounter close to a tonne of load, even on yachts of a modest size.
For this purpose, although Zest has a big aluminium backing plate below the deck fitting, there’s also a Dyneema strop taken down to a strongpoint bolted through the stem. This is then tensioned with a bottlescrew.
Sealing deck fittings
Today, an increasing number of fittings are supplied with a gasket, which means sealant is not necessary, and installation is a faster and cleaner process.
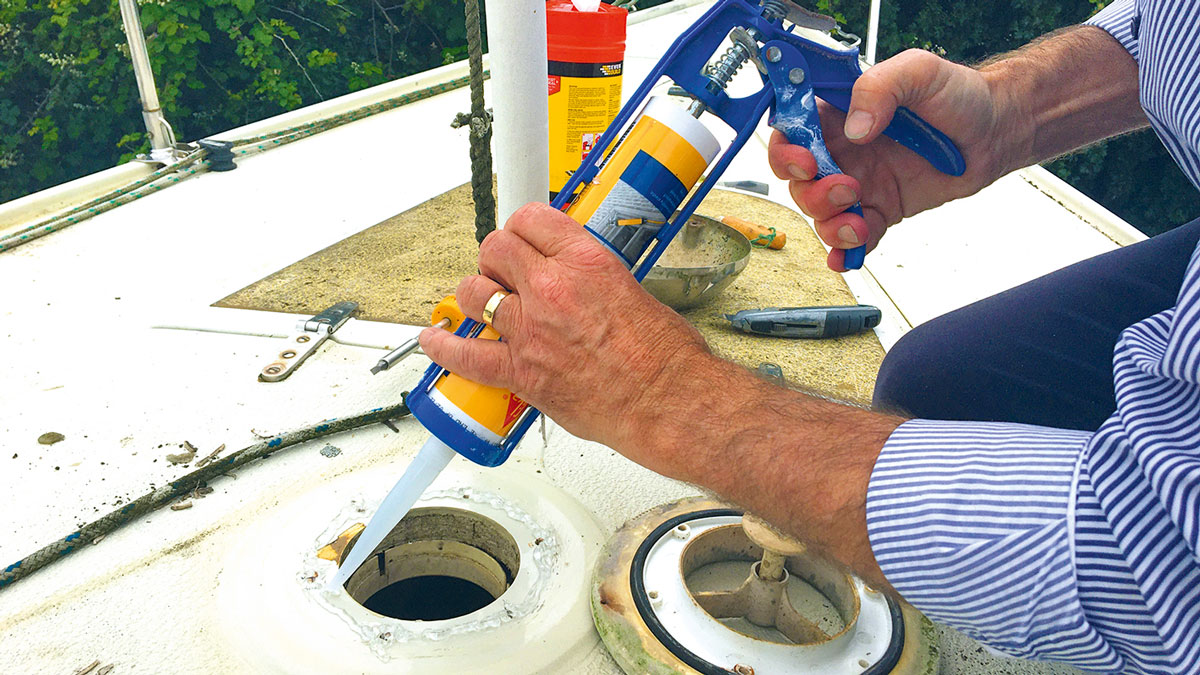
However, in most cases you’ll need to use a mastic-type sealant.
Many of these are promoted as ‘marine’ products, yet as with many generic yacht varnishes, a lot of them are unsuitable for our purposes.
Polyurethane sealants are one of two types of products I use extensively and that have kept water out for two decades or more.
They have strong adhesive properties, which help create an excellent seal.
On the downside, it can make removing fittings at a later date difficult.
Masking off around where a fitting is to go helps with cleaning up the messy sealant later. Credit: Rupert Holmes
However, these products are available with different levels of adhesion – Sikaflex 291 and 3M 4400, for instance, have a low level for use with general deck fittings, while Sikaflex 292 and 3M 5200 have a high level.
Polysulphides such as Life-Calk adhere tenaciously to almost any substrate but never fully set.
This can make them a good choice for fittings that need to be removed periodically, but check that the one you intend to use is compatible with any plastic components you’re using.
Many boat owners rate butyl tape highly, partly thanks to the mess-free working, although I’ve had less long-term success.
At all costs, avoid silicone sealants as these have a very low level of adhesion, which means the seal often breaks at an early stage.
Mask holes from underneath to prevent epoxy dripping through. Credit: Rupert Holmes
And almost nothing else will stick to silicone, which creates problems if a leaky fitting needs to be resealed.
It’s also important to remember that even the very best sealant is ineffective without proper surface preparation.
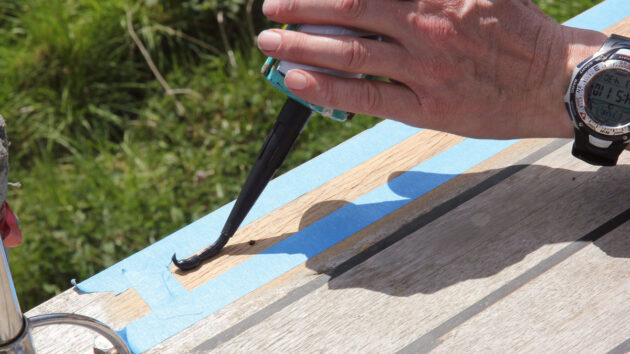
With experience, it becomes easier the judge the amount of sealant needed – this is the real key to making a neat job.
Ideally, there will be an even, thin bead squeezed out all round the fitting. But don’t worry if you have more than this the first few times – it just means you’ll spend a little more time cleaning up.
On the other hand, if sealant is not squeezed out all round the fitting, there’s a risk it’s not properly sealed.
The bolt holes are the only route for water ingress, so a single bead of sealant run along the line of the holes, and encircling them, is all that’s required.
The knack is to figure out how thick that bead needs to be to fill the gap between the fitting and the deck.
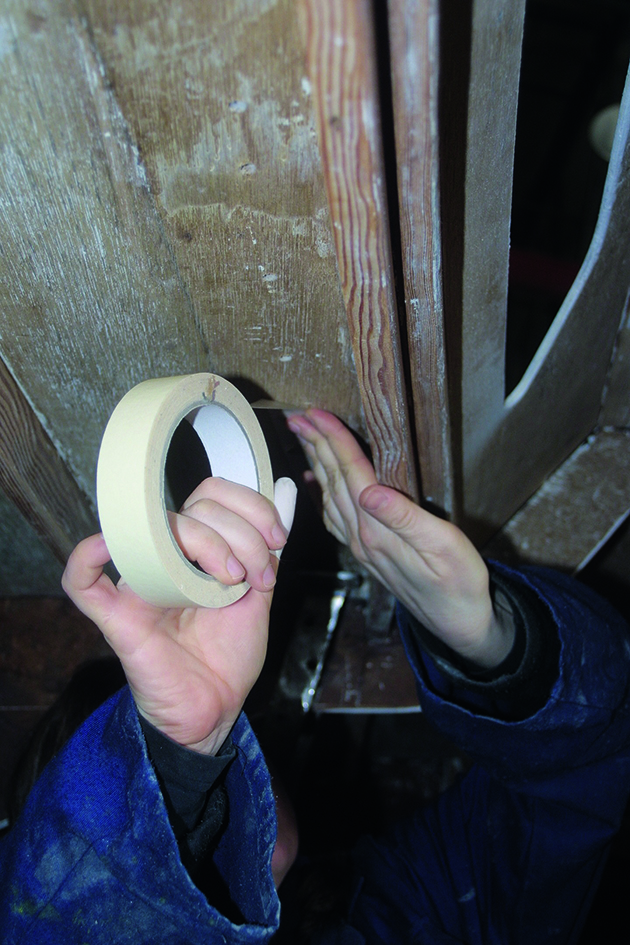
To make tidying up easier, where possible, mask both the deck and the fitting. This enables sealant that squeezes out of the joint to be easily cut away once it has cured.
The easiest way of doing this is to dry-fit the components first so that the deck can be masked around them accurately.
Redundant bolt holes
You’re far more likely to encounter these as a result of changing or upgrading a fitting than as a result of drilling a hole in the wrong place.
Fortunately, it’s very easy to achieve a waterproof and structurally sound repair, though harder to get a perfect gelcoat colour match for those with very shiny boats.
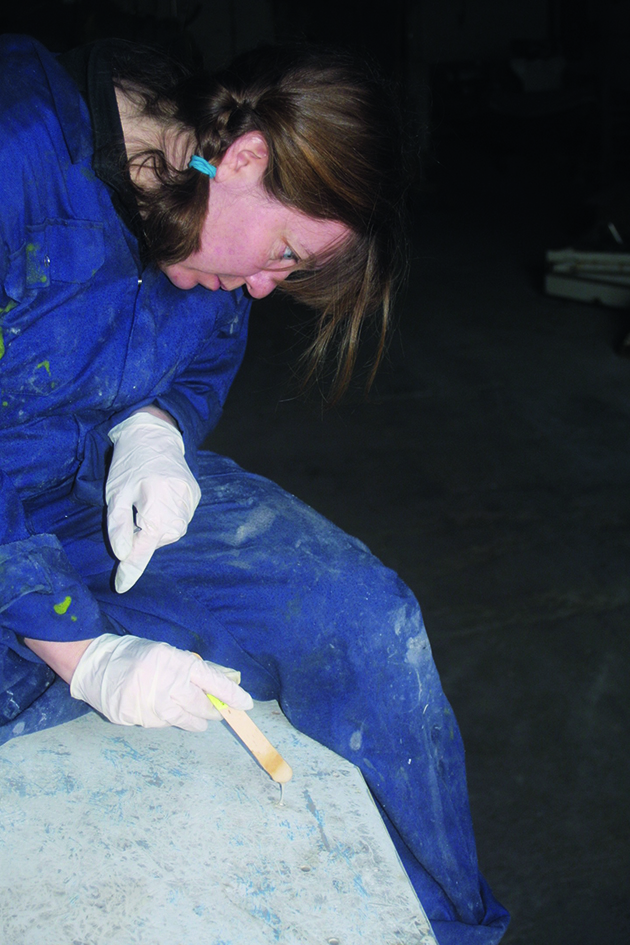
First, any remnants of sealant need to be cleaned out of the hole. This is a vital part of the preparation – any sealant left behind will prevent the epoxy from adhering to that area.
By far the quickest and most reliable way of achieving this is using a slightly larger drill bit to enlarge the hole.
Next, mix up a little epoxy resin and brush it around the newly exposed perimeter of the hole – this will help the plug to adhere to the boat.
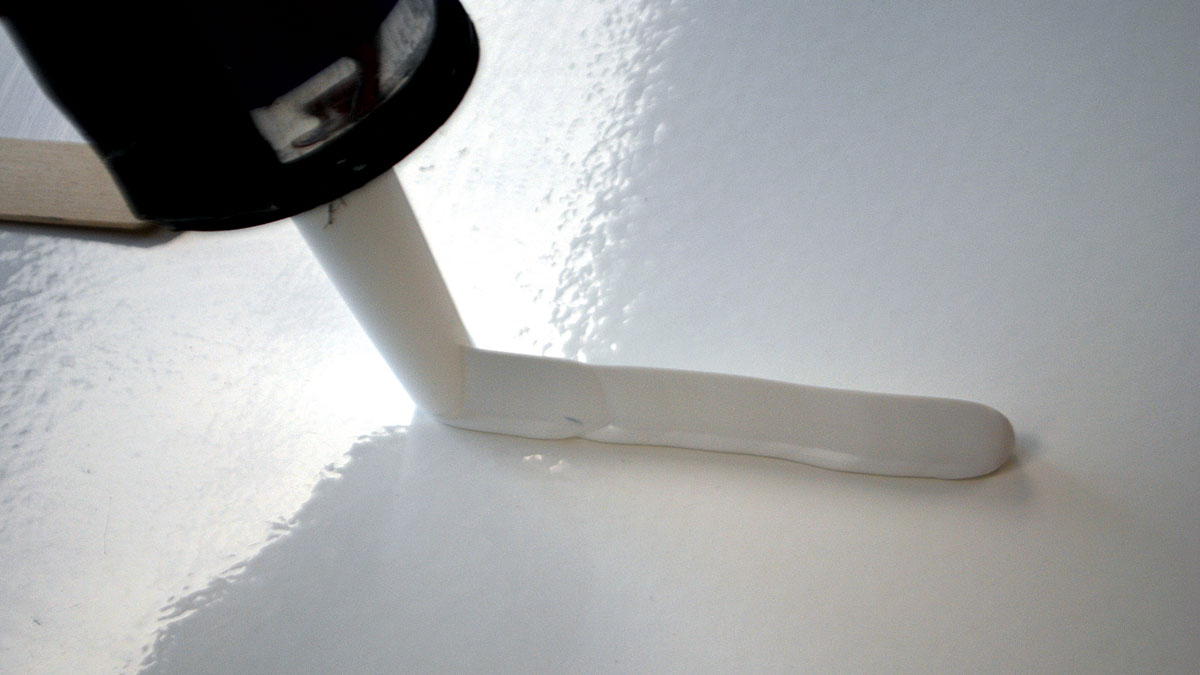
Fill the holes with a mix of epoxy and silica dripped from the end of a mixing stick. Credit: Rupert Holmes
Once that coat has become tacky (around an hour, depending on the temperature), mask the holes from underneath to prevent epoxy dripping into the boat.
Finally, mix up some epoxy and colloidal silica to a consistency at which it will just drip off the end of a mixing stick. You can then run the thickened mix into each bolt hole.
To achieve a perfectly flat surface, a second application is likely to be needed – it’s worth mixing this with a roughly 50/50 mix of silica and either microballoons (which are a distinctive red colour) or micro glass bubbles (off white), which makes it much easier to sand to a smooth finish.
If you have an unexpected need to fill bolt holes and can’t easily source the materials above, a sound and waterproof repair can be made using Araldite.
If you have to colour match the gelcoat, start by sanding the relevant area with 2000-grit abrasive paper, then polish to a clean, bright and fresh colour.
If the gelcoat is badly faded, you may need to start with 800-grit paper, working up through the grades to 2000.
This will then give you the original colour of the moulding.
Even professional boatbuilders are likely to spend an hour’s labour on getting the colour match right, so if you ever have professional repairs done on the hull or deck, it’s worth asking them to mix up a little extra that you can keep for small repairs.
Shelf life is generally two to three years, possibly a little longer at low temperatures.

Deck check: 11 essential mast and deck gear checks
Make sure the new season runs smoothly with these tips from Barton Marine
Best marine sealants and adhesives for boat jobs
With help from adhesive and sealant expert Laurie Brebner, PBO’s Ali Wood explains which works best for different jobs on…
9 tips and tricks for applying sealant
Premium bonding: Ben Meakins outlines some techniques for getting the most out of sealant without ending up covered in the…

Fixing leaks – how to reseal a leaky deck vent
Leaks are inevitable on an old boat, and deck vents are a common cause. Over time the sealant simply breaks…
Want to read more practical articles like this?

A subscription to Practical Boat Owner magazine costs around 40% less than the cover price.
Print and digital editions are available through Magazines Direct – where you can also find the latest deals.
PBO is packed with information to help you get the most from boat ownership – whether sail or power.
-
-
-
- Take your DIY skills to the next level with trusted advice on boat maintenance and repairs
- Impartial, in-depth gear reviews
- Practical cruising tips for making the most of your time afloat
-
-
Follow us on Facebook, Instagram, TikTok and Twitter