
If your boat canopy has suffered from sun bleaching, ripped windows, worn stitching or fabric tears, don’t write it off. Jake Kavanagh investigates some life-extending fixes
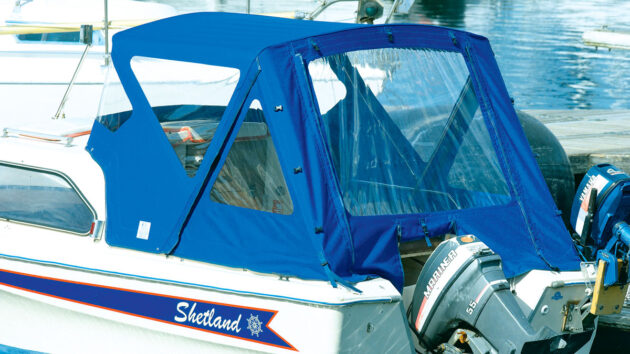
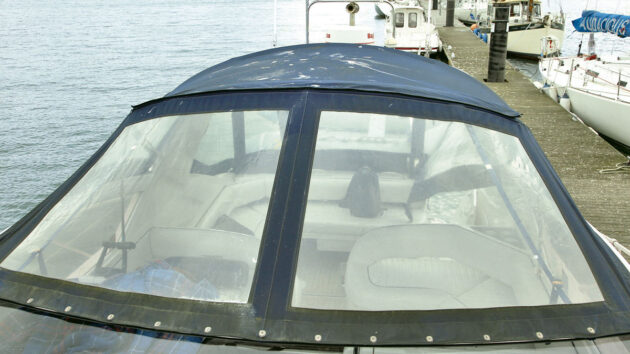
A boat canopy generally complements the boat hull with their colour and shape while also remaining versatile and easy to use. Modern designs feature more windows and vents, and the fabrics themselves have become tougher, lighter and easier to clean, but the age-old problems still remain – canopies are regularly exposed to saltwater spray and fierce UV radiation, and although fabrics are now far more resistant, gradual degradation still occurs.
The turbulence of strong airflow from gales and planing also takes its toll, and after a while colours will fade, windows will fog and fittings will break. However, extending the operational life of your boat canopy often only needs some simple and timely maintenance, such as a freshwater rinse after an outing to remove salt from studs and zips, followed by some re-lubrication of the moving parts.
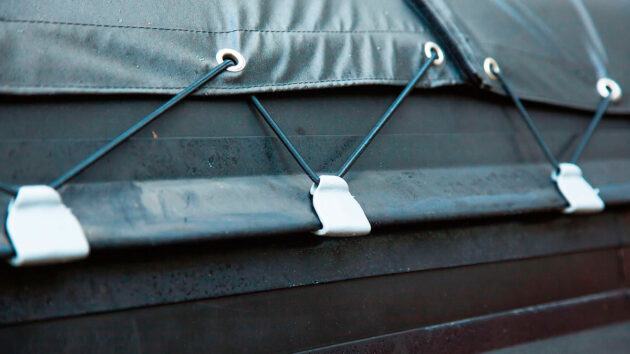
Bungee cord can thin and fray, but is cheap and easy to replace. Credit: Sergii Zhmurchak/Alamy
As the boat canopy ages, rips can be repaired, windows defogged, and even the colour of the material restored. Many of these are DIY jobs, with specialists able to undertake the more tricky repairs for you, such as window or panel replacement, or the renewal of zips and seams.
Completely replacing a complex boat canopy can be a relatively expensive operation, although the results are stunning, so even if yours looks as though it is beyond repair, you may well be able to coax another season or two out of it before you need a new one. Even then, the old patched-up boat canopy can make a good winter cover, protecting your cockpit while your expensive new version can be stored safely indoors. This will help extend the service life of your new boat canopy even further.
Here we’ll look at basic maintenance, but also a few major repair jobs that will help make a tired old boat canopy look like new again. This includes replacing a torn window, one of the most common reasons that owners decide to replace the whole thing, and fixing tears in the fabric.
We’ll also look at re-colouring the material, as this will make a huge difference to the general look of the boat.
First, some simple fixes to minimise the canopy jamming up on you.
Freeing jammed zips and studs on your boat canopy
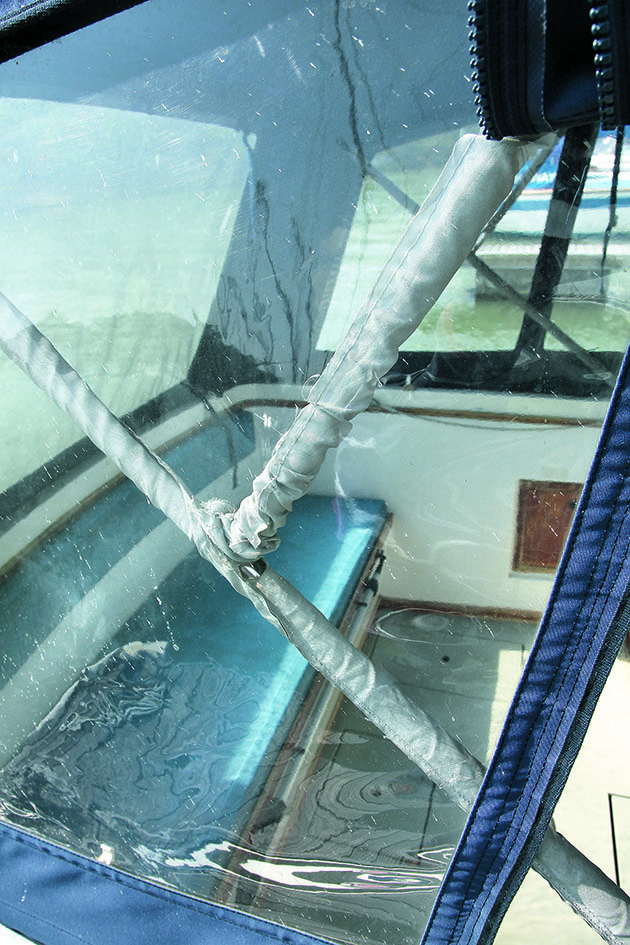
Boats used in a salty environment suffer more than usual with corrosion problems on metal fittings, and UV can make plastics brittle with age. This is why canopies usually have zips made from a tough, nylon-based material and feature large teeth and runners.
There have also been some big advances in stud and popper design for retrofitting to canopies. Dissimilar metals and fine salt spray encourage corrosion that can jam metal springs and so cause poppers to refuse to release, but by using hot water and a gentle levering movement you should be able to release the stud without tearing the fabric or marking the deck. Wash away as much of the salt as possible with hot water, and allow the fitting to dry out completely before easing the spring with some lubricant.
When dry, apply some special marine silicone spray (not WD40 – it could stain the material) and manipulate the spring metal inside the popper. This freeing technique applies to any clip or popper that uses a springy piece of wire to act as a lock.
If poppers, clips or their attachments are badly corroded, they can usually be swapped out for new ones, bought inexpensively.
Zippers can also be freed with liberal amounts of hot water. Check for any missing teeth in the zip, as UV can make the plastic brittle. Apply a coating of special marine formulation lubricant to the teeth, available in a spray or in a tube. Repeat through the season.
The bungee cord that holds the cover over some types of studs can thin and fray in just one season, but is quick, cheap and easy to replace.
Rust marks on canvas
When the window or canvas is in direct contact with the stainless steel supporting frame, rusting can occur. This is because oxygen can’t get to the steel, so the chromium ‘stainless’ element can no longer work properly. This leaves an unsightly stain.
A Velcro fabric spacer holds the window or canvas away from stainless steel frames. Credit: Motor Boats Monthly
When Peter Furby had this problem on his Sunseeker, he cured it by adding simple pipe lagging to the frame to push the window away. Realising this looked a little unsightly, he made a more permanent solution using colour-matched fabric.
Cleaning fabric
Canopies need regular cleaning, a job usually done along with the rest of the boat using a mild soap solution, but sometimes the environment can be particularly harsh on the fabric. Algae, lichen and even moss can become firmly established if left unchecked, and the droppings of holiday resort seagulls on a diet of chips and ice cream are particularly damaging.
River boats moored under trees very quickly pick up a layer of ‘organic green’ across the decks and canvas, and pine trees drop a sticky resin, so some owners place a plastic cover over their fabric if the boat is to be left for a while.
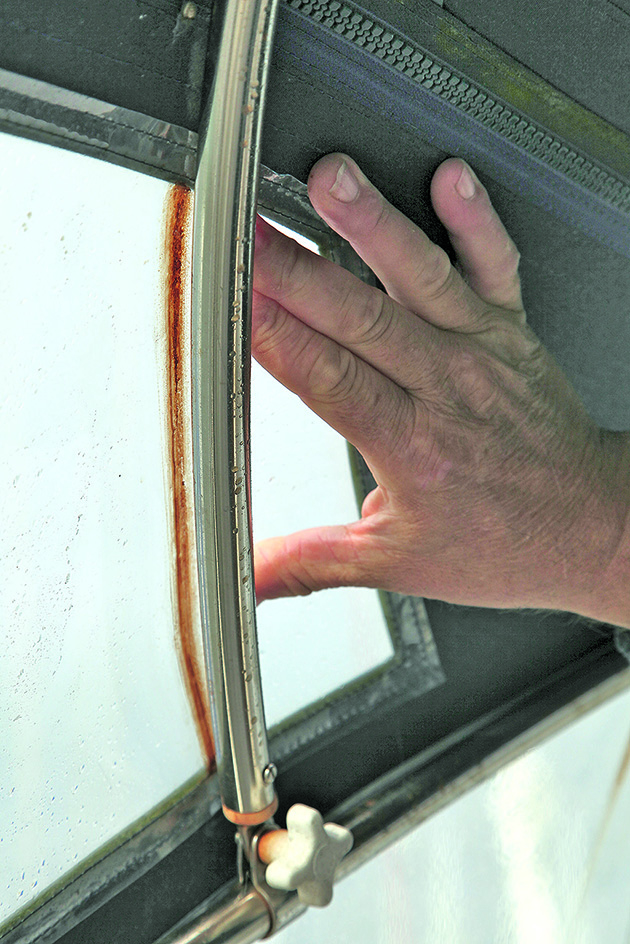
Rusting can occur if the canvas or window is in direct contact with the stainless steel support frames. Credit: Motor Boats Monthly
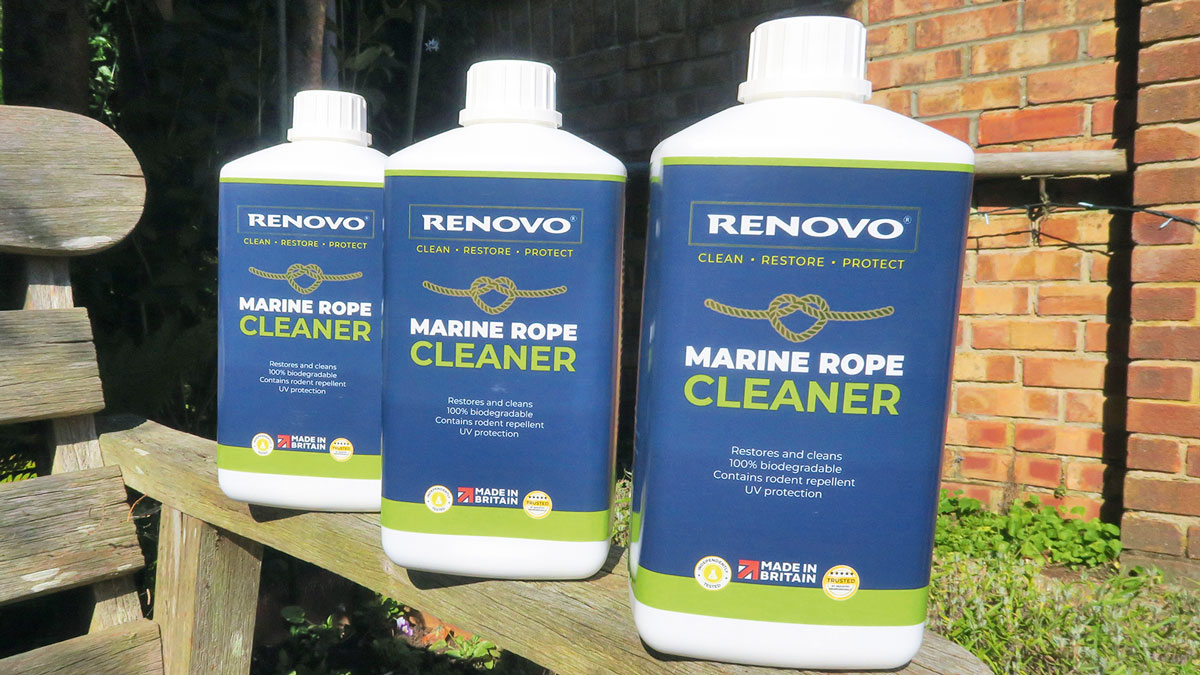
There are several specialist cleaners available, and all work well, but one we found particularly effective is Renovo. The cleaner is part of a range of products originally formulated for the convertible car market.
For the best results, apply the cleaner – usually a mild soap – neat or as directed by the manufacture, and work it into the material, especially the seams, with a soft brush. Leave the cleaner to work for at least five minutes, so it can gently attach itself to the dirt and lift it off the fabric.
Using water as hot as you can tolerate, agitate the cleaner with a stiff scrubbing brush. Be careful with the stitching. Start from the top and work down, making sure you scrub for at least a few minutes. The dirt can then be rinsed off with a freshwater hose.
Leaving the cleaner to work for a while and using hot water are the keys to success.
Replacing windows on your boat canopy
A ripped window with brittle and yellow acrylic makes the canopy unsightly and almost useless, but a repair is quite possible with a little expertise. Critical to success is keeping the old window in place for as long as possible, for support.
The first job is to flatten the panel and remove the innermost row of stitches with a special stitch remover; rub out the cut stitches with a finger and remove them from the work with a soft brush. Check for stray remnants under the seam.
Next, make a small cut in the old window somewhere near the centre. This will be used to extract it later without harming the new one. Flip over the panel and roll some fresh window material over the aperture. It is readily available by the linear metre.
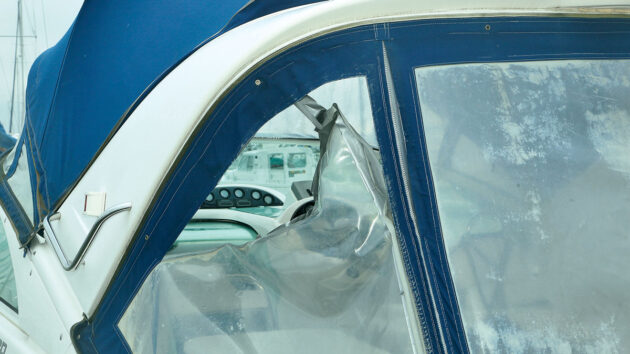
UV damage can cause the windows to become brittle or yellow, leading to damage. Credit: Motor Boats Monthly
Trim the acrylic into an oversized shape of the window, allowing enough overlap around the edges to snip back easily later; the material cuts easily. Cut long strips of double-sided tape, and place them along all four sides of the window. These will help hold the new window in place.
Stick the tape to the fabric, and then peel the top paper off, carefully pushing the window down on the exposed adhesive as you go. The trick is to keep the window relatively taut during the stick down, so gentle pressure is needed to keep everything flat.
Using a UV-resistant thread of a different colour, sewing begins from the outermost side, just outside the outer seam. With the outer seam all sewn, and the new stitching easy to see, the excess of the new window can then be trimmed back.
Next, flip the canopy over and then use the cut in the centre of the old window to trim it away, leaving the new window. The inner seam can then be sewn.
When sewing into heavy material, especially through acrylic, a regular dusting of silicone lubricant will help prevent the needle from catching, and make the whole operation much smoother.
Fabric repairs
With the canvas clean and dried, it’ll now be possible to examine it more closely for any damage. Because the canopy is detachable, panels can be removed from the boat to be worked on at home.
Repairs to the fabric can usually be done with a robust sewing machine, or even by hand. Do not worry about making an invisible repair, as dye can be used to disguise it.
Colour restoration
Old and colour-faded canvas (not vinyl) can be restored to its original colour using a paint-based dye. The dye is literally painted on to the pre-cleaned fabric with a paint brush, where it dries quickly.
Birds can cause real damage to the canvas, due to the acidity of their droppings. Credit: Motor Boats Monthly
Available from Renovo International in several popular shades, Boat Canvas Reviver turns light fabrics dark, but not the other way around. It will also dye all the threads and trims, hiding a repair, and slightly stiffen the canvas, so it tends to be used as a life extender on older material.
Cleaning windows
If the windows are still in relatively good shape but just badly fogged, they can easily be brightened again using an abrasive compound specially formulated for the task. These can vary from just a single-pot application to a three-step process, and can be used for minute scratches and oxidation on the surface to bring back the transparency.
Fogging of a window is caused by thousands of minute scratches and UV damage to the first few microns layer of the material.
The polishing compound should be applied using a soft cloth with steady pressure in a circular motion. It can then be taken off by buffing with a clean cloth.
Deep scratches can’t be removed, but enough of the smaller ones can be removed to restore full transparency.
Reproofing your boat canopy
Leaks tend to occur in awnings and canopies where the stitching has deteriorated. The threads no longer seal up the holes, so the simple answer is to coat the canvas with a re-proofer.
This is simply brushed on as a watery liquid, but dries into a flexible, transparent film, sealing up the holes and making the canopy completely watertight again. Pay particular attention to the seams.
Reproofing should be done every six months, and takes only a few minutes. It’s also a finishing touch after canvas restoration.
Going for new
If your canopy is beyond repair, or you have changed the colour scheme of your boat and feel it is time for a new look, then several companies will be happy to make a new canopy for you. Covers can even be customised – such as putting in extra vents in the roof – depending on your requirements.

How to make your own canvas bucket
Lin and Larry Pardey's step-by-step guide to producing a durable canvas bucket: from the January 1995 issue of Practical Boat…
How well does Renovo Marine Rope Cleaner work?
On the verge of throwing away those stiff, algae-covered warps? Jake Kavanagh tests the new Renovo Marine Rope Cleaner to…
Banish damp from your boat this winter
Ashore or afloat, winter cold and damp can have a detrimental effect. Jake Kavanagh looks at the options for keeping…

How to replace your sprayhood windows
Do you have a foggy view? Don’t throw away your expensive sprayhood or awning – you can replace the windows…

What to read more practical articles like How to revive your boat canopy?
A subscription to Practical Boat Owner magazine costs around 40% less than the cover price.
Print and digital editions are available through Magazines Direct – where you can also find the latest deals.
PBO is packed with information to help you get the most from boat ownership – whether sail or power.
-
-
-
- Take your DIY skills to the next level with trusted advice on boat maintenance and repairs
- Impartial, in-depth gear reviews
- Practical cruising tips for making the most of your time afloat
-
-
Follow us on Facebook, Instagram, TikTok and Twitter