
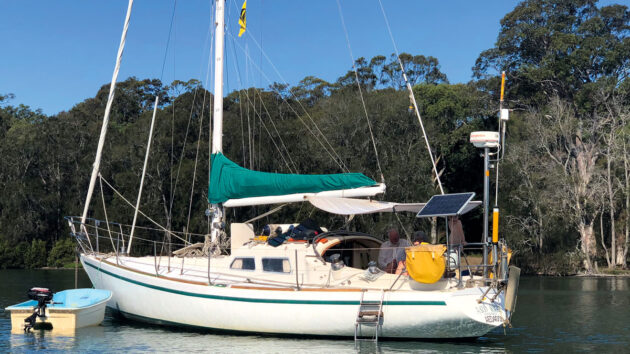
After 11 years under the harsh Australian sun John Tylor’s mainsail cover was falling apart. Here’s how he brought it back to life...
Nothing lasts forever, and this is particularly true for fittings and covers exposed to salt water and intense ultraviolet radiation.
The Australian sun is relentless, even in winter, and especially after several years of drought. Throw in the hottest summer for decades, and it’s not surprising my canvas mainsail cover was looking a little ancient.
When it was originally custom-made, I asked the upholsterer to use UV-stabilised thread. He advised it wasn’t necessary as the Sunbrella canvas would likely fail by the time the thread decayed.
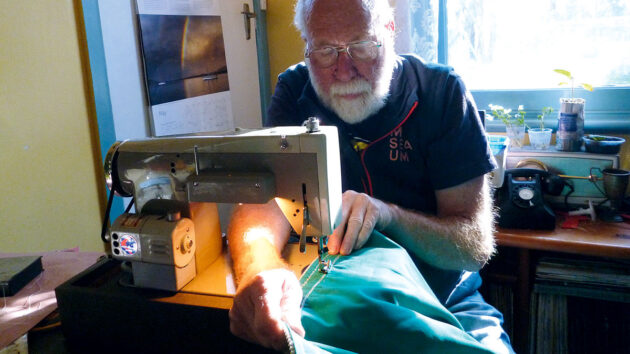
The repairs took John a weekend to complete. Credit: John Tylor
Well, the canvas is still serviceable after 11 harsh years, and I’m now preparing to replace the stitching for the second time.
The cost for an expert to do this again was somewhat eye-watering, so I thought I’d attempt the job myself.
The sail cover isn’t on a multi-million dollar yacht, and as my sewing isn’t too terrible, so few would notice the occasional glitches.
I have a tough old sewing machine and could buy the appropriate thread, so what could be simpler?
“It only needs to pass the 10-10 test,” a boatbuilder friend had said, “Viewed at 10 metres at 10 knots.”
The right machine for sail cover repairs
I was not allowed to use my wife, Patsy’s lovely new machine with its ‘walking foot’ – a mechanism that produces a more consistent stitch length as the foot feeds the fabric from the top and the ‘feed dog’(the serrated moving part under the foot) pulls the bottom forward.
So instead, I had to resurrect the faithful old clunker. I’d bought this at a church fête many years ago when making new cushion covers for the boat. There were 10 machines in a line under a tree, so I began my initial selection based on weight, lifting each one in turn.
A modern sewing machine with a ‘walking foot’. Credit: John Tylor
Number six nearly pulled my arm out of its socket, so – for just AUS$10 – a deal was done.
The machine had been neglected but was basically sound. After a general clean up, including some oiling, tightening a few screws and removing some surface rust, it began to look almost new again.
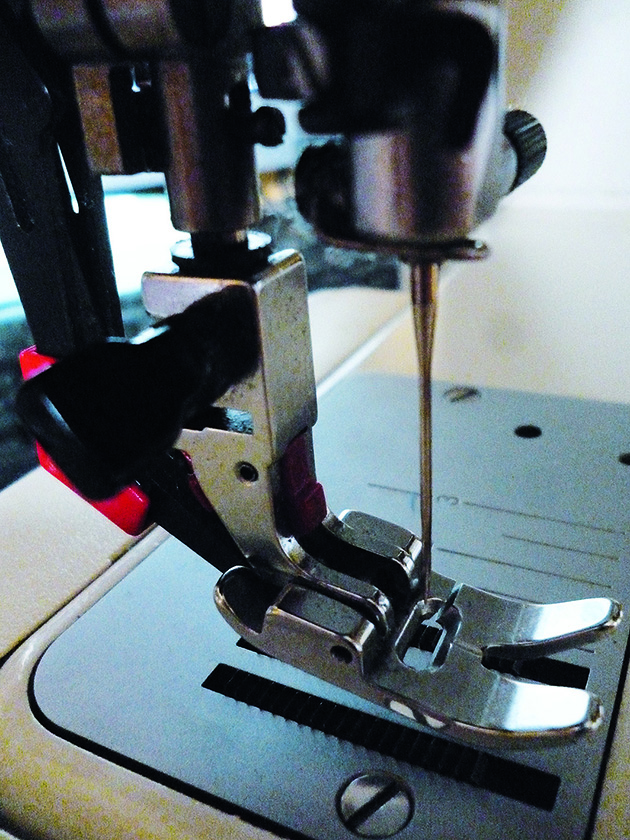
The old machine showing the needle with the thread feeding through the long groove in the needle. Credit: John Tylor
A modern set of needles and a test run proved it was well and truly up to the job.
Then, after some fine adjustment to the bobbin and tension controls to suit the heavy canvas, I was ready to start.
While it had a limited selection of stitch patterns, just straight or zigzag, it did have a suitable choice of stitch lengths.
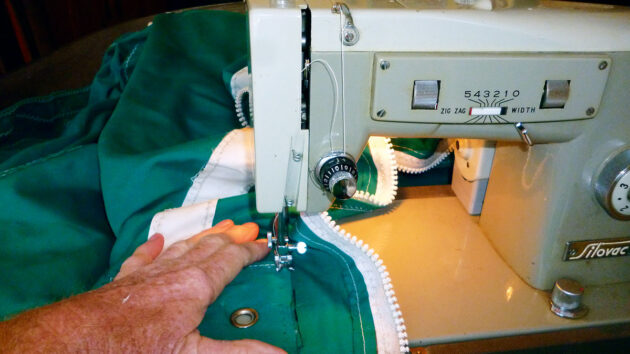
The fête bargain sewing machine in action. Credit: John Tylor
The cast steel body and steel gears made it entirely suited to this type of cover work, more so than the more modern lightweight model.
I didn’t need all the fancy stitches possible with them – but I did have to feed the fabric to take the load off the feed dog and help keep the stitches even.
Prepping the sail cover
When I got my sail cover home, I discovered that the stitching was worse than I thought.
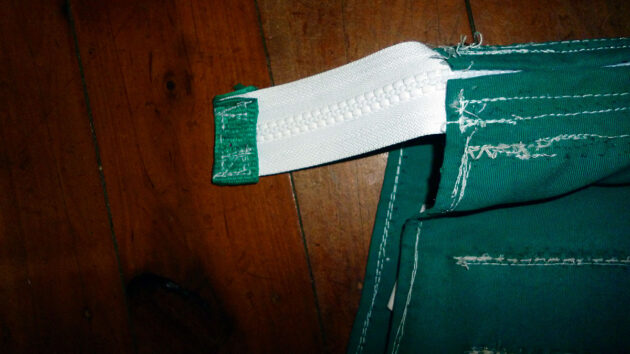
Via the Internet, I bought 400m of polyester thread, the most UV-resistant I could find. A local upholsterer sold me the replacement plastic chunky-tooth zipper, and I was away.
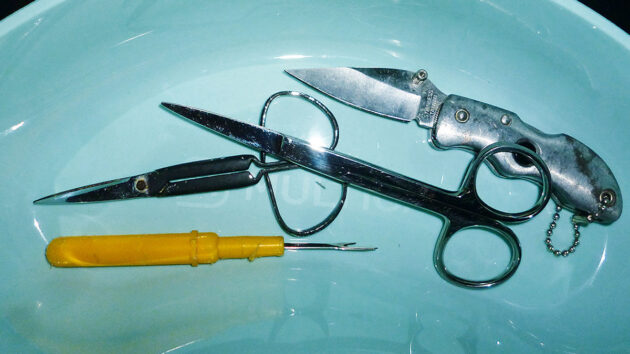
Equipment required: unpicking tool, thread scissors, spare needles, felt pen, double-sided tape and a small knife to aid in removing reluctant threads. Credit: John Tylor
The first job was to remove the old zipper. This was simple, as the thread was so badly sun-damaged that it simply broke away from the fabric.
I only had to pick the old thread remnants out – a tedious job, but not actually difficult.
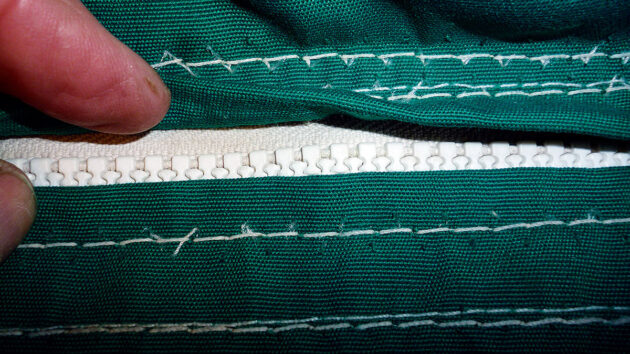
Other stitching that was not so badly affected, I simply stitched over – an approach that saves a lot of time.
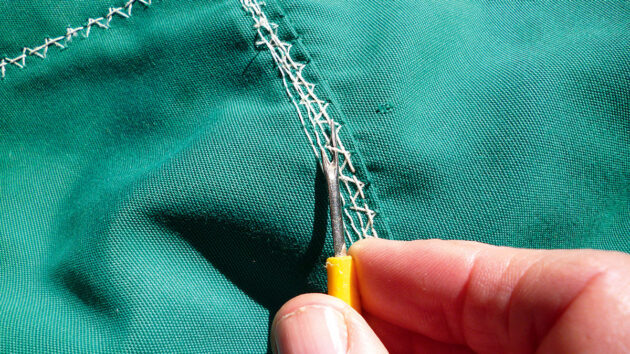
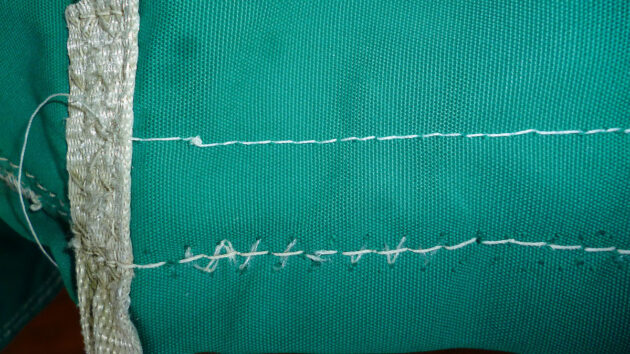
Use the unpicking tool to test for UV damage. If the thread breaks easily, replace it. Credit: John Tylor
This is what the previous repairer had done, so I only had to be sure any loose threads didn’t catch the foot of the sewing machine.
A simple test for sun-damaged thread is to scratch the stitch with your fingernail.
If the thread goes fuzzy then it needs replacing or overstitching.
The badly rotted zipper fabric. This needed to be completely removed before I started the repair. Credit: John Tylor
Next, slip a small spike under the stitches. If they break then obviously the whole run needs replacing.
On my project, though, I simply replaced or over-stitched every run as the whole lot had been UV-damaged.
This not only saved many hours of tedious work, but it also held the shape of the cover, making the repair much simpler.
Top tips for using the sewing machine
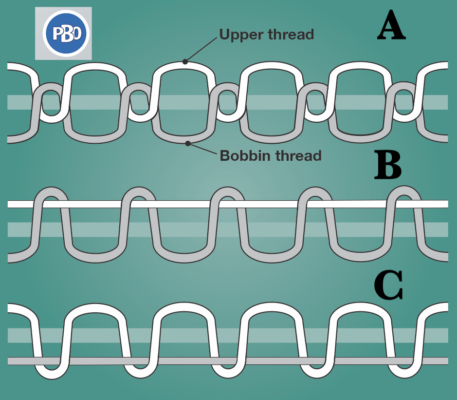
Line A shows correct bobbin and thread tension.
Line B shows excess top tension.
Line C shows too little top tension.
- Stitch tension: Correct bobbin and thread tension is critical and needs to be adjusted to suit the material being used. In the diagram above Line A shows a stitch pattern when the machine is set up with the correct bobbin and thread tension. Line B shows excess top tension, while line C shows too little top tension. As the canvas was three layers thick in places, I had to experiment. When properly adjusted, the tension needs to show an even stitch pattern on both the top and the bottom of the fabric. There is not a lot of latitude with this, so I made fine adjustments until satisfied. Too much tension will see the thread pulled up, with the bottom loop appearing at the top of the fabric. Too little and the loops will appear on the bottom, pulled down by the bobbin tension. When it is just right, the loops will be evenly buried within the material. If possible, it helps to use a piece of scrap to get this adjustment right. I didn’t have one, so I chose a less obvious part of the cover to practice – and unpicked the failures.

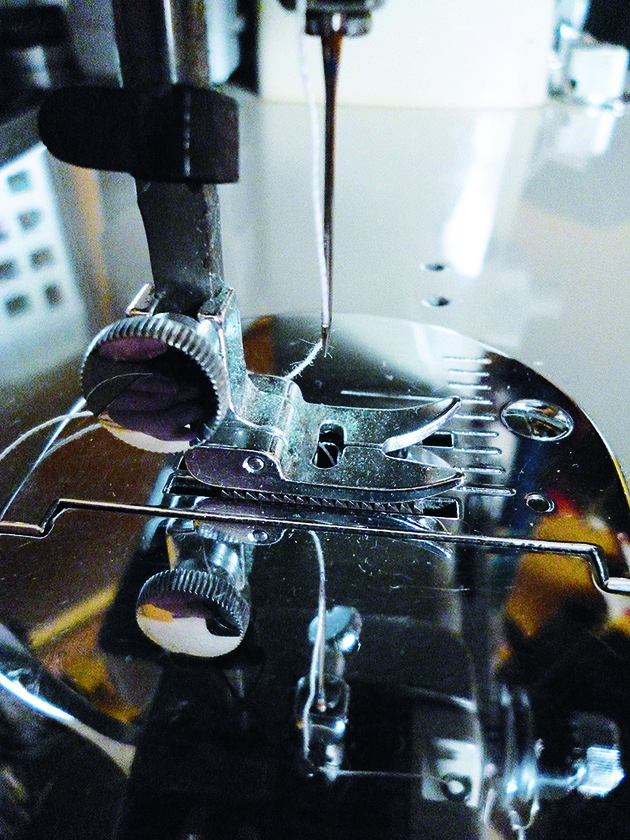
Check the bobbin tension by jiggling it up and down. A slight slip in the thread means the tension is just right. Credit: John Tylor
- Bobbin adjustment: Fully load the bobbin and insert it into the bobbin case. Bring the thread through the slot under the tension spring. Hold the case by the thread and jiggle it up and down gently by the thread. If it slips slightly while doing this, the tension should be about right. If it doesn’t slip, slightly reduce the tension by a slight adjustment on the bobbin screw. If it slips while holding still, increase the tension by tightening the screw. Do this slowly as the adjustment is quite subtle. Often, barely a quarter of a turn of the screw – or less – is all that’s needed. The adjusting screw is tiny, so be careful not to drop it – they’re then hard to find!
- Straight is better than zigzag: While there are benefits to each type of stitch, I opted to use straight stitches. This is very much a personal choice, although perhaps they don’t look as ‘boaty’ as zigzag. The previous repairer had used straight stitches, as they use less thread, take less time and are less visible. Sails are almost always made with zigzag stitches as they allow some movement, and the stress is more evenly distributed over the seams. As this is probably the last time the canvas can be repaired, it seemed simpler – and certainly quicker – to use straight stitches. Unfortunately, a wonky line is more obvious, but it forced me to practice, and you can always unpick any that look too terrible. Even the previous professional repair had left a couple of less-than-perfect areas.
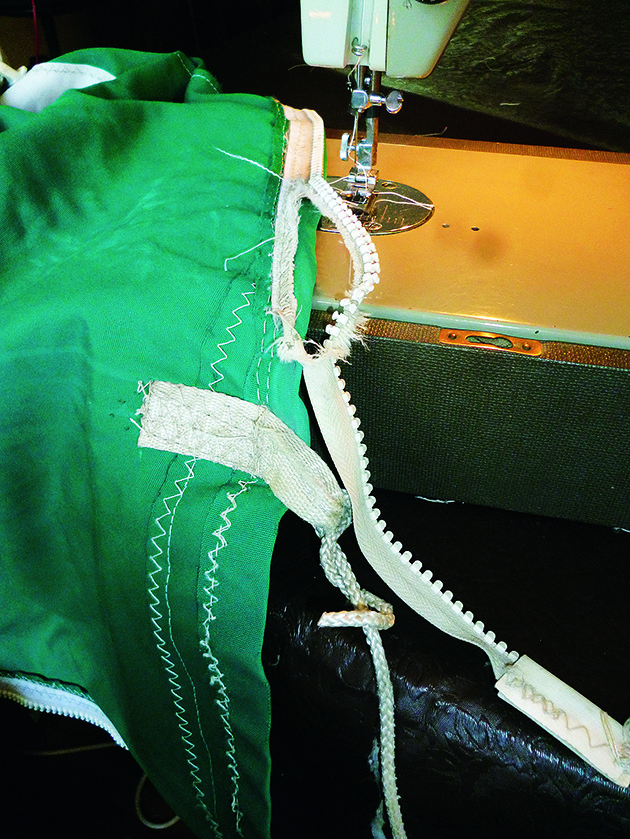
The start of over-stitching and a new run. Retaining the old stitching helped keep all the fabric pieces together. Credit: John Tylor
- Good needle selection is vital: What works well on a cotton fabric, for example, is not suited to a tough material like canvas. A thick needle with a sharp point is essential, so buy a new set. They are low cost and you won’t regret it.
I used a needle designed for jeans – 90/14 grade – which worked well, punching through the multiple layers cleanly without pulling the material up. The numbers define the grade (or thickness) of the needle. The higher the numbers, the thicker the needle, so with my 90/14 the ‘90’ is the European gauge, while the ‘14’ is the American. The needle can only go into the machine one way, as one side has a long groove in it where the thread feeds into the eye. This allows the thread to sit in the groove and pass cleanly into the material being stitched. The reverse side has a short groove which always faces toward the shuttle (the side away from the bobbin). If the material lifts as the needle retracts, then a short spray with a silicone lubricant onto the needle can help. But be sparing with this; it can be messy. - While you’ve got it – wash it! Having the sail cover at home was an opportunity to get it properly washed once it was repaired. After some spot cleaning to remove ‘seagull evidence’ and with good drying weather, I loaded it into the domestic washing machine. This worked well, and the cover came out looking fresh and with all the stains removed.
A sail cover’s life extended
The finished job is not too bad, given that it is an old cover, but next time I will not use contrast stitching – it’s too obvious and shows up my occasional mistakes and wobbly lines.
A thread the same colour as the canvas will hide those nicely.
This project will extend the life of the sail cover by another couple of years. There were a few places where multiple layers of canvas thickness were too much for the machine to punch through.
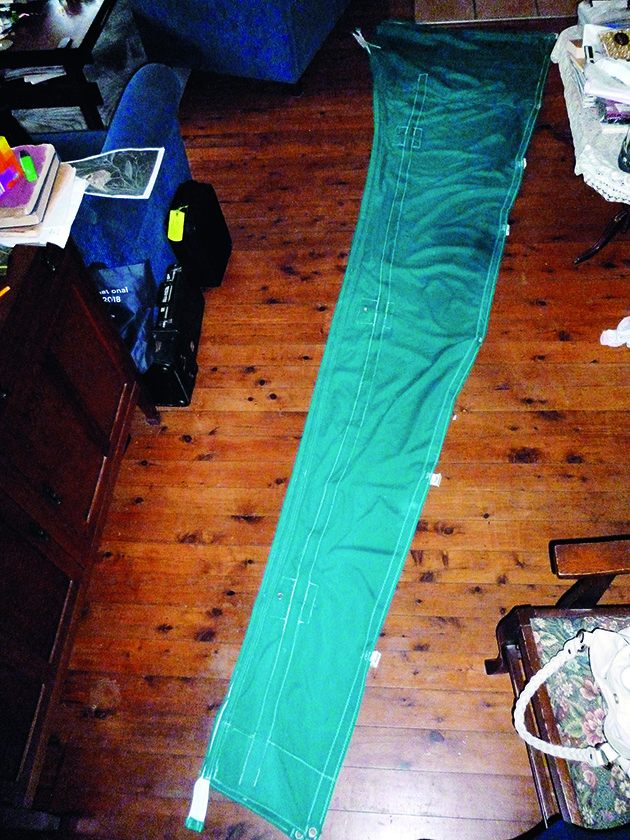
The repaired cover ready to be reunited with the boat once lockdown eased. You need plenty of floor space for a project like this. Credit: John Tylor
Here I was able to manually turn the balance wheel, taking the load off the motor.
Normally, it acts as a flywheel, so keeping a constant speed allows the machine to produce a clean run of stitches, especially through the heavy material.
Slow and steady is best, and you’ll find the optimum speed with a little practice.
The biggest limitation with my little machine was the short arm (the distance between the vertical casting and the needle assembly).
To cope with this, I found rolling the material so it fitted between the casting and assembly worked as long as I helped with the feed.
It’s important not to force the material through, however. Instead, allow the feed dog to do the advancing, but keep all tension off the material so it can move without jamming.

The new cover in place. It should give me another couple of years service. Credit: John Tylor
Finally, a commercial machine with a long arm would have been ideal, but at a huge increase in cost (AUS$400 to AUS$1,200).
Because it would get relatively little use afterwards, plus the issue of storage, this kind of investment made no sense.
Instead, the final cost – including the fête-bought machine – was less than AUS$60, and it filled an otherwise boring week.
I’m not planning to make a completely new sail cover from scratch just yet, but time will tell.
Fitting a zip to a sail cover: step-by-step
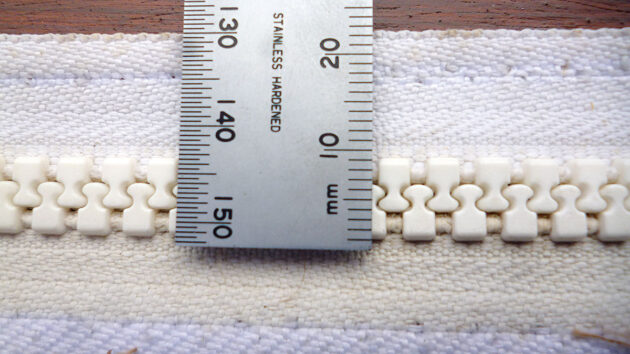
1. The chunky zipper required is defined by a size number: size 10 simply means 10mm wide.
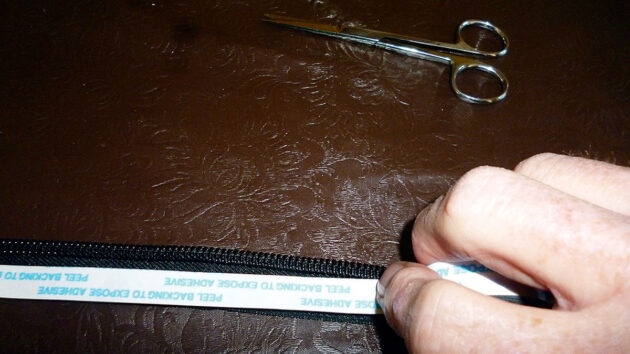
2. I used double-sided tape (shown here on a different project) to hold the zip in position during sewing: it’s easier than tacking by hand and more successful than trying to use pins.
3. Sew a small patch of webbing to the end of the zip to prevent the slider from coming off.
4. To preserve the life of the zip, it’s important to properly protect the zipper teeth from the sun by including a material overlap to cover them.

DIY Sail repairs – how to do a ‘get you home’ repair
Ben Meakins tries out some useful temporary sail repair methods that will tide you over until you can get to…
Sail repairs – how to get sticky stuff to stick
Acetone is the key!

How important is headsail trim?
PBO reader Jenny Spear wants advice on how to improv the performance of her boat's headsail. Ian Brown has this…

How to get more life out of sailboat lines: step-by-step
Dena Hankins shares how to make your running rigging last that little bit longer
Want to read more practical articles?

A subscription to Practical Boat Owner magazine costs around 40% less than the cover price.
Print and digital editions are available through Magazines Direct – where you can also find the latest deals.
PBO is packed with information to help you get the most from boat ownership – whether sail or power.
-
-
-
- Take your DIY skills to the next level with trusted advice on boat maintenance and repairs
- Impartial, in-depth gear reviews
- Practical cruising tips for making the most of your time afloat
-
-
Follow us on Facebook, Instagram, TikTok and Twitter