
Don Fitzroy Smith finds a new way to 'raise the flag' by building his own flagstaff for his ensign
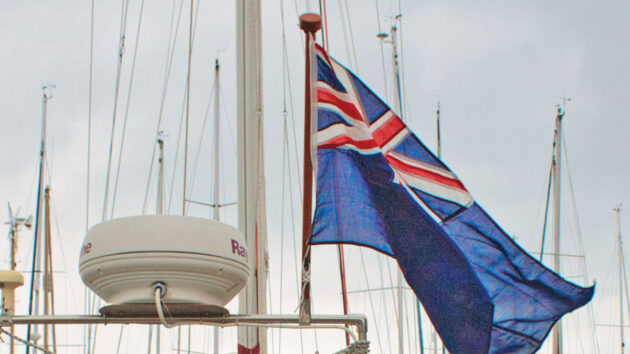
For years I’d set my ensign off the radar gantry, but it was time for a change. I’d seen ensign flagstaff examples in the chandlery which were nice enough, but having a suitable piece of hardwood left over from a garden bench refurbishment I decided to make one myself.
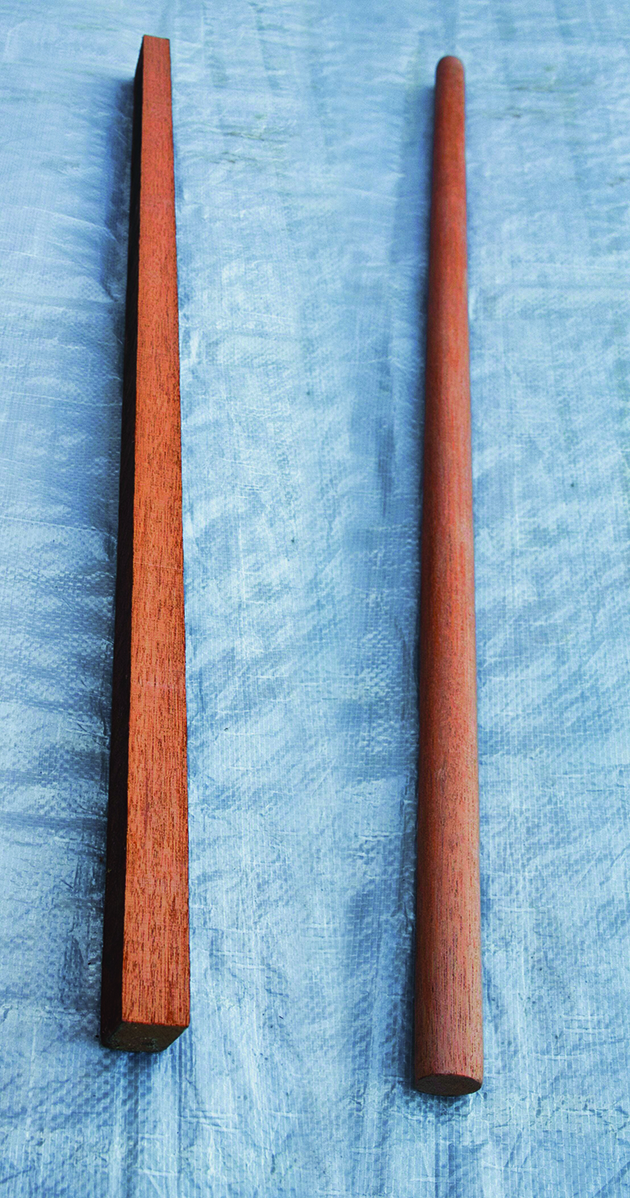
I marked up and cut a 25mm x 25mm piece on my bandsaw and then got to work with the spar gauge to mark up the first stage of rounding. If you don’t have a spar gauge it’s easy to make one out of scrap and odd pieces – you can see examples of them on YouTube – but it basically involves two end stops (dowels in my case) and two sharp points evenly spaced between them.
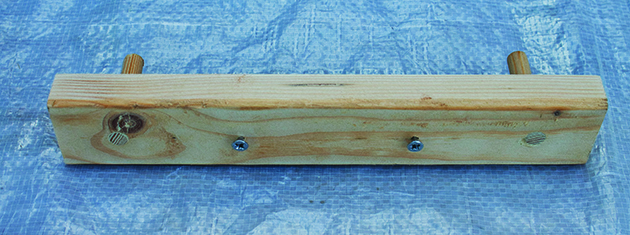
Upper view of DIY spar gauge. Credit: Don Fitzroy Smith
Regardless of the width of the piece you’re working on, the scribes will always be in the right place when the dowels are touching the sides of the piece and drawn along the length of the timber.
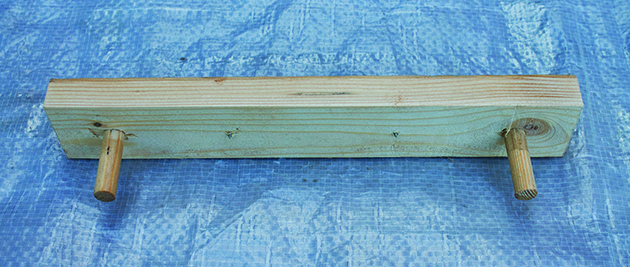
Underside view of the spar gauge – note screw points just protruding. Credit: Don Fitzroy Smith
Having scribed my marks I started planing off the corners, turning from four to eight sides before repeating the planing process on each angle to end up with a 16-sided piece. From there it was easy to fair it off to a round staff. If you prefer a slight taper, mark that up earlier and cut the excess off before starting the rounding process. Then plane to four, eight and 16 sides and finally sand to a round staff.
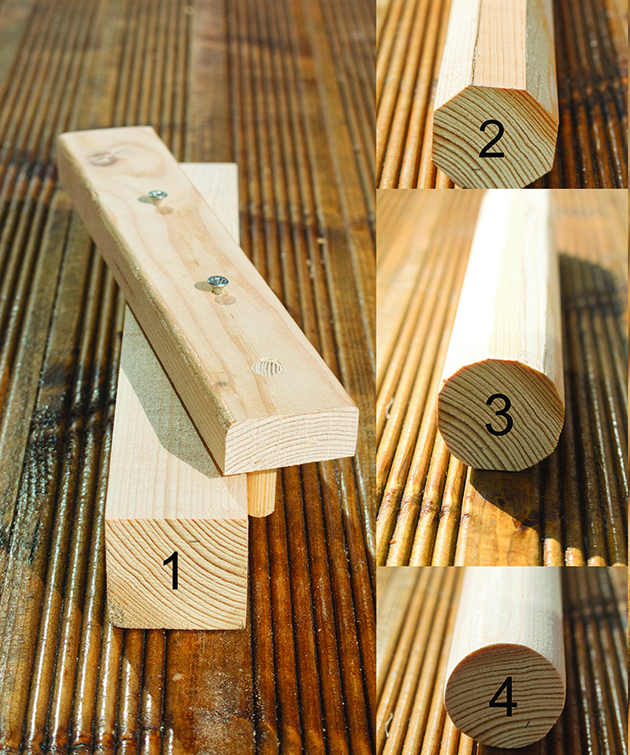
Spar gauge in use on square section (1), planed to eight sides (2), then to 16 sides (3) and finally rounded (4). Credit: Don Fitzroy Smith
I now had a rounded 24mm diameter ensign flagstaff and I moved on to the button. I’d saved a small rectangular block on which I scored out a circle of 55mm diameter using a round jar cap and then cut it out on the bandsaw.
A tapered stock of hardwood and how it looks once rounded. Credit: Don Fitzroy Smith
From there I faired it off to remove the odd bump and saw marks. If I’d used a compass to mark out the circumference of the button I’d have the centre point already marked – but I hadn’t. So instead I used a centre marking gauge – again, you can make a simple one from scrap pieces that will work for occasional jobs (see YouTube).
In the centre of the lower surface, I drilled a 12mm-deep hole with a 25mm Forstner bit into which I could mount the staff. I faired off everything, glued the staff into the button and when set I rounded off the top for a minimalist finish on a belt sander (clamped upside down), but you could continue shaping until it was dome-shaped if you wished.
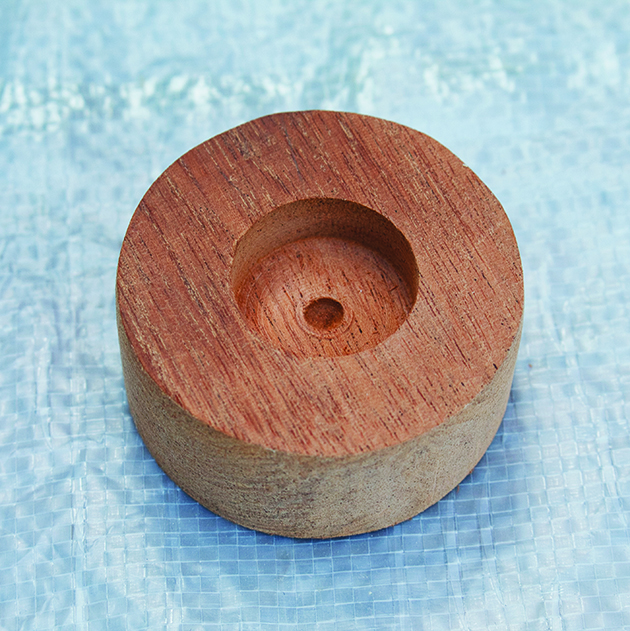
Drilled button top for the ensign flagstaff. Credit: Don Fitzroy Smith
Before varnishing, I drilled a central hole through the staff close to the button to provide the means to secure the ensign with cord. I used a drill press, but with a keen eye a hand drill could be used.
Should I ever have to dip the ensign, it will be quicker to unship the staff and lower it than fiddle about with a flag halyard that only lowers it a few inches and would not be appreciated by the saluted vessel.
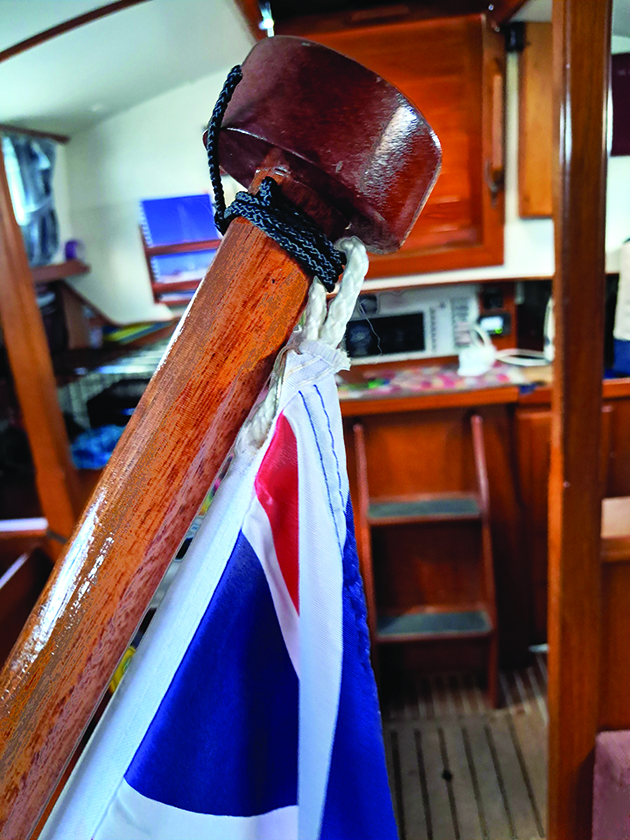
How the ensign is attached at the top of the flagstaff. Credit: Don Fitzroy Smith
I ordered a stainless steel socket that would mount on the radar gantry rails and, once fitted, I was able to mount a cleat I had in hand near the base of the staff, just clear of the mount.
To ensure a good grip on the staff by the securing bolt I drilled a shallow hole just larger than the bolt. So, there you have it; a chandlery flagstaff for more than £50 versus one made for pence from stock in hand. In either case you may still need an appropriate mounting socket which cost me £27.85.

What is an undefaced ensign? And why does it matter? Ask the experts
Tjalling Halbertsma from Bergen, North Holland writes: “I sail a 28ft flat-bottomed Vollenhovense Bol, built in steel and a fine…

Boat flag etiquette: Everything you need to know about ensigns and burgees
Almost everything we do, ashore and afloat, is governed by laws, which we must obey, and guidance, which we can…

How to make your own cockpit awning as a DIY practical project
We needed more shade on Aderyn Glas, our Moody Eclipse 33 we keep in the Ionian, and our small boom…

10 practical projects – crafty ideas to improve your summer cruise
The extra miles of sailing on a summer cruise, or days at anchor can highlight new issues on board or…
Want to read more practical projects like How to make your own ensign flagstaff?
A subscription to Practical Boat Owner magazine costs around 40% less than the cover price.
Print and digital editions are available through Magazines Direct – where you can also find the latest deals.
PBO is packed with information to help you get the most from boat ownership – whether sail or power.
-
-
-
- Take your DIY skills to the next level with trusted advice on boat maintenance and repairs
- Impartial, in-depth gear reviews
- Practical cruising tips for making the most of your time afloat
-
-
Follow us on Facebook, Instagram, TikTok and X