
Paul Diamond repairs a dinghy that was chewed by rodents

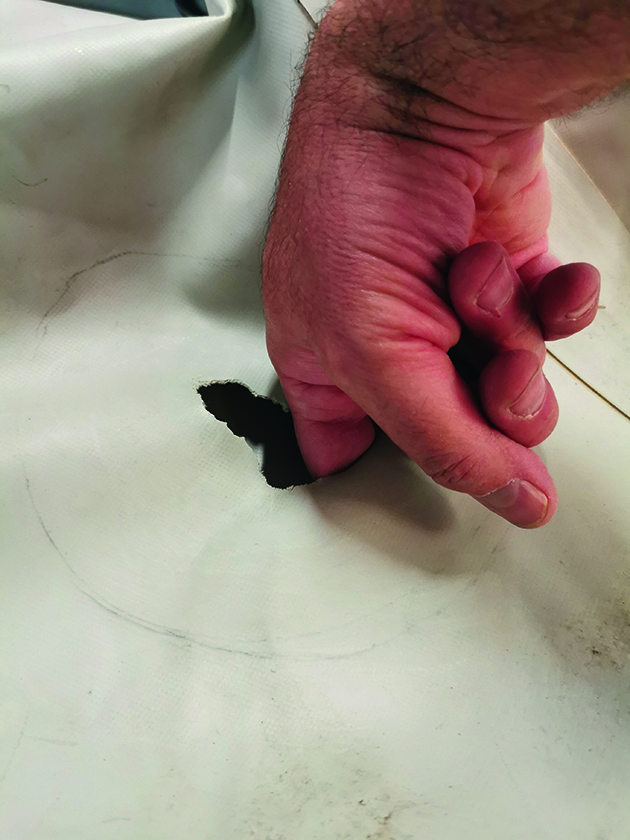
I’ve had a 2.3m Excel inflatable tender for over a decade, but during winter storage, vermin got to it and chewed holes, one in each of the dinghy’s three chambers, writes Paul Diamond.
If the baffles had also been holed, the tender would not have been repairable, but fortunately, they were untouched.
The proper way to repair these holes was to patch from both the inside and outside to make a PVC sandwich, using the appropriate two-part PVC adhesive.
Single-part glue and external patches may be OK for pin-sized holes, or as a get-you-home-fix, but are not a permanent, long-lasting repair.
It’s worth noting that some tenders are made of Hypalon, and the repair process is the same for those, apart from using Hypalon patches and glue instead of the PVC that I used for mine. The two types are not interchangeable.
Glue will need to be applied inside the tube for a first inner patch. Credit: Paul Diamond
The difficulty in doing inside patches is removing the boat valves to get access, lining up the patch, and sticking it down using the contact adhesive, ensuring you don’t glue the tubes together while pressing the patches into position.
I used a piece of garden wire to hook the valve backs near their holes, to save having to fish for them from inside the tube later, once the repair was completed.
PVC glue does not stick to polythene, so I used an old plastic shopping bag to line the tube inside before applying the patch through the hole.
I stuck a loop of gaffer tape to the bag with a piece of line tied on, so I could drag the bag back out through the valve hole once the repair was complete.
Follow instructions when repairing an inflatable dinghy
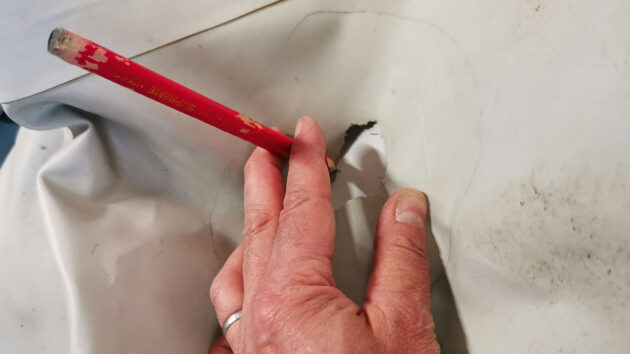
It is important to follow the instructions on the glue box to the letter. I marked a line 2in (50mm) from the edge of the hole to guide me.
Make sure there are no sharp corners on your patch, as these tend to peel off more easily.
Then, I prepared the inside PVC surfaces by sanding carefully with 120-grit paper, and vacuumed out the dust.
This gives a keyed surface for the glue to adhere to (do be careful not to sand right through the top surface to the mesh!).
It is important to sand the inside of the tube while repairing an inflatable dinghy. Credit: Paul Diamond
I cut the patch to match my markings, and marked the centre and top so I could orient the patch once inside the tube before sticking.
Sand the surface of the patch to be glued as above, ensuring your marks are still easily visible. Re-mark them after sanding if necessary.
I made up the two-part glue at 25:1 ratio, measuring as accurately as possible.
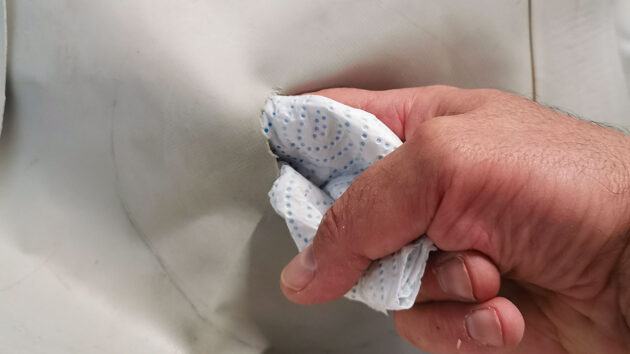
The Polymarine PVC glue I used has a four-hour pot life, so plenty of time to do my patches. I cleaned both surfaces with acetone, and after five minutes, repeated the wiping down process, again as per the instructions.
After a further 10 minutes, I used my marks to guide me as I applied a thin, even coat of glue to the inside of the tube with a trimmed 1-inch paint brush, and also to the patch.
Clean with acetone. Credit: Paul Diamond
Another 20 minutes passed, allowing it to tack off before applying another thin, even coat to both surfaces.
I laid a polythene sandwich bag over the glued side of the patch so I could roll up the patch and push it in through the hole without it sticking to the tube.
This is contact adhesive, so you only get one chance to stick it in the right place.
Once the patch was inside the tube, I could unroll the patch and line it up with my centre and top marks without fear of unintentionally sticking it to the glued surface inside the tube.
Once correctly aligned, I could hold it in place, peel off the sandwich bag and press the tube down all in the right place.
It’s worth taking a bit of time to ensure the tube is flat and fully supported, and the patch is aligned before doing this. It does stick instantly.
Then I used a roller to work outwards from the middle to push out any tiny air bubbles.
Patch complete
Once the inside patch was completed, I used my line to pull the shopping bag out of the valve hole.
I applied a light smear of waterproof grease to the valve hole and thread before screwing it back in place.
Do be careful not to drop the valve back into the tube; otherwise, you’ll have several minutes of cursing while fishing around to retrieve it.
I reinflated the tube to full size but not full pressure – just enough to apply force to the inside of the patch, but not to give it balloon-like herniation outwards through the hole.
I repeated this process with each hole and waited at least 48 hours for the glue to cure.
Do check the cure time of whichever glue you use. Outside patching was a similar process, except for not needing the polythene bags, and it was far easier to do with the tubes inflated.
Again, follow the manufacturer’s instructions carefully.
Rowlock removal
The last problem was that the rats had chewed a hole through the fabric and into one of the rowlocks, so I had to remove it to properly repair it.
Heat destroys the bond in the glue, but too much can also damage the fabric.
I used a hair dryer and a spoon to peel up the rowlock, but after 45 minutes had made little progress.
The hairdryer heat was too gentle, so I dug out my heat gun and, with a careful approach, was able to quickly remove the rowlock (which was not reusable and had to be replaced with a new one).
Attaching the rowlock was the same process as for the other external patches.
So, with the holes patched from the inside and from the outside, and the careful use of two-part PVC glue, I hoped to have made a permanent, long-lasting repair.
It was a repetitive and time-consuming process, but satisfying to have done a proper job.
Repairing an inflatable dinghy: Patching the dinghy tube

1. Dragging a polythene bag through the chewed hole in the dinghy tube with a rope via the valve hole.

2. Sand the inside of the tube through the hole and against a block (above) before marking the patch.

3. Clean the inside of the hole and the patch itself with acetone.

4. Patch rolled inside a polythene bag that won’t stick to the glue.

5. One of the patches inside (above) and with a covering patch outside (below).

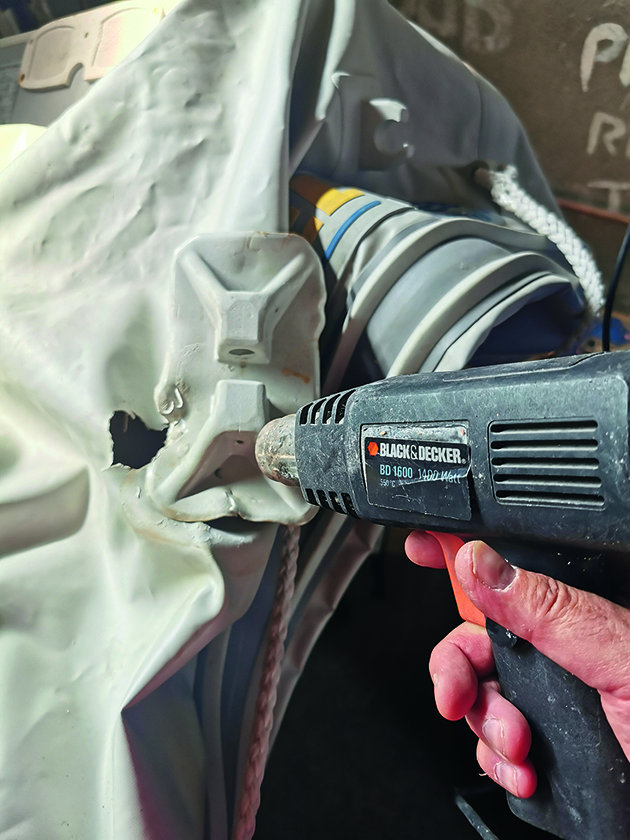
6. A heat gun was used carefully to soften the glue securing the chewed rowlock.
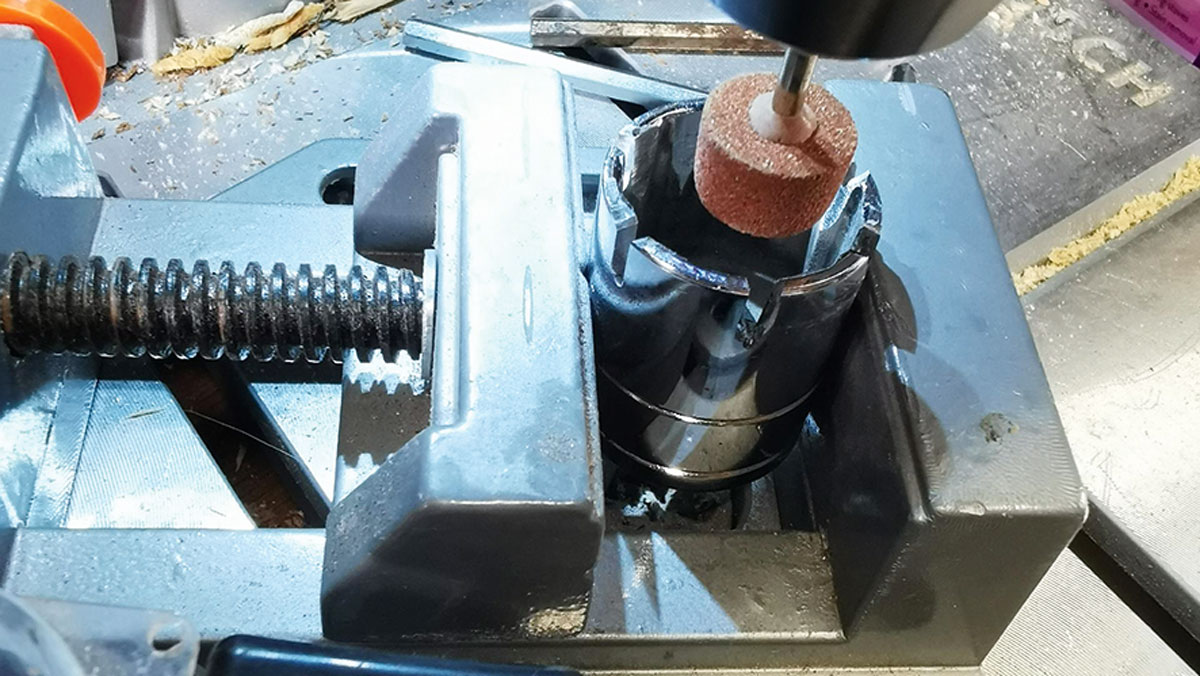
How I made a specialist tool to repair my dinghy
Paul Diamond creates a specialised valve removal tool from a socket spanner in order to repair his inflatable tender

Inflatable boat valve replacement: step by step
A failed inner valve could spell the end of an inflatable tender – but Jake Frith has a fix

Inflatable boat repair and reconstruction: How to save your dinghy from the tip
The ‘service life’ of the adhesive used to attach floors and transoms to the tube collars of most small inflatable…

Best inflatable boat: 9 compact tenders put to the test
Inflatables are everywhere: paddleboards, canoes, kayaks, tents, kites and wings – and inflatable boat technology has long been a practical…
Want to read more practical articles like Repairing an inflatable dinghy?

A subscription to Practical Boat Owner magazine costs around 40% less than the cover price.
Print and digital editions are available through Magazines Direct – where you can also find the latest deals.
PBO is packed with information to help you get the most from boat ownership – whether sail or power.
-
-
-
- Take your DIY skills to the next level with trusted advice on boat maintenance and repairs
- Impartial, in-depth gear reviews
- Practical cruising tips for making the most of your time afloat
-
-
Follow us on Facebook, Instagram, TikTok and Twitter