



Teak-laid decks look great on virtually any boat, but sooner or later they’ll need maintenance requiring more than just a scrubbing brush and a bucket of water, as Richard Johnstone-Bryden explains
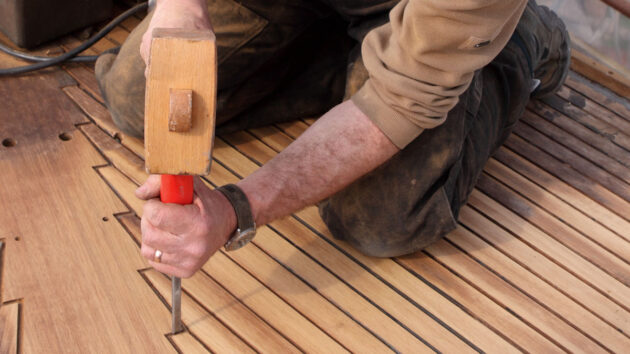
By virtue of their role, a teak deck is subjected to a lot of wear and tear. This inevitably causes problems that will have to be dealt with either as emergency repairs or as part of a longer-term maintenance plan to preserve watertight integrity.
From time to time it may be necessary to replace one or more teak wood planks within a laid deck, either because of rot, impact damage or because there’s a hole left by the removal of a redundant deck fitting. You’ll need to inspect the sub-deck – fairly easy if there’s a fitting to remove, otherwise you’ll have to cut away rotten or damaged planks with a chisel or router to see what state the sub-deck is in.

Planks needing replacing due to redundant deck fittings. Credit: Richard Johnstone-Bryden
This will determine the overall scale of the job. If the sub-deck (usually marine plywood on wooden boats) is damaged you may have to either fit a small patch or replace an entire sheet or sheets of plywood. On a modern production boat you may have to carry out some glassfi re repairs to the GRP sub-deck.
Once you have established what (if any) repairs have to be carried out on the sub-deck you can work out how much of the teak planking needs to be removed. This will be influenced in part by the position of the nearest joints – from both a practical and aesthetic point of view it’s always better to remove an entire plank and cut a new one to fit the existing joints.
Removing and replacing teak deck
Credit: Richard Johnstone-Bryden
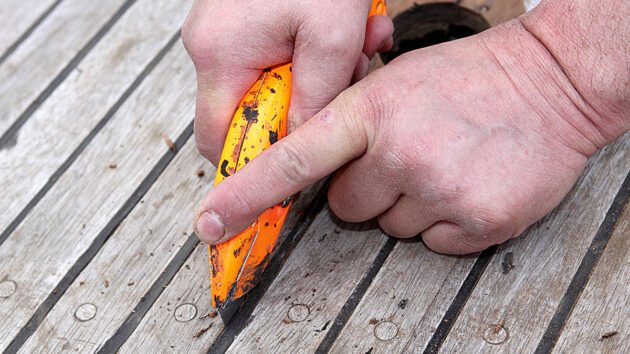
1. The first job is to remove the surrounding caulking sealant. Run a sharp craft knife very carefully along each side of the old caulking. This should be done carefully to ensure you only remove the old sealant and not the wood on any of the adjacent undamaged planks.
Credit: Richard Johnstone-Bryden
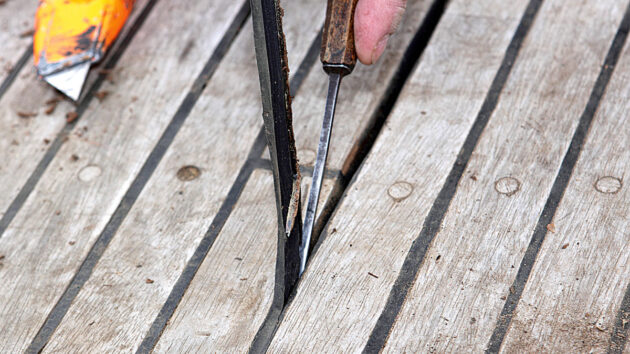
2. Now use a narrow chisel to cut the bottom seal and help in pulling the sealant from the seam.
Credit: Richard Johnstone-Bryden
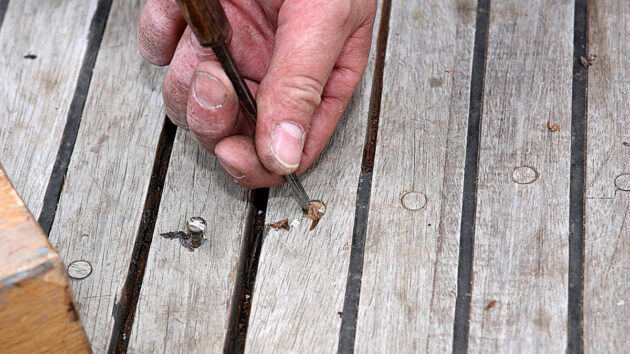
3. Next turn your attention to any fastenings. Begin by using a mallet and chisel to carefully cut and prise off the wooden plug above the fastening.
Credit: Richard Johnstone-Bryden
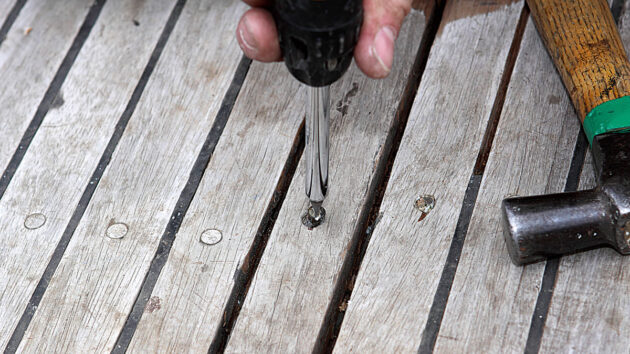
4. Clean out the screw slot with a sharpened bradawl or similar, then with luck the fastening will be in good enough condition to be unscrewed. Ideally, use a screwdriver which fits the slot exactly. For hard-to-shift screw,s give the screwdriver a firm knock with a hammer, or try tightening them a fraction before unscrewing: that might be just enough to break them free and won’t mash the screw slot.
Credit: Richard Johnstone-Bryden
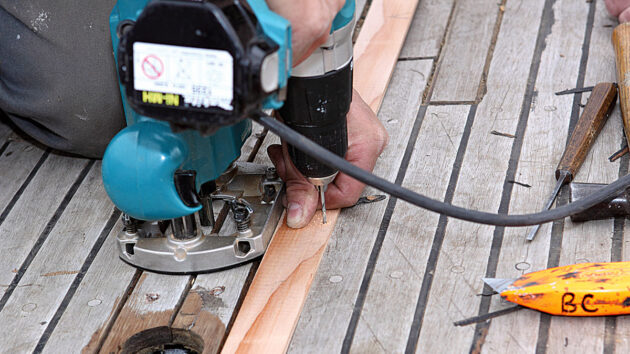
5. A router provides the most effective means of removing a damaged plank. Secure a batten to act as a guide for the router to run along.
Credit: Richard Johnstone-Bryden
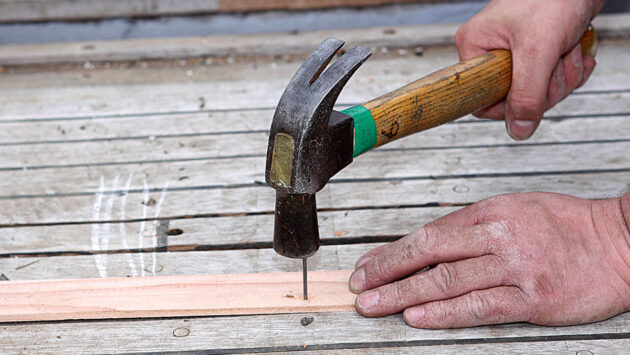
6. By nailing or screwing the batten through one of the caulking seams, you’ll avoid leaving any lasting marks in the deck. On wooden decks it’s worth fixing above a deck beam – you don’t want screws or nails going right through the deckhead into the cabin below.
Credit: Richard Johnstone-Bryden
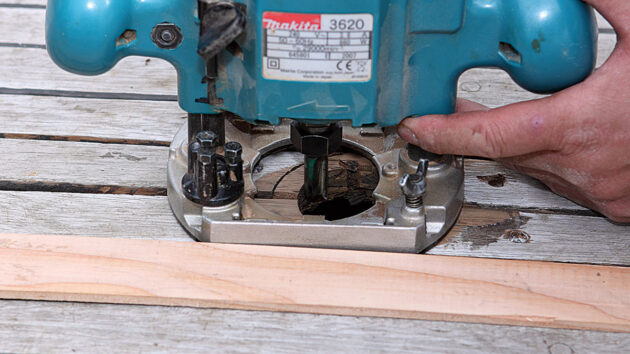
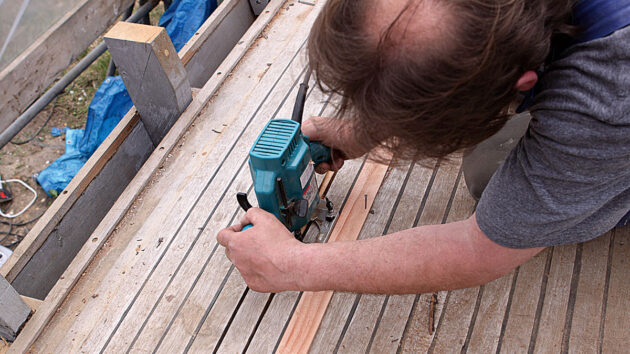
7. Now set the depth of cut on the router. If the plank is more than 8mm thick, don’t try to chop it all out in one pass of the machine. If the plank is 12mm thick, for example, it’s worth making two passes at a depth of 6mm each time. This will reduce the chances of the router jarring and removing more wood than you’d planned.
Credit: Richard Johnstone-Bryden
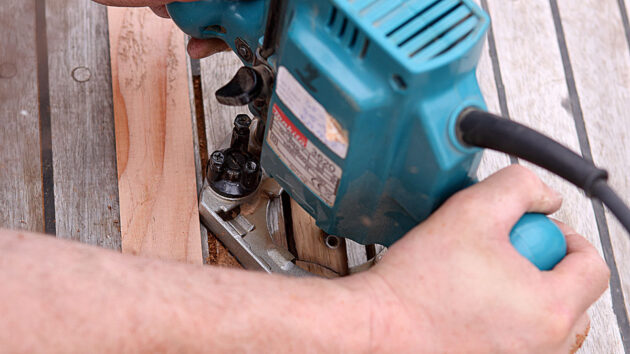
8. Once the batten is in place and the depth of the router has been set, simply start from one end of the section to be removed and work your way steadily along the length of the plank with the router.
Credit: Richard Johnstone-Bryden
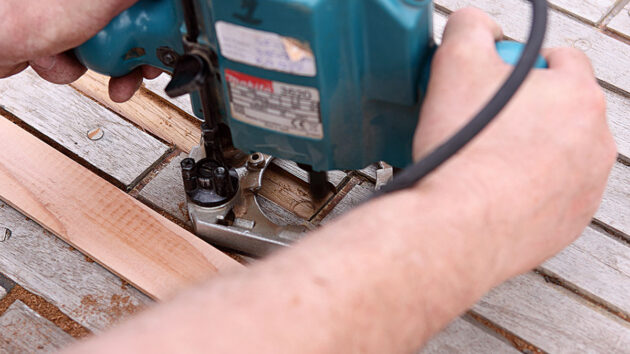
9. Swivel the base of the router to cut into wood further away from the batten. To avoid having to adjust the position of the batten for each plank, simply attach an additional wooden block of an appropriate width to the base of the router so it stands further away from the batten.
Credit: Richard Johnstone-Bryden
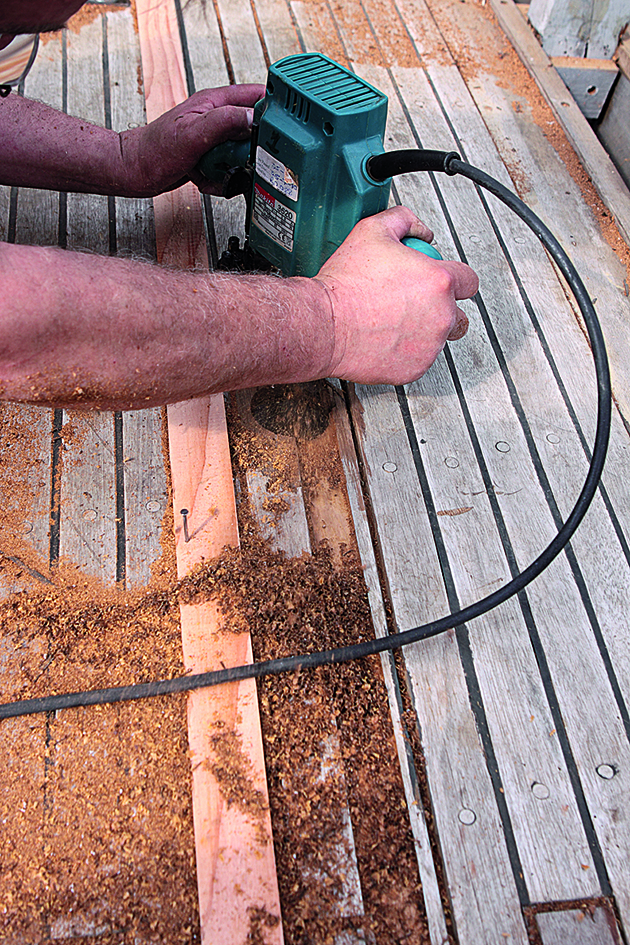
10. Take care when approaching plank end joints that you don’t let the router chomp further than you want.
Credit: Richard Johnstone-Bryden
11. After you have made several passes with the router, the damaged plank will gradually be cut away.

Credit: Richard Johnstone-Bryden
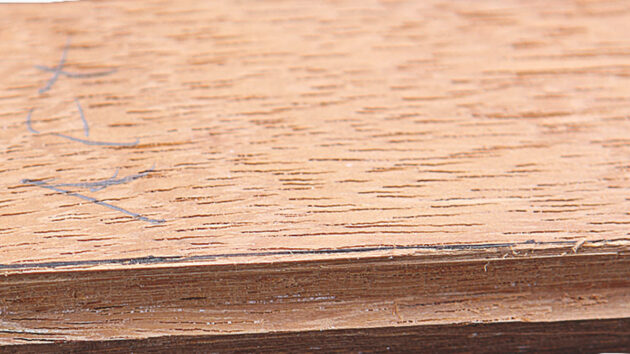
12. Sweep and vacuum away the mess, then you can determine the required dimensions of your replacement plank – it can be bought pre-cut to the right size from your local timber merchant or, if you have the tools, you can machine a suitably-sized piece of teak yourself. Lay your planks in place, then mark them up appropriately so you can cut rebates to match the existing gaps of the other planks.
Credit: Richard Johnstone-Bryden
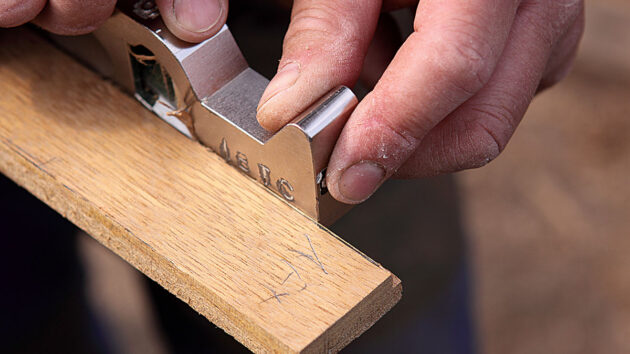
13. Use the router again to cut out the bulk of the rebate, cutting slightly to the waste side of your marked lines…
Credit: Richard Johnstone-Bryden
14… then use a small bull-nose plane to trim the remaining excess.
Credit: Richard Johnstone-Bryden
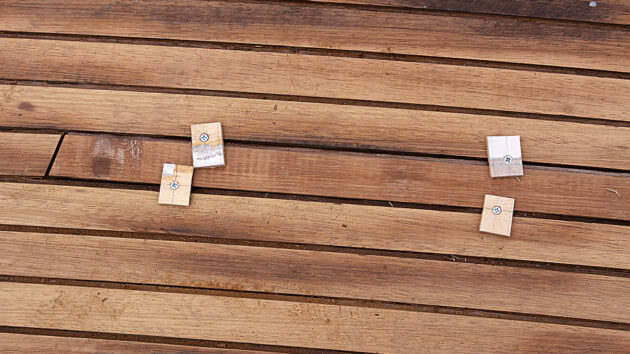
15. The plank is now ready to be secured in position. To improve the strength of the bond, the plank is fi rst wiped with acetone to remove the teak’s natural oils from the lower surface, then it’s laid on a bedding compound which has been applied to the sub-deck. While the bedding compound cures, the plank is held in position with a series of wooden blocks screwed along the seam – or it may be screwed down with countersunk screws which are later plugged to match the existing planks.
Recaulking
Credit: Richard Johnstone-Bryden
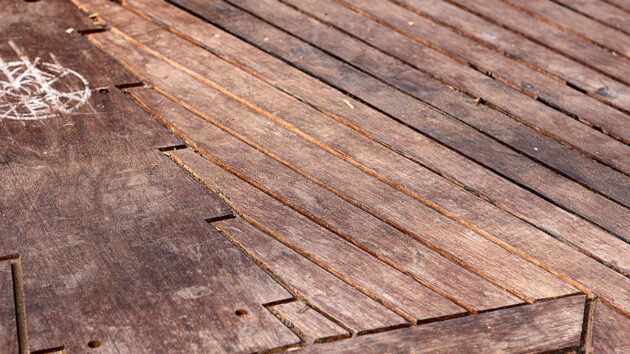
1. The amount of recaulking required after the replacement of a plank or two will be determined by the overall condition of the rest of the deck’s caulking. In this example, much of it was suspect so the whole lot has been removed from the foredeck ready for replacement.
Credit: Richard Johnstone-Bryden
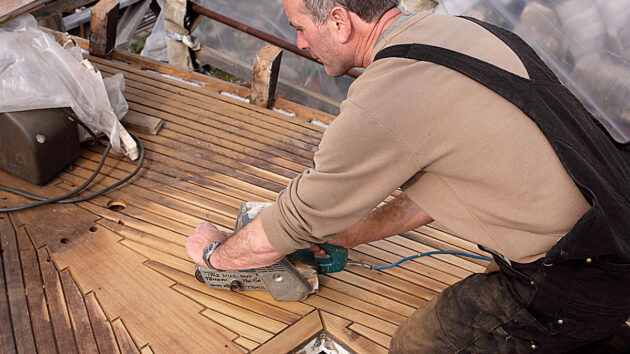
2. The weathered planks are first sanded with a belt sander: this not only improves the appearance, but helps to level imperfections where some areas have worn over years of use. In these circumstances it may also be necessary to increase the depth of the seams with a router to accommodate the new sealant – but this will only be possible if the planks are still thick enough to take a deeper seam.
Credit: Richard Johnstone-Bryden
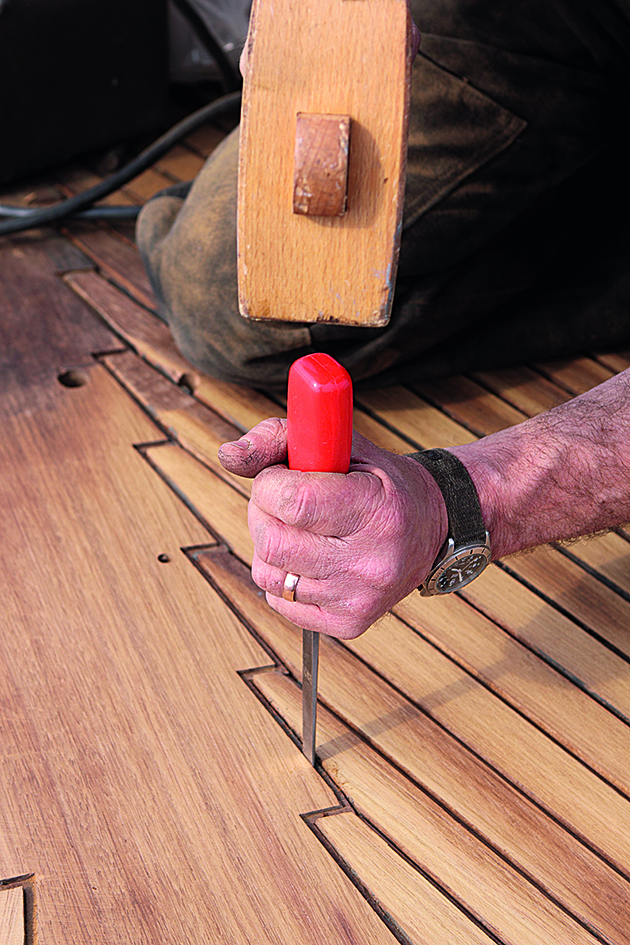
3. Having cut and raked out old caulking, it’s almost inevitable there’ll be some minor damage to the rebates. Tidy these up now with a chisel, squaring off edges and making sure gaps are nicely aligned.
Credit: Richard Johnstone-Bryden
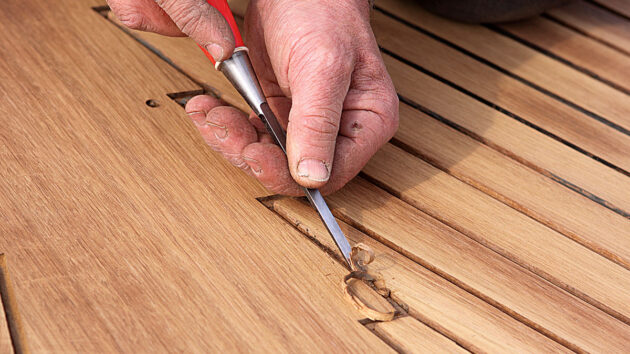
4. Localised areas of rebate that need deepening can be cut with a chisel.
Credit: Richard Johnstone-Bryden
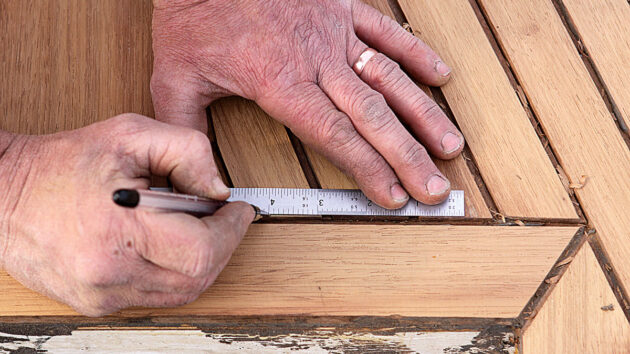
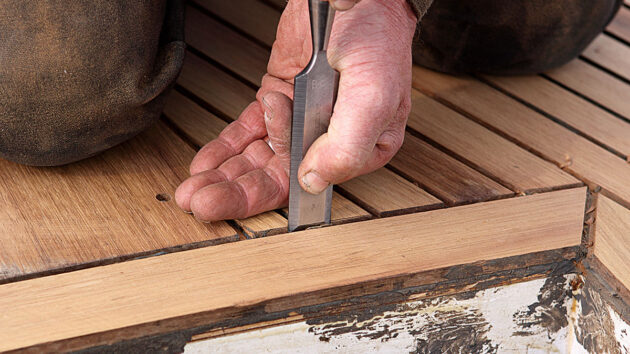
5. Check that the ends of the planks are all even, marking up any imperfections that were missed when the planks were first laid.
Credit: Richard Johnstone-Bryden
6. Now trim back to your scribed mark with a chisel. Vacuum away dust and debris from all the seams before the next step.
Credit: Richard Johnstone-Bryden
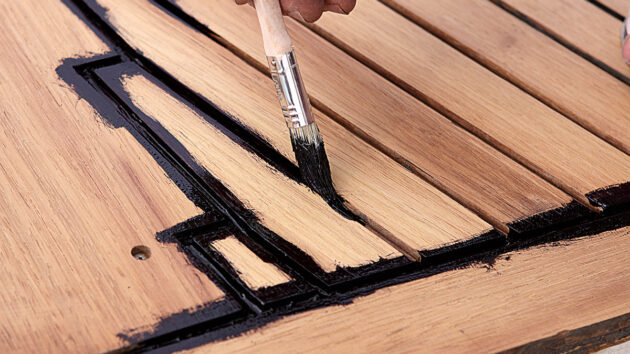
7. Primer is now applied along the seams. For hardwoods, black shows how well you’ve covered the seam, but on softwoods it can bleed into the end grain so it’s better to use a clear primer. Ensure the primer is compatible with the rest of the sealant system.
Credit: Richard Johnstone-Bryden
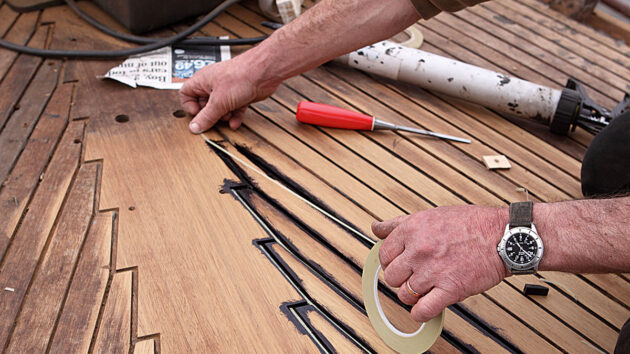
8. A breaker tape is next applied along the bottom of each seam to prevent the caulking sealant from sticking fast to the bottom of the rebate: this way the caulking can expand and contract between the rebated seam walls without actually coming unstuck from them.
Credit: Richard Johnstone-Bryden
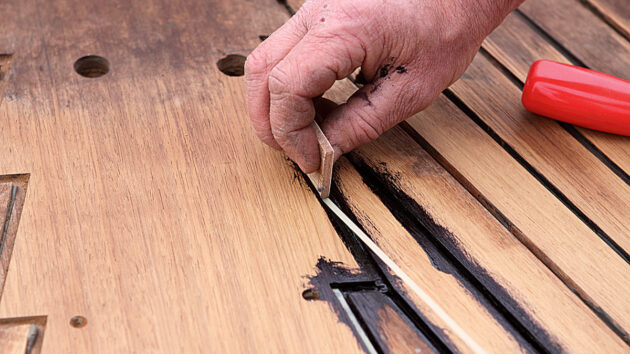
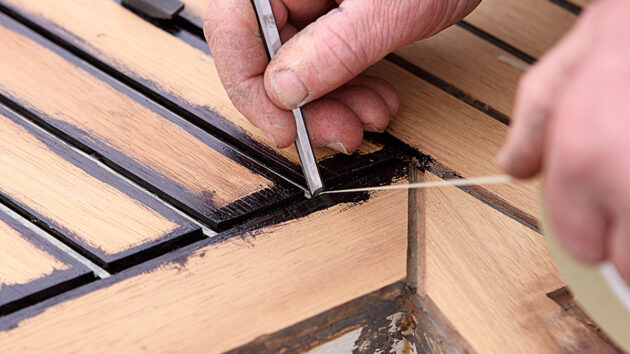
9. A scrap of thin ply can be used to press the breaker tape firmly into the bottom of the rebate.
Credit: Richard Johnstone-Bryden
10. Use a narrow chisel to cut the breaker tape at the end of a run. Ensure the bottom of all rebates is taped, with no gaps.
Credit: Richard Johnstone-Bryden
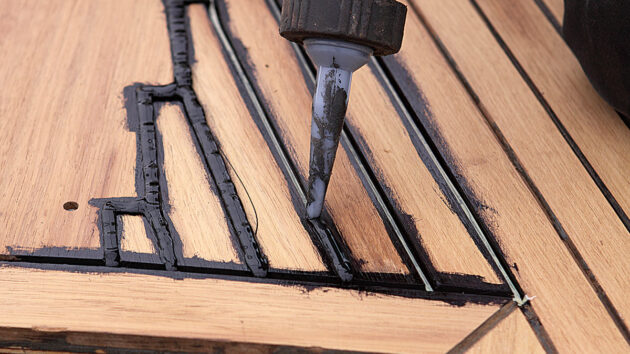
11. Next is the process of injecting caulking into the seam. Work slowly to avoid air bubbles which could later undermine the seam’s watertight integrity. Ensure the sealant stands a little proud of the seam so that when it settles it doesn’t drop below the level of adjacent planks.

Credit: Richard Johnstone-Bryden
12. Follow the manufacturer’s instructions for sealant curing time and how long before the teak deck can be walked on. When it’s ready, run a wide chisel over the seams to remove the excess sealant before using a belt sander to finish off.

How to replace a worn teak deck
Genevieve Leaper explains how friend Sokratis Kavallieratos laid a new teak deck on his Najad 320

Teak alternatives: How to make your decks look as good as the real thing
However, according to a recent report by the Environment Investigation Agency, there are grave questions over the sustainability and sourcing…

How to re-caulk teak decks: Vagabond 47 owners explain how they did it
First, they removed the old caulking between the planks using a Bosch Palm Router and pinned a guide into the…

How to restore teak decking: Varnish or oil? Ask the experts
“Can your paint expert help me identify the coating on my boat’s flybridge deck and stairs? “Is it likely to…
Want to read more articles like Teak deck refurbishment: step-by-step to guide to replacing planks and caulking?

A subscription to Practical Boat Owner magazine costs around 40% less than the cover price.
Print and digital editions are available through Magazines Direct – where you can also find the latest deals.
PBO is packed with information to help you get the most from boat ownership – whether sail or power.
-
-
-
- Take your DIY skills to the next level with trusted advice on boat maintenance and repairs
- Impartial, in-depth gear reviews
- Practical cruising tips for making the most of your time afloat
-
-
Follow us on Facebook, Instagram, TikTok and X