
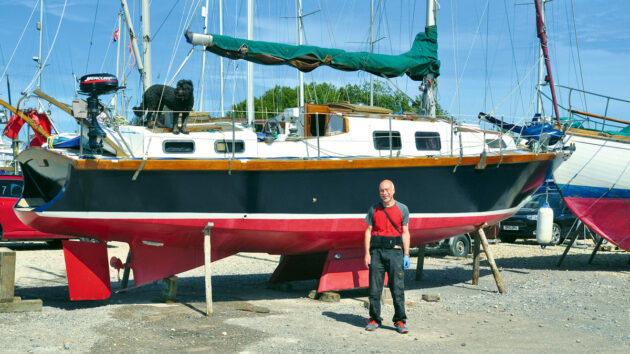
When his Bukh DV20 engine fails, boat owner Richard Reed saves money by installing a ‘new’ second-hand Beta 28 and doing a DIY engine replacement.
Early in 2021 I was desperate to find another boat. I’d been forced to sell my beloved Moody 33 the previous year, as I was haemorrhaging cash thanks to the Covid lockdowns.
Thankfully by 2021, my finances had started to recover a little.
I was still on a tight budget and my eye kept getting drawn to photos of a pretty plywood and GRP ketch called Seven Summers at Cobb’s Quay in Poole Harbour.
Described as a Santa Barbara 32, no-one seemed to know much about her origins.
It turned out her sweet 1970s lines had been drawn by East Coast designer Charles Greene, founder of Cruiser Kits Ltd, based in Bunghay, Suffolk, though she wasn’t built until the 1990s.
Engine replacement needed
Her elderly Bukh DV20 engine was plagued with problems, however. It was time for an engine replacement.
The Bukh DV20 had a tendency to run hot, and when starting from cold would smoke and spit gobs of oil out of the exhaust.
I left the boat on the Isle of Wight and did little sailing over the next 18 months – partly due to a lack of confidence in the engine.
By 2023 I was determined to get her back to Devon.
I set sail for Yarmouth from Bembridge that May, but had barely left harbour when the engine spluttered and died.
I managed to restart it and carry on, but by the time I got to Ryde it had died completely and I had to call SeaStart to tow me in.
Once safely in the harbour, a quick inspection of the filters showed serious fuel contamination – something which has become almost endemic with the advent of biodiesel.
I found someone who was able to remove most of the contaminated fuel, and I replaced the filters, but there was no inspection hatch in the tank so there was little more I could do other than hope we’d cured the problem.

The second-hand Beta 28 aboard Richard’s yacht following his DIY marine engine replacement. All photos credited to Richard Reed
Running out of patience
I set off for Devon in late May, but the engine again played up, refusing to run at more than half speed. I put into Poole and picked up a mooring at Lakeyard.
I tried changing the filters again, but the engine just refused to play ball – running happily in neutral, but not going more than a few hundred yards in gear.
The gearbox was also leaking oil like a sieve.
I just wasn’t sure what was to blame, and was at my wits’ end.
The engine cut out again on the way to Ridge Wharf Yacht Centre, Wareham for the winter, and I had to be towed in by SeaStart once more.
I’d had enough. I had lost the best part of two seasons, and the engine was a liability.
I had completely lost confidence in it – it was time for an engine replacement.
After scouring the internet, I found a second-hand Beta 28 on eBay with just 21 hours on the tacho.
Mystified, I contacted the seller and asked if it was a typo.
The vendor turned out to be the director of a marina in Scotland.
Apparently, someone had re-engined an old wooden boat, sailed it down the Caledonian Canal, then never used it again.
The boat had fallen apart on the hard but the engine was unaffected, and sounded like a ‘good ’un’ from the video.
Perhaps some luck at last!
We negotiated a price, and for £2,500 I had a nearly-new Beta 28.
I would need a new prop, and I wanted one that would both take the boat to maximum hull speed, which is 7.2 knots, but also be able to punch a strong tide or choppy seas if needed.
After consulting some online prop-size calculators and checking with the helpful guys at Beta, the choice came down to a 14x9in or 15x9in (diameter x pitch).
I went with Beta’s advice and ordered a 15x9in through Castle Marine in Caernarfon – more on the prop size later.
Astonishingly, there were none in the country and it had to be cast by Michigan Marine (MMP) in the US and imported to the UK – but only at a cost of just under £500. Ouch!

Prop may be sitting too close to the rudder for good steerage astern, but Richard wanted to make room for an anode and ropecutter
Fuel tank cleaning ahead of engine replacement
The fuel contamination issue needed addressing, however, before I put any diesel through my new engine replacement; I was convinced this was still a factor.
I’d hoped to simply replace the old stainless-steel tank, but it was built-in, and overlapped the engine bay, so that wasn’t an option short of major surgery.
Seeking help on the brilliant ybw.com forum, someone recommended CP Fuel Polishing in Poole.
The owner, Carl, was brilliant – a more helpful guy would be hard to find.
Before he arrived I removed a rectangular section of the floor of the cockpit locker above the tank with a jigsaw, so he had a good working area.
Carl then rigged up a high-powered pump and sucked out all the dirty fuel for disposal.
His next task was to cut a hole in the top of the tank with a 115mm hole saw and remove copious amounts of fire-retardant, stainless-steel mesh that filled the tank, without which a deep clean would have been impossible.
We had fire extinguishers to hand, but the chances of diesel vapour spontaneously igniting were remote.
It was now time to flush the tank, which had a thick layer of sludge on the bottom.
It hadn’t helped that the fuel take-off was right at the bottom of the tank and so was constantly pulling through dirty fuel.
The cleaning process was easily accomplished using Carl’s pump, and the tank was left to air dry.
To finish the job, Carl fitted a Wema FLB-1 inspection hatch into the new hole, complete with an integral fuel sender, so I now had a fuel gauge, which was a welcome bonus.
He also installed a ‘dipper’ fuel pick-up tube in the top of the tank, which stopped short of the bottom to avoid pulling through any more debris that might accumulate.
While I was at the yard he carried out a similar job on another boat, and several other owners I spoke to reported serious problems with fuel contamination – it seems biodiesel is much more prone to diesel bug and is a really serious issue.
Preparing the engine bay

The old Bukh DV20 in the engine bay with a certain amount of untidy wiring!
I’d hoped to find a professional to install my Beta, as I was wary about taking on such a major project.
However, even though Seven Summers is a centre-cockpit boat and engine access is excellent, the quotes were coming in at £1,500 plus just to mount and align the engine.
This was out of my budget, so I decided to tackle the job myself.
In preparation for the yard to lift out the old Bukh, I disconnected all the diesel fittings and engine and gearbox control cables, and removed the old engine control panel together with surplus wiring that would no longer be needed.
The Beta came with its own loom, pre-wired to the new control panel.
I also carefully removed the heavy-duty ground cable from the engine block, and the live cable to the starter motor, disconnecting both at the battery end first.
I also removed the gearbox cable mounting bracket, which protruded into the transmission tunnel, and anything else that might get in the way – the water strainer (which needed upgrading to ¾in anyway), the electric diesel lift pump I had installed in a bid to solve my problems, and the Racor fuel filter.
Using the boat crane, it took the yard team less than half an hour to lift the old DV20 out of the engine well.

The old Bukh safely out of the boat and awaiting collection for refurbishment
Upgrading the seacocks
With the old Bukh removed I now had an empty engine bay, and I took the opportunity to do some work before the Beta went in – it was a chance I wouldn’t get again.
I wanted to install a third cockpit drain on the starboard side of the boat – two were not enough, in my book, for a centre-cockpit boat.
I upgraded the existing 1¼in cockpit drains to 1½in, and replaced one of the seacocks to match.
The other seacock, it turned out, was already 1½in.
It was easy enough to cut off the old nylon drains, but making a hole bigger using a hole saw can be tricky, as you have no centre to take the pilot drill.
However, another owner at the yard suggested filling the existing hole with a cut-off emergency softwood bung, which worked a treat.
I also used this technique to enlarge the hole for the engine raw-water intake, which needed upgrading from ½in to ¾in.
To install the new starboard cockpit drain, I re-routed the aft centre drain from its starboard-side seacock to a new TruDesign composite skin fitting on the port side.
I then drilled and fitted the new starboard drain, threading the hose to the now vacant seacock on the same side of the boat.
I struggled to find cheap 1.5in threaded elbows for the new deck drains, until I found some nylon irrigation fittings online for about a fiver each.
Replacing the engine also gave me the one-off opportunity to install a calorifier in an empty compartment on the port side of the engine bay.

A new calorifier awaiting installation while the engine is out
Engine replacement time
Now it was time to install the new Beta.
I’d already measured the position of the feet on both engines and was confident it would fit on the engine bearers.
I was pretty sure the standard sump would be too deep, so I had the yard fit the optional shallow sump.
The Beta 28 is slightly smaller than the Bukh and was an easy fit using the boat lift.

An eBay buy chain hoist was used to manoeuvre the engine into position

The new Beta 28 being lowered into position for the engine replacement. New and re-routed cockpit drains are circled
This put the engine in roughly the right position, but now I needed to line up the gearbox flange with the prop shaft before securing the engine mounting bolts – a tricky operation.
I’d borrowed a scaffolding pole from another owner, and I laid the pole across the top of the cockpit coaming and secured it in place with a couple of wooden blocks.
This meant screwing through the teak capping, and I’d have to make that good afterwards.
I had bought a one-ton chain hoist for £30 on eBay, and it was simple to rig this up on the scaffolding pole, using a line and shackle to connect it to the engine’s lifting bracket.
There’s no point trying to rush a job like this, and I’d allowed a couple of days for the alignment process.
Because the prop shaft was too short for the new engine, I had opted to buy and fit a 4in spacer known as a bobbin to the end of the prop, rather than buy a new one.
This avoided having to drop the rudder to remove the prop, but was a decision I’d come to regret.
Fine tuning the new engine replacement

An access hole was cut using a hole saw and fitted with a cover plate, including a fuel gauge. The new dipper fuel pick-up is above
Having attached the bobbin to the prop shaft, I now had to bolt it to the flexible coupling on the gearbox flange, ensuring it was perfectly aligned not just vertically, but also laterally, ie from left to right.
I needed to get it to within 30 thousands of an inch all round, using a feeler gauge.
It was also important to ensure the vertical adjustment bolts on the engine feet were not at the top of their travel.
This is where my engine hoist came into its own, as it was dead easy to lift the engine up or down a few millimetres using the ratchet chain, or nudge it across from one side to the other.
I needed to get the engine inclined downwards from front to back, and it was immediately obvious there wasn’t enough adjustment on the front feet to raise the engine as much as necessary.
Luckily I had some hardwood blocks that had been used to mount the Bukh, and I put these under the front feet, later adding a couple of thick steel shims to get roughly the correct angle.
It was then time to make the final adjustments on the feet themselves.
Before the engine replacement was dropped in I’d used an angle grinder to cut away a small section of the hefty engine-mounting brackets to give better access to the bolts with a socket.
It took a while to get the hang of the alignment process, working in two planes simultaneously, but I got there in the end, getting the clearance down to 25 thousands of an inch.
The final job was to screw some hex-head coach bolts down through the engine-mounting feet and into the hefty hardwood bearers beneath.
Ideally, I would have drilled and tapped the thick steel plates on top of the bearers, but it would have been very easy to get the two holes on each foot slightly out of alignment.
It’s not a hugely powerful engine and the old Bukh had been mounted this way.

The new starboard cockpit drain with the 1½in threaded elbow from an irrigation supplier
Exhaust connections
I asked Sam, the yard’s helpful engineer, to fit the exhaust hose, as wrestling with a rubber anaconda in the transmission tunnel wasn’t something I fancied tackling in my 60s!
The exhaust elbow had already been cut and welded so it pointed in the right direction, but he still had to twist the exhaust hose over the prop shaft to route it into its slot under the aft-cabin floor.
I’d decided to leave the existing 45mm Vetus water lock in place, rather than spend £150 replacing it with the 50mm unit (plus a new exhaust outlet; another £100) to fit the Beta exhaust – apparently, the Nanni version of the same Kubota-based engine only uses a 45mm exhaust.
I had sourced a Vetus adapter and Sam connected it all up using a short section of old pipe.
I then installed the new ¾in water strainer and connected up the diesel and electrical connections, and I was able to reuse the existing engine control cables.

Richard photographed the back of the old control panel for reference ahead of the engine replacement

A custom instrument panel was needed to fit the steering console as the new Beta panel was too big
The engine control panel that came with the Beta was much too big for my steering console, however, so I had a replacement made up by Brian Ward Marine in Norwich for just £85.
They also transferred the switches and warning lights across, and all I had to do was reattach the wiring loom, using a photo of the old console I’d taken as a guide.
Finally, it was time to start her up.
Having rigged up a hose to the water strainer I tried the key, but despite much turning, she wouldn’t fire.
I’d reinstalled the electric lift pump, as I knew from the specs that the Beta’s manual lift pump wasn’t beefy enough to pull the diesel up through the new dipper tube.
However, the electric pump was not self-priming.
Luckily I had a 12V diesel transfer pump – bought from Lidl – and I now rigged this up to the end of the fuel line.
It worked far better than expected, so much so that I was showered with diesel!
Still, the job was done and with everything reconnected, she fired up well.

The Beta mounted in position with all the ancillaries back in position – the fuel filter, water strainer and electric pump

The exhaust elbow cut and welded (circled) now pointing downwards
Lessons learned
Once on the pontoon, I left the engine running for a while, and she started to vibrate quite badly before stalling. I was mortified – was my new engine a dud?
This happened several times, and I was getting gloomier and gloomier before I noticed that the valve on the diesel return pipe, which I’d shut when the old engine was removed, had not been reopened… Mea culpa, but an easy oversight with so much to check.
With the return valve open, she ran very sweetly indeed.
The final part of my learning curve, and not something I could have foreseen, came later in the summer when the engine began to vibrate quite badly at high revs.
There was also a fair bit of water coming in through the stern gland, which was somewhat alarming (my stern gland is an old-fashioned white-metal bearing set-up, with no cutless bearing.)
By this stage, I was exploring the pretty Exe estuary, so I took the boat into Trout’s boatyard at Topsham, where I asked their helpful engineer, Joel, to investigate.
He found that the engine had slipped down on its mounts as the adjuster nuts had worked loose.
Surprisingly there are no locking nuts on the Beta feet adjusters, though there should have been some lock washers on the top nuts, which Joel installed, as well as replacing the damaged flexible coupling.
Luckily there was no damage to the stern gland.
Joel thinks the bobbin on the prop shaft was creating a centrifugal effect and causing the prop to whiplash, making the engine vibrate.
Thankfully it only seems to happen at higher revs, so for now, I am keeping the revs below 2,000rpm where possible and checking the engine feet adjuster nuts regularly.
He suggested a short-term fix would be to mount the bobbin directly to the gearbox, with the flexible coupling between the bobbin and the prop.
This will hopefully reduce the whiplash effect.
Longer term, removing the bobbin and installing a longer prop shaft is the obvious way to go.
Finishing touches

An anti-syphon device was fitted as the exhaust elbow is below the waterline and could suck cooling water into the engine
Final modifications I have made recently include fitting an anti-syphon valve to the raw water cooling system, as the exhaust elbow is below the waterline.
These cost about £20 and are easy to install, so if in any doubt, fit one; it could save a very expensive engine failure.
The other issue came to light as a result of admiring my boat on her mooring and noticing that she was noticeably bow down.
It took a while to figure out why until I looked at the specs for the two engines – the Bukh DV20 is 70kg heavier than the Beta 28.
This weight differential had altered the balance of the boat.
I’ve spent the past few months buying up spare rolls of roofing lead and stuffing it under the bunks in the aft cabin, and she now sits nice and level.
It’s been a steep learning curve, but I now know my engine and my boat inside out, and I’m confident I can deal with most issues that might arise.
Installing an engine replacement yourself is quite doable – just get plenty of professional advice, and take it one step at a time.
About the author

Richard Reed is a freelance journalist.
He had a Mirror dinghy in his teens, and after a long break from sailing bought his first ‘big’ boat, a Trapper 500, before moving on to a Moody 33 MkI.
He now owns Seven Summers, a Cruiser Kits Santa Barbara 32, and would like to complete a leisurely Round Britain before he gets too ancient.

Why plywood boats are making a comeback
A wonder material in the 1950s and 1960s, plywood is making a comeback. Rupert Holmes analyses what lies behind a…

The legacy of Cruiser Kits
Richard Reed investigates the history of Cruiser Kits and its founder, Charles Greene

DIY boat engine replacement – How I fitted a Beta 30 in a Moody 31
I bought my 1987 Moody 31 MkII in September 2017 and still remember the excitement of flying down with a…
Want to read more money-saving articles?

A subscription to Practical Boat Owner magazine costs around 40% less than the cover price.
Print and digital editions are available through Magazines Direct – where you can also find the latest deals.
PBO is packed with information to help you get the most from boat ownership – whether sail or power.
-
-
-
- Take your DIY skills to the next level with trusted advice on boat maintenance and repairs
- Impartial in-depth gear reviews
- Practical cruising tips for making the most of your time afloat
-
-
Follow us on Facebook, Instagram, TikTok and Twitter