
Colin King shows how he fitted an antivibration system for smoother, quieter cruising and reduced wear on his yacht’s engine and gearbox
Like many boat owners I got increasingly fed up with the noise and vibration generated by my engine and gearbox, and concerned about the possibility of damage to the gearbox bearings and seals.
After a bit of research I decided to fit a Halyard Aquadrive anti-vibration system which, by isolation of the engine from the hull structure, is promised to reduce cabin and cockpit noise and vibration by 50% or more.
I hope by sharing my installation method, I can assist PBO readers with the fine detail that would be impossible for Halyard to cover in their otherwise excellent instructions, which are obtainable at halyard.eu.com.
How the Halyard Aquadrive anti-vibration system works

The Halyard Aquadrive principle is based on a fixed thrust bearing to take the longitudinal loads generated by the action of the propeller plus a double constant velocity connection between the thrust bearing and gearbox that caters for axial alignment.
Firstly, the soft engine mounts isolate the engine from the hull.
Secondly, the constant velocity driveshaft absorbs engine vibrations and eliminates the need for accurate alignment.
Thirdly, the thrust unit, fastened on a load bearing hull section, is promised to reduce stress on the transmission, on the engine mounts and bearings.
The Aquadrive is available in several different sizes depending on engine horsepower, normal engine revolutions per minute (rpm) and gearbox ratio.
Before ordering an Aquadrive it’s sensible to contact several suppliers to compare price.
My supplier was TW Marine Ltd (I have no connection with them) and I sought their advice on which model would be most suitable.
Armed with this information the space available should be thoroughly checked against the dimensional information available on the Halyard website.
TW Marine selected an Aquadrive CVB 05:10 for my boat based on the data I supplied ie Beta 20 diesel, 2,500rpm normal cruising revs and 2:1 TMC gearbox.

The engine mounts for the Halyard Aquadrive
Boat specific – rudder removal required
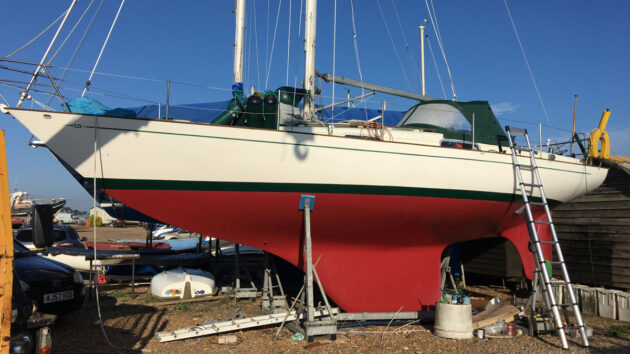
To install the Halyard Aquadrive on my Contessa 32 Coppelia, I needed to remove the propeller shaft and to do so I had to remove the rudder.
For this procedure, I found the Refit & Sail YouTube channel run by George Isted to be particularly helpful.
As part of my project I was replacing the fixed three-blade prop by Darglow FeatherStream so I removed the prop using a three-legged puller.
Next, I tried to undo the bolts on the clamp connecting the gearbox to the prop-shaft – in the end, I had to cut the clamp off by using an angle grinder!
Then it was time to remove the R&D coupling from the gearbox.
I disconnected all the wiring and pipework connections and the existing anti-vibration (AV) mounts from the engine and slid the engine out using a chain hoist supported on a beam across the companionway (not a bad effort for a single-handed octogenarian!).
Modern replacements ahead of Halyard Aquadrive installation

Engine and facsimile engine bed built up from plywood
With the engine removed I took the opportunity of refurbishing the engine bay and replaced the horrible rusty steel plates that sat between the bed and the AV mounts using ultra-high-molecular-weight (UHMW) plastic from Par Plastics.
I had temporary bearings CNC machined from UHMW by PAR Group to use to ensure that the prop shaft sat centrally in the stern tube, one at each end of the tube with the old worn cutless bearing removed.
Due to scoring from the worn cutless bearing I purchased a new 1in diameter duplex stainless steel prop shaft and had it machined to suit my new FeatherStream prop and also had a 6mm threaded hole bored into the inboard end to take a reversed pointed grub screw.
I was now in a position to slide the shaft into the temporary bearings to check the angle between it and the gearbox output.
On the recommendation of my supplier I had fitted new ‘soft’ AV mounts to the engine and it became apparent that I needed to raise the rear of the engine to achieve the angle required as per the instruction manual.
To do this, I fitted 10mm-thick powder coated spacers under the aft AV mounts.

Thrust bearing, support in position

Bearer bonded in
Important note
The bearer for the thrust bearing must be as near as possible 90° to the centreline of the prop shaft.
To achieve this, I first inserted the prop shaft using the temporary bearings and using scrap plywood held against the bearing adjusted its position such that the inboard end was, minus the thickness of the ply, the correct distance from the gearbox adaptor.
Due to gravity, I held the shaft in place to stop it sliding completely out with a pair of grips against the protruding end of the stern tube.
By rotating the plywood I was able to mark, using a permanent marker, the location where the bearer would join the hull moulding.
I used an electric file sander to remove the flow coat from the hull moulding in the vicinity where the thrust bearing bearer would be bonded in.
I used stiff cardboard to make a template for the bearer and used that to make the actual bearer using 18mm WBP Plywood.
I’d originally intended to make the bearer using biaxial carbon fibre but having moulded it I was unhappy with the result and abandoned it due to the complex angles involved.
I used the same method as (c) to position the bearer and having checked that it was in the correct location to achieve Halyard’s requirements I bonded it in, using West Epoxy thickened with smoked silica.
Note that eye and respirator protection is essential as the smoked silica is really nasty stuff – it’s very light and susceptible to being blown around by the slightest draught.
With the bearer tab bonded to the hull I reinforced the junction using biaxial glass.
I fitted a pointed grub screw to the prop shaft and used it to mark the centre of the thrust bearing on the bearer and used a large hole saw to cut the hole required by the former and cut down the sides to form a U-shape.

Moving the original Propshaft coupling
Final stages of Halyard Aquadrive installation
With the bearer in place it was time to fit the thrust bearing!
With the prop shaft inserted into the bearing I rotated the combination until the holes for the holding bolts were as near-horizontal as possible then marked the centres and drilled the requisite sized holes.
Next, I bolted the bearing to the bearer. The prop shaft was slid into the cutless bearing with the correct distance between the shaft’s inboard end and the gearbox adaptor.
The point on the prop shaft where it came out through a new Tufnol cutless bearing was then marked up with sticky tape to allow me to accurately identify how much of the new shaft needed to be removed so the FeatherStream propeller fitted neatly into the cutaway portion of Coppelia’s skeg.
The prop shaft was then removed and was cut to length by Hamble Propellers who, without being asked, checked the new shaft for runout, corrected it and even sent me a video of the test!
I inserted the prop shaft into the stern tube, carefully slid on the radice seal and slid the shaft into the thrust bearing.
With everything in place, I bolted everything up using a torque wrench as per the Halyard instructions.
I fitted the FeatherStream propeller and associated anode, following the instructions from Darglow.
Readers may have noted that the thrust bearing support had until now not been fitted with any fore and aft bracing.
To brace the support I fashioned, using 18mm WPB Plywood pieces.
Fortuitously the shape of the hull dictated that the edges where the pieces met the hull should be chamfered thus increasing the bonding area.
The pieces were bonded onto the top of the bearing support and hull again using West Epoxy with smoked silica.
The bearing support was encapsulated using biaxial glass cloth and painted. All pipework and electrics were then reconnected. The installation was given a thorough test and, very pleasingly, the reduction in noise and vibration was found to justify the effort.
My installation cost approximately £1,000 although on other boats there might be some minor price variations as things like the adaptor plate between the gearbox and the Aquadrive vary.
Not essential but I did fit four ‘softer’ engine mounts, which cost approximately £70 each.
The bearer plate for the thrust bearing was made using plywood from my scrap box so zero cost in reality.

Templating the bearing support

Expert responses
James Gilliam, technical sales manager, Halyard and TW Marine, responds: “We were delighted to read Colin’s inspiring account of installing a Halyard Aquadrive in his Contessa 32.
“His project reflects both the technical benefits of the Aquadrive system and real-world challenges and ingenuity involved in retrofitting classic yachts.
“The Aquadrive’s fixed thrust bearing and constant velocity joint configuration is designed to isolate engine movement from the hull, improving comfort while extending the life of engine mounts, gearboxes, and shafts.
“Colin’s reported results of lower vibration, reduced noise, and smoother running match normal feedback from customers post-installation.
“We were especially impressed by Colin’s bespoke solutions for shaft alignment, bearer fabrication, and engine bed upgrades.
“His use of temporary UHMW bearings and carefully templated plywood structures shows the level of detail that can go into a successful retrofit.
“We encourage boaters considering a similar upgrade to consult with us early in the planning stage as we are always happy to help specify the correct unit and offer guidance.
“Congratulations to Colin for a superbly executed project.”

UHMW plastic replacements for the rusty steel plates in the engine bay
Andrew Porter, sales manager UK at Comer Industries, a supplier of the Aquadrive System, responds: “We are grateful to read about this success story, which clearly highlights the benefit of the Halyard Aquadrive System.
“In a traditional powertrain installation, the drive shaft must always be precisely aligned with the engine – this requires regular maintenance.
“Rigid motor feet transmit high vibrations even with ideal alignment, which significantly increases the wear and tear on all components of the drive train.
“With the Aquadrive anti-vibration system, the motor can be installed horizontally on soft motor feet.
As a result, a noticeable reduction in vibrations and noise in the entire drive train will be achieved.
“The Aquadrive system can be retrofitted easily and even in tight engine compartments.
“Well done, Colin! Enjoy always a pleasant drive of your boat.”
About the author

Colin King is a retired engineering consultant who competed in International 14s, Enterprises, Hornets and Fireballs at European and World Championships level.
He built several boats and has owned his Contessa 32 since 2017 spending much time (and money!) updating the instruments, plus a full rewire, new sails, rigging, heater, fridge, solar panel and Halyard Aquadrive installation.

Electric engine conversion on a Contessa 32
Norman Rubenis gets ‘Thunderstruck’ when he ditches the diesel and converts his Contessa 32 to run on a 10kW electric

Smoothing the cruising – a buyers guide to ‘shock-absorbing’ boat gear and more!
The ability to soften that slamming motion of a fast boat at sea has been greatly helped with more advanced…

Boaters warned to mitigate against ‘shocks and impact’ in small vessels
Accumulative effects of shocks and impacts to boaters using small vessels at high speed or in rough water have been…
Want to read more articles like How to install a Halyard Aquadrive in a Contessa 32?

A subscription to Practical Boat Owner magazine costs around 40% less than the cover price.
Print and digital editions are available through Magazines Direct – where you can also find the latest deals.
PBO is packed with information to help you get the most from boat ownership – whether sail or power.
-
-
-
- Take your DIY skills to the next level with trusted advice on boat maintenance and repairs
- Impartial, in-depth gear reviews
- Practical cruising tips for making the most of your time afloat
-
-
Follow us on Facebook, Instagram, TikTok and Twitter