
Andrew Simpson looks at pendulum servo self-steering gears, and describes how to get the best out of them

Vane gear are, to some, are an ugly protuberances, burdening the stern of otherwise handsome yachts.
But to many an offshore sailor they are a godsend, an inexhaustible crew member who will toil night and day without complaint or sustenance.
Without wind vane self-steering gears – often simply called vane gears – this particular sailor would be reluctant even to put to sea. Yet, if you ask around, experiences seem mixed.
Some skippers find them obliging and obedient; others have had less consistent results.
Many say they rely on their electronic autopilots for shorter passages, preferring push-button simplicity to the relative complexities of setting up their vane gears, though I find this surprising, since it takes no more than a few seconds to rig and engage a modern, well-engineered gear.
But there’s no doubt that vane gears can seem temperamental, and perhaps with good reason.
Uncomplaining and tireless though they might be, they won’t be treated disrespectfully.
To get the best out of them they must be appreciated, understood, even cosseted.
The more you use them and become familiar with their ways, the better they will serve you.
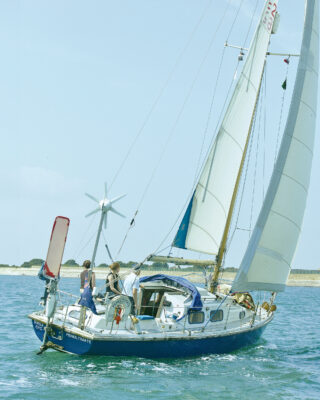
The more familiar you become with the boat’s wind vane gear, the better the performance. Photo: Graham Snook/Future PLC.
How do vane gears work?
Wind vane gear works by sensing the wind direction and converting that information into an action that will steer the boat on a course relative to it.
This can either be via a direct linkage to their own auxiliary rudder, such as on the well-regarded Hydrovane, or by harnessing the water flow past the boat hull to create a powerful servo effect which, in turn, either works directly on the boat’s primary steering or, again, on a smaller auxiliary rudder.
Types of vane gear: direct drive and pendulum servo self-steering
The first type is known as ‘direct drive’, and the second as pendulum servo self-steering.
There’s also another servo type which uses trim tabs on the main rudder, but these are only rarely seen nowadays.
Since space doesn’t allow a wide-ranging discussion on all the variations, this article deals mainly with pendulum servo self-steering, although a lot of the principles apply to all.
Pendulum servo self-steering gears consist of three major components, as shown in the diagram below.
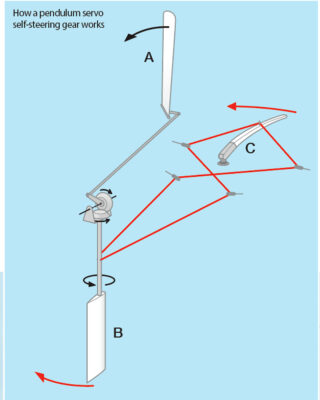
Photo: Practical Boat Owner.
The wind vane (a) provides the input signal.
With the boat on course the wind vane stands upright, its leading edge pointing directly into the wind.
If the boat strays off course the wind falls on whichever side of the wind vane is turned towards it and presses it over.
The force generated is not usually enough to steer the boat on its own (the direct drive Hydrovane uses a larger than usual wind vane) but is sufficient to turn the servo blade (b) which until now had simply been streaming in the wake.
This gives the blade an angle of attack to the waterflow, generating lift and allowing it to perform the ‘pendulum’ action that defines this type of gear.
The lift sweeps the blade to one side or the other, depending upon which way it was turned.
This action is extremely powerful, at high speeds enough to cause injury, and is connected to the boat’s steering by way of lines and blocks to the tiller or wheel (c).
Once the corrective action is applied, the boat returns to its course and the wind vane comes upright again.
As I’ve described it here, this sequence seems rather dramatic with the various components thrashing wildly about.
But in reality vane gears are constantly in action, making tiny corrections in very much the same way as would a skilled helmsman.
The extraordinary sensitivity with which they can achieve this is awesome to behold, but the responsibility for this doesn’t rest entirely with the manufacturer.
You can’t expect a vane gear to compensate for bad seamanship. The role of the skipper is vital.
So, if you are thinking of trying a vane gear or are faced with taming one that is behaving badly, what sort of issues should you be looking at?
Vane gear tip: Work with the wind
Let’s start at the input end of the system – the wind vane.
Since everything depends upon the integrity of the information it delivers, its importance cannot be overstated.
The wind vane must accurately divine from which direction the wind comes and then, through its various linkages, convey that information very precisely to the servo mechanism.
Without the information the rest of the gear is useless. Garbage in, garbage out, goes the saying.
But before we get too embroiled in the hardware, let us dwell on what we mean by ‘the wind’.
Whereas electronic autopilots are guided by a more or less static reference (the earth’s magnetic field), the wind vane lives in a swirling gaseous fluid – air – which is inherently turbulent.
Moreover, the strength and direction of the wind as experienced by all on board, including the wind vane, partially arises from the boat’s forward motion – the well-understood concept known as ‘apparent wind’.
The rate and manner in which the apparent wind varies on different points of sailing isn’t always fully appreciated, however.
Figure 1 (below left) shows a boat doing 5 knots with a true wind of 10 knots dead abeam.
The apparent wind speed would be just over 11 knots and coming from about 27° forward of the beam – the direction the wind vane would be aligned to hold the boat on that course.
Now let’s imagine that an improvement in sail trim increased the boat speed to 6.5 knots, the yacht’s maximum boat hull speed.
The apparent wind would move to about 33° forward of the beam, and its strength would be felt as 12 knots.
If left unattended, the vane gear would bear away from the true wind, thereby maintaining the original apparent wind angle but now steering 5° to port of the course.
From left to right – Figure 1, Figure 2 and Figure 3. Photo: Practical Boat Owner.
Wind on the move
A little later, the wind picks up (Figure 2 above centre). Limited by its boat hull speed, the boat can’t accelerate, but the vectors show that the apparent wind has moved aft again.
Now let’s look at our boat with the wind a mere 10° off astern. We might think this as being as near a dead run as makes no difference, but the wind vane sees it differently.
In Figure 3 (above right), the yacht is again doing 5 knots in 10 knots of wind speed. The apparent wind speed is a little under 5 knots and seems to be coming from 18° off astern.
Hoping to squeeze more progress out of the situation, our skipper pops the cruising chute, and now we’re back at boat hull speed, 6.5 knots.
The apparent wind speed sags to a little over 3.5 knots, but its direction moves forward another 8°, now being a full 26° off astern – almost a broad reach in the eyes of the wind vane.
Finally, if we had started off sailing dead downwind the apparent wind angle wouldn’t change at all, but its velocity would be reduced by whatever boat speed we were making.
So, our vane gear responds to an unstable, shifting environment hugely influenced by changes in circumstances.
With the wind near or forward of abeam, the input energy activating the wind vane will be increased by boat speed. Off the wind it will be reduced.
In both circumstances (other than a dead run) the shifts in apparent wind angle can be considerable. Since the wind vane can only sense the apparent wind it will alter course accordingly.
Offshore this is rarely a problem. Indeed, the boat will be more comfortable sailed to the wind and minor waywardness in direction tends to cancel out.
Inshore, with perhaps hazards nearby, the skipper needs to keep a wary eye on what her unpaid hand on the transom is up to.
Offshore, wind vane gear can be left unattended, but inshore, you need to keep an eye out for hazards. Photo: Ocean Frontiers/OGR/GGR/CG580.
Give the vane gear a chance
So far we’ve only looked at how nature and its dynamics might confound our vane gear self-steering, but many of us can do a pretty good job of that ourselves.
Considering the importance of the input signal, it’s absolutely essential that the wind vane can see the wind clearly.
Unless a boat is carrying a dinghy in davits, the view astern is usually clear. This is extremely fortunate, since we know that the fall-off in apparent wind speed can make that signal very feeble in light conditions.
As the apparent wind moves forward, the signal strengthens, but we can then face another problem. The aftmost quarters of sailing cruisers are enticing places to stow gear (and in some cases, the only place to stow it).
Many boats, particularly long distance cruisers, find themselves pushed for space below, so the after deck becomes an obvious place to dump the overflows.
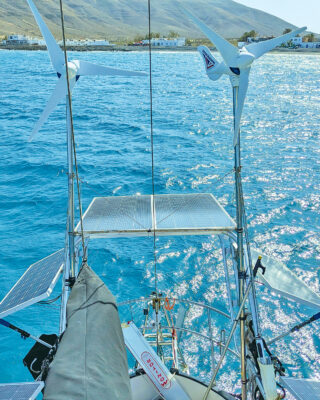
You’d expect to find such things as dan-buoys, solar panels and even Starlink for internet connectivity attached to the pushpit, but it’s not uncommon to also see fenders, bicycles, barbecues and all manner of other bits and pieces, much of it disturbing or impeding the airflow to the wind vane when harder on the wind.
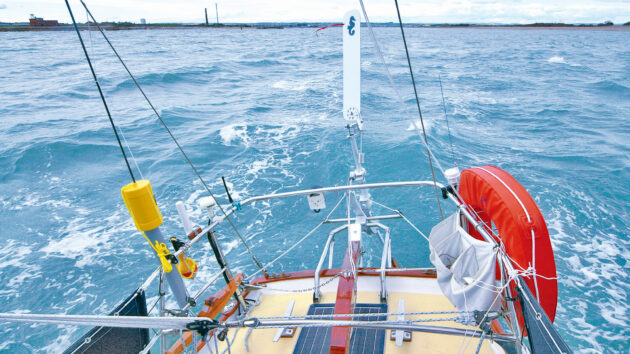
Loading gear on the after deck, like solar panels or an outboard engine on the pushpit, can affect the way your wind vane performs. Photo: Dena Hankins and James Lane.
On my yacht, Shindig, I was puzzled as to why our monitor wind vane was happiest on starboard tack than on port.
I then spotted the dinghy’s outboard clamped to the pushpit immediately upwind of the vane. Stowed in a locker, the problem disappeared.
Perhaps due to the strength of the signal when reaching or beating, it’s surprising how tolerant most wind vanes are in this situation, but there are limits beyond which they will rebel.
If necessary, consider using a taller (it will also have to be lighter to maintain proper balance) vane that can reach above the clutter.
Minimise friction
The other serious enemy of vane gear efficiency is friction. The best gears go to a lot of trouble to minimise it, using ball or roller bearings at critical points such as the vane and pendulum axes.
These are invariably ‘open’ bearings, or plastic or stainless steel and should never be oiled or greased.
That doesn’t mean you can neglect them. A regular rinse out with fresh water will wash away any dirt or salt crystals and keep them turning freely.
Once the action passes to the pendulum and beyond, the forces become strong enough to overcome friction.
But there is one notable exception, the control lines.
Control lines to the wind vane gear should have a bit of slack. Photo: Peter Poland.
The number of lead blocks should be kept to a minimum and be of good quality, preferably with roller bearings.
In light conditions, the lines should be rigged with just a little bit of slack, which can be cinched in tighter as the wind picks up. Incidentally, in very light airs, the pendulum alone may be steering the boat.
Situated well aft, it makes a small but efficient rudder. To have it trying to move the primary steering could actually be counterproductive.
Don’t ask the impossible of your vane gear system
A skipper’s biggest responsibility lies in trimming the boat correctly. No matter how well the vane gear has been set up and maintained, it can’t be expected to overcome gross imbalances in trim.

Your wind vane gear will never work properly unless you trim the sails correctly. Photo: Graham Snook/Future PLC.
Skippers accustomed to having electronic autopilots gloss over their own shortcomings will inevitably be disappointed with vane gears. If a boat is hard work to steer by hand, a wind vane gear will find it no easier.
And, of course, some boats are more difficult to trim than others.
Very beamy boat hulls with broad sterns are inherently prone to weather helm, particularly when heeled.
Fin keelers tend to be more flighty than long-keeled yachts.
Multihulls and lightweight flyers can do startling things with the apparent wind.
The ideal boat for wind vane self-steering gears is probably moderate in every regard – displacement, beam, keel profile and rig – but that doesn’t mean you can’t have success outside the norm.
Weather helm must be avoided at all costs.
Many helmsmen like the characteristic load on the tiller, saying it gives them more ‘feel’. A vane gear cares nothing for feel, it only recognises the direction of the apparent wind. It is therefore probable that your ‘normal’ trim won’t suit a vane gear.
The main will be slightly oversheeted and the gear will be fully occupied, preventing the boat from rounding up.
Easing the mainsheet can produce wondrous results, as can depowering it by other means, such as increasing the foot tension and easing the main halyard a little.
A typical cross-cut cruising mainsail will suffer serious bias stretch if the luff tension is too much. Flatten the main – at least the lower part – with the clew outhaul by all means, but go easy on that halyard.
Excessive luff tension can be decidedly unproductive.
Trolley trouble
When sailing downwind, any wind vane gear would prefer the boat to be towed rather than pushed, strikingly similar to my own experiences with supermarket trolleys.
This often means dowsing the main and running under just a headsail, perhaps twins, or maybe even a cruising chute.
Abandoning the mainsail might seem extreme, but it usually has little effect on passage times.
Once you have the rig balanced and the helm as light as possible, it is finally time to let your vane gear take over.
It is important to start with the gear properly centred. This means that with the pendulum blade hanging vertically and the wind vane upright, the tiller or wheel should be amidships with the control lines attached.
If necessary, mark the control lines with a short whipping so you can rig them in an instant.
Now put her on course, adjust the wind vane so it is feathered to the apparent wind, and latch in the gear.
Hopefully, that will be all there is to it.
Resist fiddling
Sometimes there may be some further adjustments to make, but resist the temptation to fiddle with the vane gear immediately.
First, take another look at the sail trim, particularly the mainsail. Easing the mainsheet still further is often the only fix the boat will need.
Only when you are certain that all is well aloft should you make adjustments to the vane gear.
A chain and a peg on the tiller are used to adjust a servo pendulum wind vane on a tiller-steered boat. Photo: Katy Stickland.
On tiller-steered boats, this is usually through a short length of chain that engages with a notched catch – you move the chains along a link at a time to bias the action to one side or the other.
Wheel steering will use some form of adjustable drum.
Either way, you should proceed slowly, a step at a time, until you have everything working properly. And you will.
There is no doubt that living with a vane gear takes a bit of getting used to, and many skippers become discouraged far too soon. The idiosyncrasies of each gear and boat will make every combination unique.
I have seen skippers rise from despondency to jubilation after just a few hours of thoughtful experimentation.
The prize is worth having, believe me!

Hebridean wind vane: testing the DIY self-steering gear
David Pugh assesses the build-it-yourself Hebridean wind vane in a moderate breeze off Lowestoft

Windvane self-steering: a complete guide for sailors
Ali Wood explains how you can harness the power of the wind and sea to steer efficiently

How to service Monitor wind vane self-steering gear
Dena Hankins and James Lane show their Monitor wind vane self-steering gear some love and learn that patience is a…
Boat rudders: everything you need to know
Delivery skipper Ben Lowings examines how different popular rudder designs affect handling, and explains how to maintain them
Want to read more articles like Tools for tight spaces on a boat?
A subscription to Practical Boat Owner magazine costs around 40% less than the cover price.
Print and digital editions are available through Magazines Direct – where you can also find the latest deals.
PBO is packed with information to help you get the most from boat ownership – whether sail or power.
-
-
-
- Take your DIY skills to the next level with trusted advice on boat maintenance and repairs
- Impartial, in-depth gear reviews
- Practical cruising tips for making the most of your time afloat
-
-
Follow us on Facebook, Instagram, TikTok and Twitter